Blog — Red Wagon Plants

vermont gardening

Thank you, How to Find our Plants and Herbs, plus a Recipe

Thank you from all of us for an incredible, memorable, and unique season!

Thank you from all of us for an incredible, memorable, and unique season!

As our regular retail hours for 2020 end today at 5pm, our team would like to thank you for a wonderfully unique season. We are closing a little earlier than usual, but will keep up a once a week pick up with online sales and will continue twice a week deliveries to our wholesale partner stores. Read below to find out more!

During the month of August, we will be doing curbside pick up once a week, on Fridays between noon and 5. If you would like to order plants, please do so here, and we will have it ready the following Friday as long as orders are placed before midnight on Wednesday.

Our online store will carry an assortment of veggies and herbs for the fall kitchen garden, perennials, and houseplants. For the first time, we will also be offering directly to you the herbs and herbal products coming from our herb farm: freshly harvested herbs in bulk quantities for your drying and processing needs, herb salts, herbal vinegars, and pesto. Please check the website every Saturday for the latest updates, and place your orders by the following Wednesday at midnight for Friday pick ups between noon and 5.

If you need something sooner than the following Friday, just let us know and we can make another arrangement.

Confused? Have questions? Drop us a line at info@redwagonplants.com.

Thanks for a fantastic season in weird times. We are just so grateful for all of the orders and purchases you made this year. You kept our crew going, and you planted gardens like never before. We loved hearing from you and seeing you in person once we opened for shopping.

You can continue to find our plants at our wholesale partner stores:

  • Shelburne Supermarket

  • Gardeners Supply, Intervale and Williston locations

  • Healthy Living

  • CIty Market, South End and Downtown locations

  • Bibens Ace Hardware, North Ave location

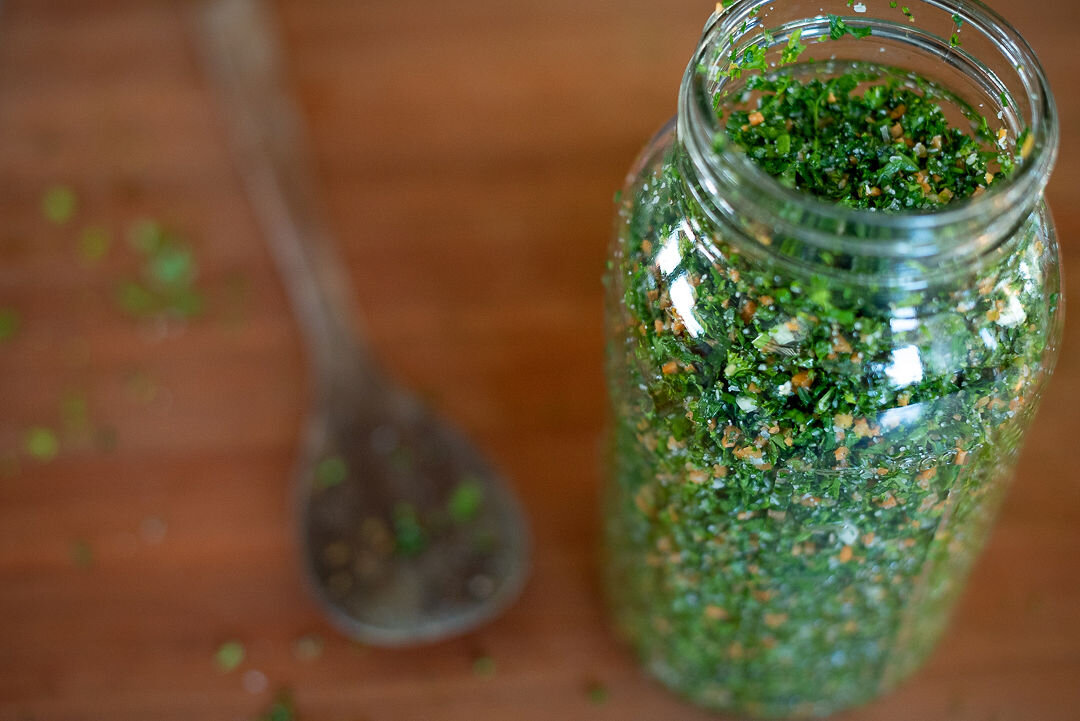
Recipe for Herbes Salées (adapted from Spruce Eats)

Here is a traditional Quebecois way to preserve large amounts of herbs to use all winter.

Suggested uses: A teaspoon in hot water makes a soothing and instant herbal broth. Stir into soups and stews, mix into salad dressings and tomato sauce, mix with cream cheese or cottage cheese….the uses are endless and a jar of these preserved herbs will be a welcome reminder of summer and freshness during the depths of winter.

  • 1 cup chives (fresh, chopped)

  • 1 cup savory (fresh, chopped)

  • 1 cup parsley (fresh, chopped)

  • 1 cup chervil (fresh, chopped)

  • 1 cup carrots (grated)

  • 1 cup celery leaves or lovage or cutting celery (chopped)

  • 1 cup green onions (chopped)

  • 1/4 to 1/2 cup coarse salt

    In a large bowl, combine chopped chives, savory, parsley, chervil, carrots, celery leaves, and green onions.. Layer 1 inch of herb mixture in the bottom of a crock or glass bowl and sprinkle with some of the salt. Repeat layers until all of the herb mixture and salt is used.

    Cover and refrigerate for 2 weeks. Drain off accumulated liquid and pack herb mixture into sterilized jars. Refrigerate until ready to use. Can keep for up to a year in the refrigerator.

Herbes Salées photo by Kate Bentley

Herbes Salées photo by Kate Bentley

Herbal Vinegar Infusions

By Sophie Cassel, herbalist, gardener, educator and RWP employee. 

herbal+vinegar+photo.jpg

Of all the ways of preserving herbs, I think that vinegar infusions really capture the essence of summer in a way that lasts all year. At its foundation, a vinegar infusion is super simple: Chop up flavorful herbs, pack them into a jar, and cover with apple cider vinegar. Let the herbs infuse into the vinegar for a couple weeks, then strain for a punchy liquid that is versatile, healthful, and pretty tasty. 

Apple cider vinegar (ACV) is the vinegar of choice, but other vin aigre (translated to “sour wine”) like red wine, white or balsamic are also viable options, depending on what your final product will be. Vinegars are a natural product of the fermentation and winemaking process, and have been used across cultures and generations to preserve and flavor food and beverages. In the northeastern US, apples were originally grown to produce cider and apple jack, and so cider vinegar has been our locally abundant source of acetic acid, the chemical responsible for that puckery tang that is so indispensable to our salads and pickles. 

Many folks are familiar with infusing vinegars for salad dressings- adding a couple sprigs of rosemary and thyme and a few cloves of garlic into the vinegar bottle can add complexity to a simple oil-and-vinegar dressing. But did you know that infused vinegars also lend themselves to sweet concoctions?

The first time I fell in love with an herbal vinegar was when a friend, faced with a glut of tulsi flowers from her garden and uninterested in drying the lot, shoved the herb bunches into a jar with apple cider vinegar and let them sit on her kitchen counter until she almost forgot about them. Weeks later, she gave me a sample of the strained liquid. The vinegar had absorbed and preserved all the delicate floral flavors of the tulsi, and it tasted just like we were back in the heat of July. 

Since then, I’ve been getting creative with different herb combinations, and adding honey or molasses to amp up the sweetness of my “elixirs”. When made in small batches, infused vinegars are a fun way to let your inner flavor wizard come through, and delicious local vinegar is inexpensive and easy to come by. Let yourself be guided by the bounty in your garden and your tastebuds, and you’re sure to come up with some successful combinations of your own. Below are a few traditional styles of vinegar infusions, with some ideas for herbs and spices to use. 

  • Switchel: Also known as “haymaker’s punch”, this is a classic beverage drunk by northern farm workers while working through the heat of the day. Switchel usually includes ACV, honey or maple syrup, and water, with herbs steeped in for flavor. It functions much like a home-made sports drink, with the vinegar and sweetener providing much-needed electrolytes and salt. Try infusing a jar of vinegar with ginger, thyme and lemon, and keeping it on your counter, ready to add to your sweetener and water for a refreshing beverage that can be drunk throughout the day, even if you’re not making hay. 

  • Shrub: These vinegars are infused with seasonal fruit and honey to make a luscious syrup. Added to cocktails or sparkling water, shrubs are tart, sweet, and deeply refreshing on a hot summer’s day. Added to a bit of hot water in the winter, it brings to mind the flavors of summer. Try a combination of strawberries and thai basil, or blackberries and raspberries with anise hyssop. The color of the berries will seep into the vinegar, adding a visual element to any beverage.

  • Fire Cider: This spicy concoction has been a staple of the kitchen medicine community for generations, receiving added attention in past years as the fight to prevent the trademarking of the name went national. Kitchen staples like onion, garlic, horseradish, cayenne and black pepper are chopped and added to vinegar and honey, then strained when the brew is nicely potent. Taken by the spoonful or added to a hot toddy, Fire Cider is sure to clear the cobwebs from your immune system and provide some internal warmth in the depths of winter. If you’re excited about Fire Cider, a new book compiled by Rosemary Gladstar dedicated to the topic will give you ample recipe ideas and inspiration.

Infusing herbs in vinegar is so quick and simple, you’ll soon find yourself making a new batch every week, capturing the seasonal shifts of your garden. Make sure to label every jar with the date you made it and the herbs you added in. Infused vinegars are safe for everyone when diluted, and make an excellent offering to kiddos or folks who aren’t drinking alcohol. They also can help jump start digestion before a meal. The possibilities are as varied and abundant as your garden!

Further resources:

Folk Medicine: A Vermont Country Doctor’s Guide to Good Health. Dr. D.C. Jarvis. 1950’s book, makes some wild claims but is a fun read and a portal back in time. His office is preserved at the Shelburne Museum!

Salt, Fat, Acid, Heat. Samin Nosrat, 2017. Specifically the chapter on acid, but this entire book is a treasure trove.

Fire Cider! 101 Zesty Recipes for Health-Boosting Remedies Made with Apple Cider Vinegar. Rosemary Gladstar, 2019. The “godmother of Western herbalism” and the originator of Fire Cider, Rosemary is an enormous resource to the beginning herbalist.

Plant Profile: Lemon Balm, Melissa officinalis

By guest blogger, Sophie Cassel, herbalist and Red Wagon Plants team member

Organic Lemon Balm

Lemon Balm, Melissa officinalis

Lemon balm, cousin to some of our more famous mint family plants, has a historical reputation that far exceeds its diminutive nature and ease of growth in the garden. Herbalists and philosophers since ancient times have revered Melissa officinalis for its bright scent and flavor and ability to brighten and revive the spirit. The latin name Melissa refers to the plant’s association with honey bees, and the species officinalis tips us off that this plant has been used medicinally for so long that it was part of the official pharmacopeia in monasteries. We can take our cues from the bees and the ancients, and make Melissa a part of our medicinal herb gardens. 

Native to the Mediterranean and parts of Asia, lemon balm was brought to the Americas during colonial times and has naturalized somewhat, particularly on the west coast. Like most mints, it’s easiest to start lemon balm from cuttings or divisions, but it can also be started by seeds, which are light dependent. It isn’t fussy to grow and can tolerate a bit of shade, but it does prefer moist, well drained and fairly fertile soil without much competition, spaced about a foot apart. Unlike the more aggressive perennial mints, lemon balm tends to form clumps and spreads fairly slowly, making it a more friendly addition to any perennial mix or tea garden. There’s speculation that the high volatile oil content of lemon balm makes it a good companion plant, working to deter pests with its strong scent. 

It’s best harvested just before flowering- cut the top third of the plant on a hot afternoon for the highest concentration of aromatic volatile oils. It will continue to branch and grow over the course of the summer, but be sure to let it set flowers at some point to attract its namesake bees to dine on its exquisite nectar. 

Once harvested, the sky is the limit when it comes to lemon balm recipes. As a freshly infused tea, it can’t be beat. Simply pour boiling water over the fresh leaves and steep for 5-10 minutes, or place in a jar with cool water and let steep in the sunshine for a few hours, and you’ll be rewarded with a bright and delicate solar infusion that really captures the essence of the plant.  Lemon balm dries easily- spread out in a basket in a warm dry spot for a couple days. You can then use it for a delicious, relaxing tea throughout the winter. Or take a cue from the seventeenth-century Carmelite nuns and infuse lemon balm and other herbs in alcohol to make a delicious cordial; drunk before meals it aids digestion and brings levity to any dinner party. 

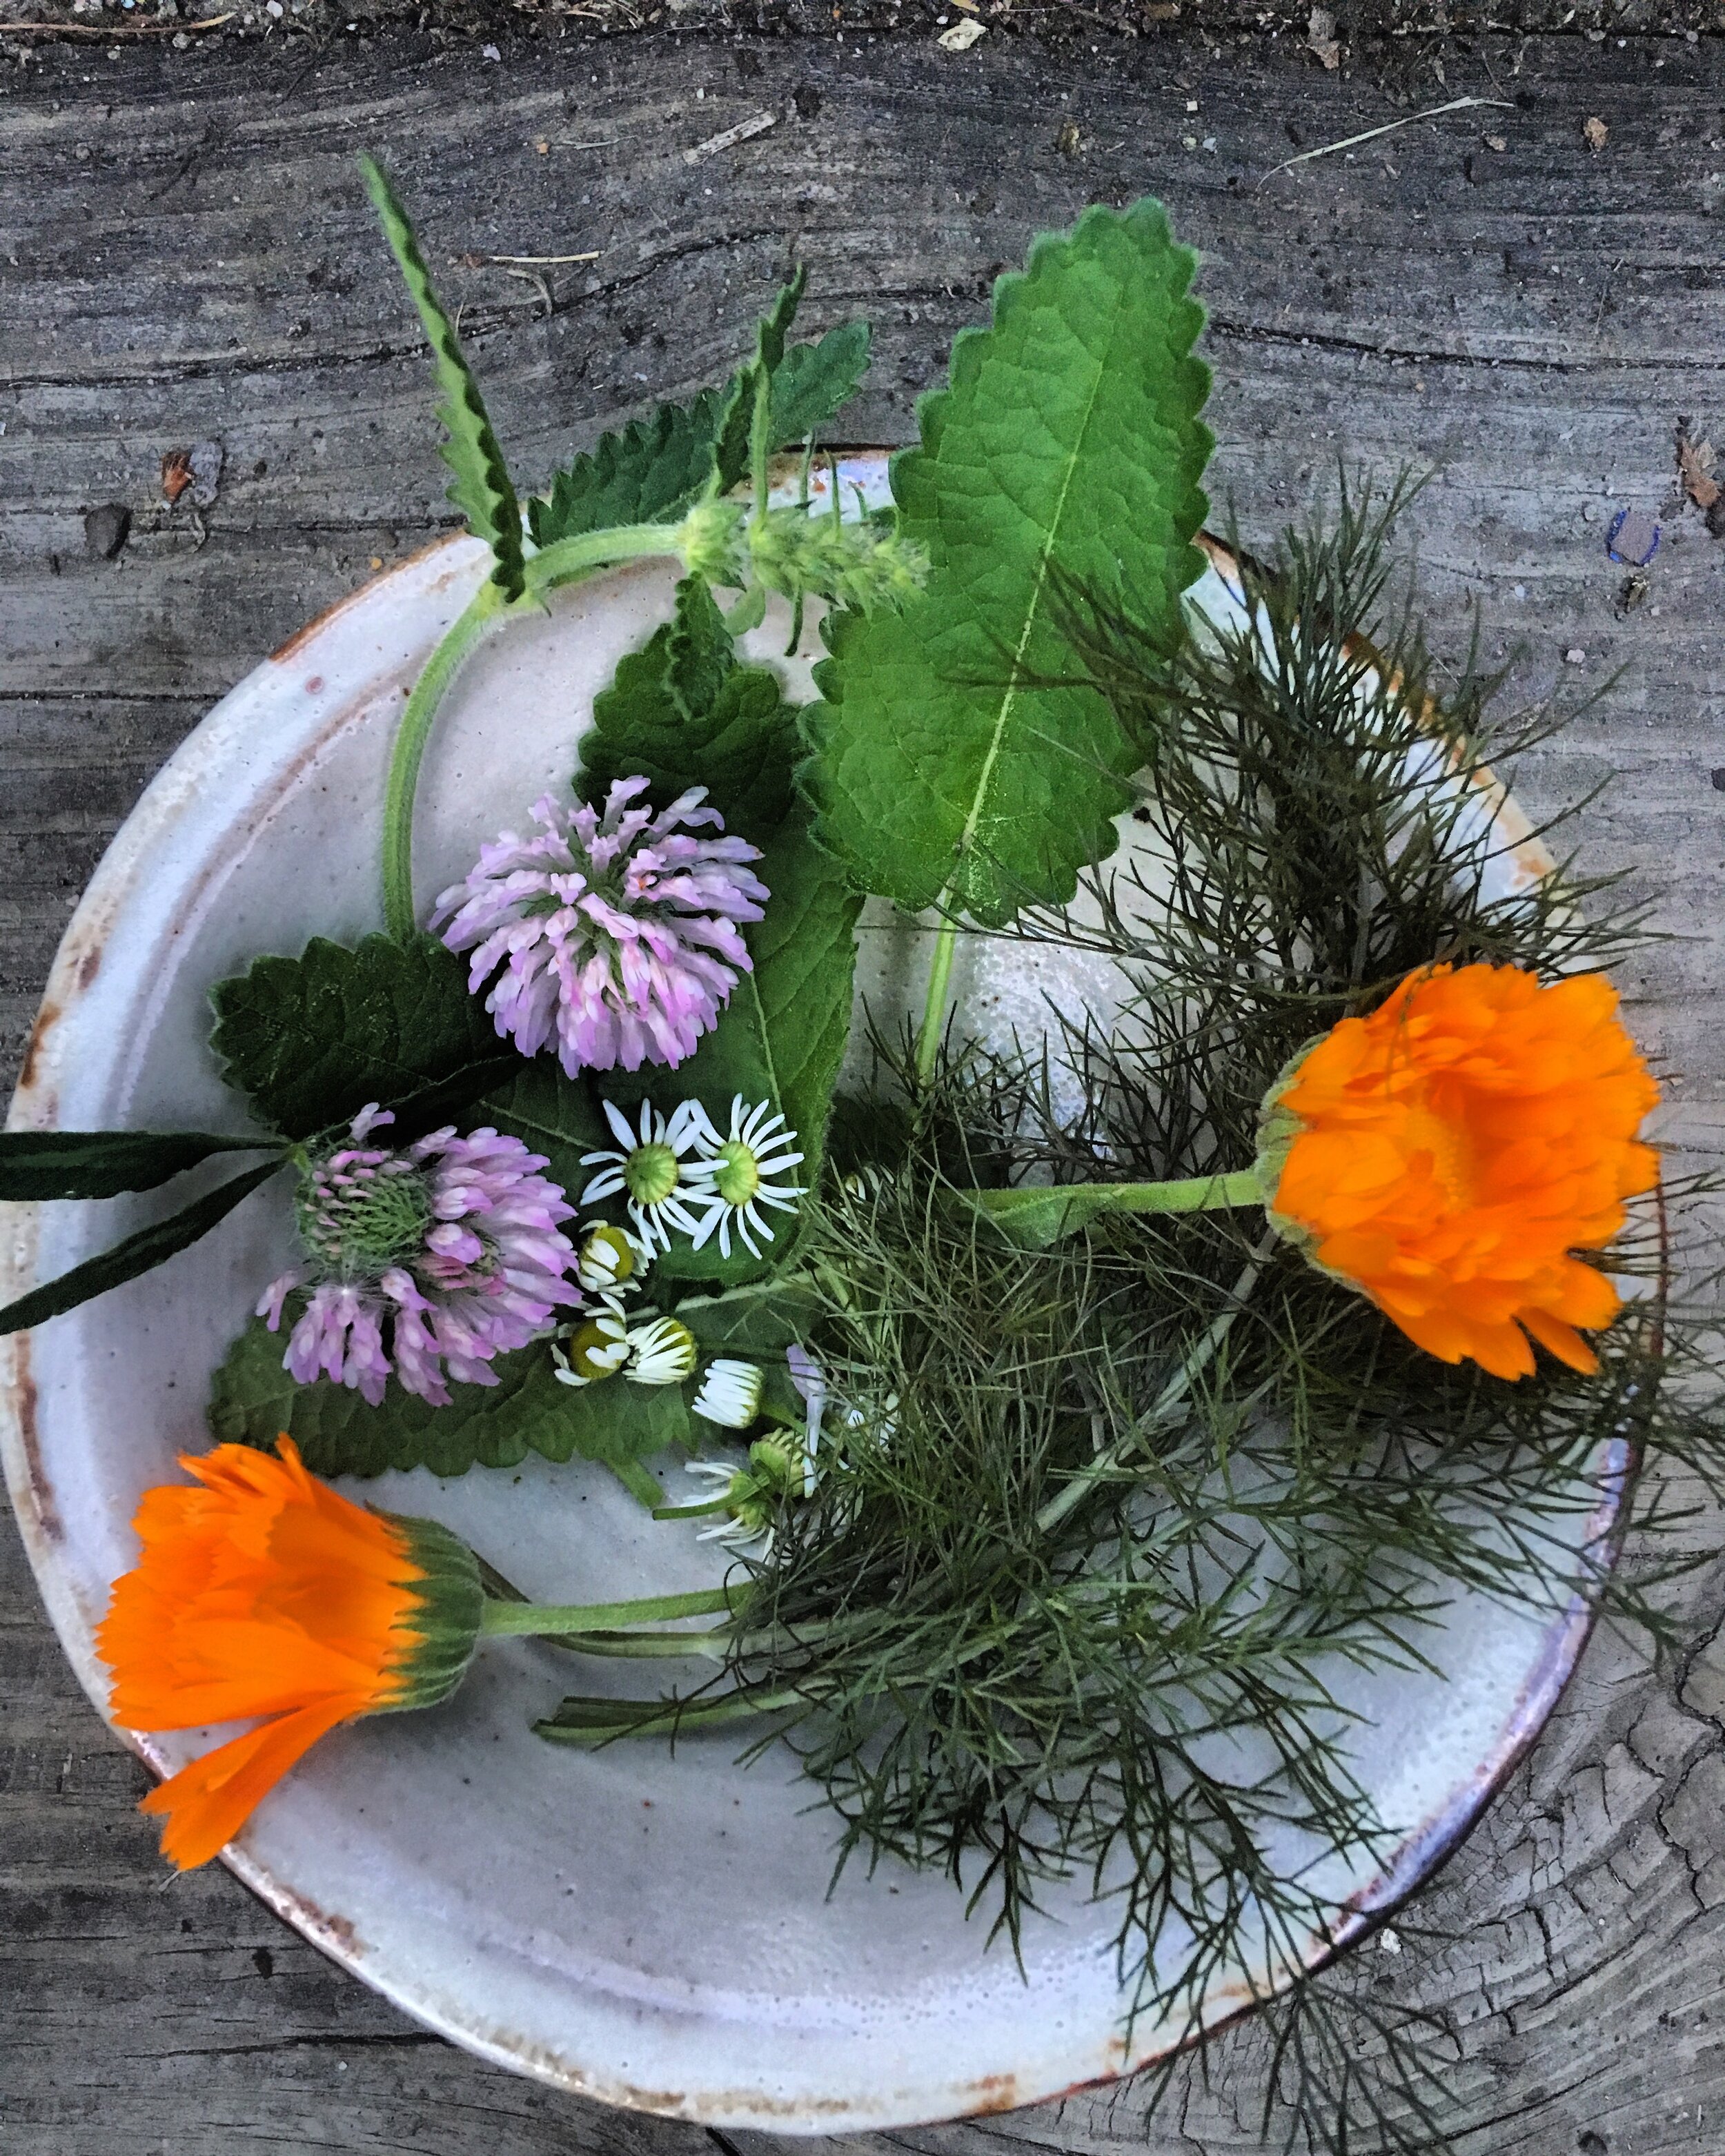
Medicinally, Melissa’s applications are broad. An easy way to think of the signature of lemon balm’s medicine is for ailments “like bees”. Busy, buzzing, unable to settle or slow down enough to rest or digest, that’s where lemon balm comes in. Equally beneficial for a disquieted mind as a rumbly tummy, try lemon balm tea to prepare for bedtime, or to quiet the nerves before a big presentation. It makes a great after-dinner drink, and is safe for both children and elders alike. Rosemary Gladstar uses lemon balm in a wonderful “Colic Remedy” tea that she notes is actually helpful for “anyone with digestive disturbances due to nervous stress, but is especially helpful for infants and those elders who have stomach problems”: 

Colic Remedy: 

  • 3 parts lemon balm leaf

  • 2 parts chamomile flower

  • 1 part dill seed and leaf [or substitute for fennel seed and frond for a sweeter option]

Steep herbs in freshly boiled water for 10-30 minutes, depending on desired strength. The tea will become slightly more bitter as it steeps, which increases its efficacy for digestive troubles but may be less tasty to sensitive palates. 

Plant some lemon balm in your garden this spring, and you will be rewarded with the accolades of bees and delicious medicine all year long. 

Resources:

Gladstar, Rosemary (2012). Medicinal Herbs: a beginner’s guide. North Adams, MA: Storey Publishing, 

Grieve, Maude (1931). A Modern Herbal. NY: Dover Publications.

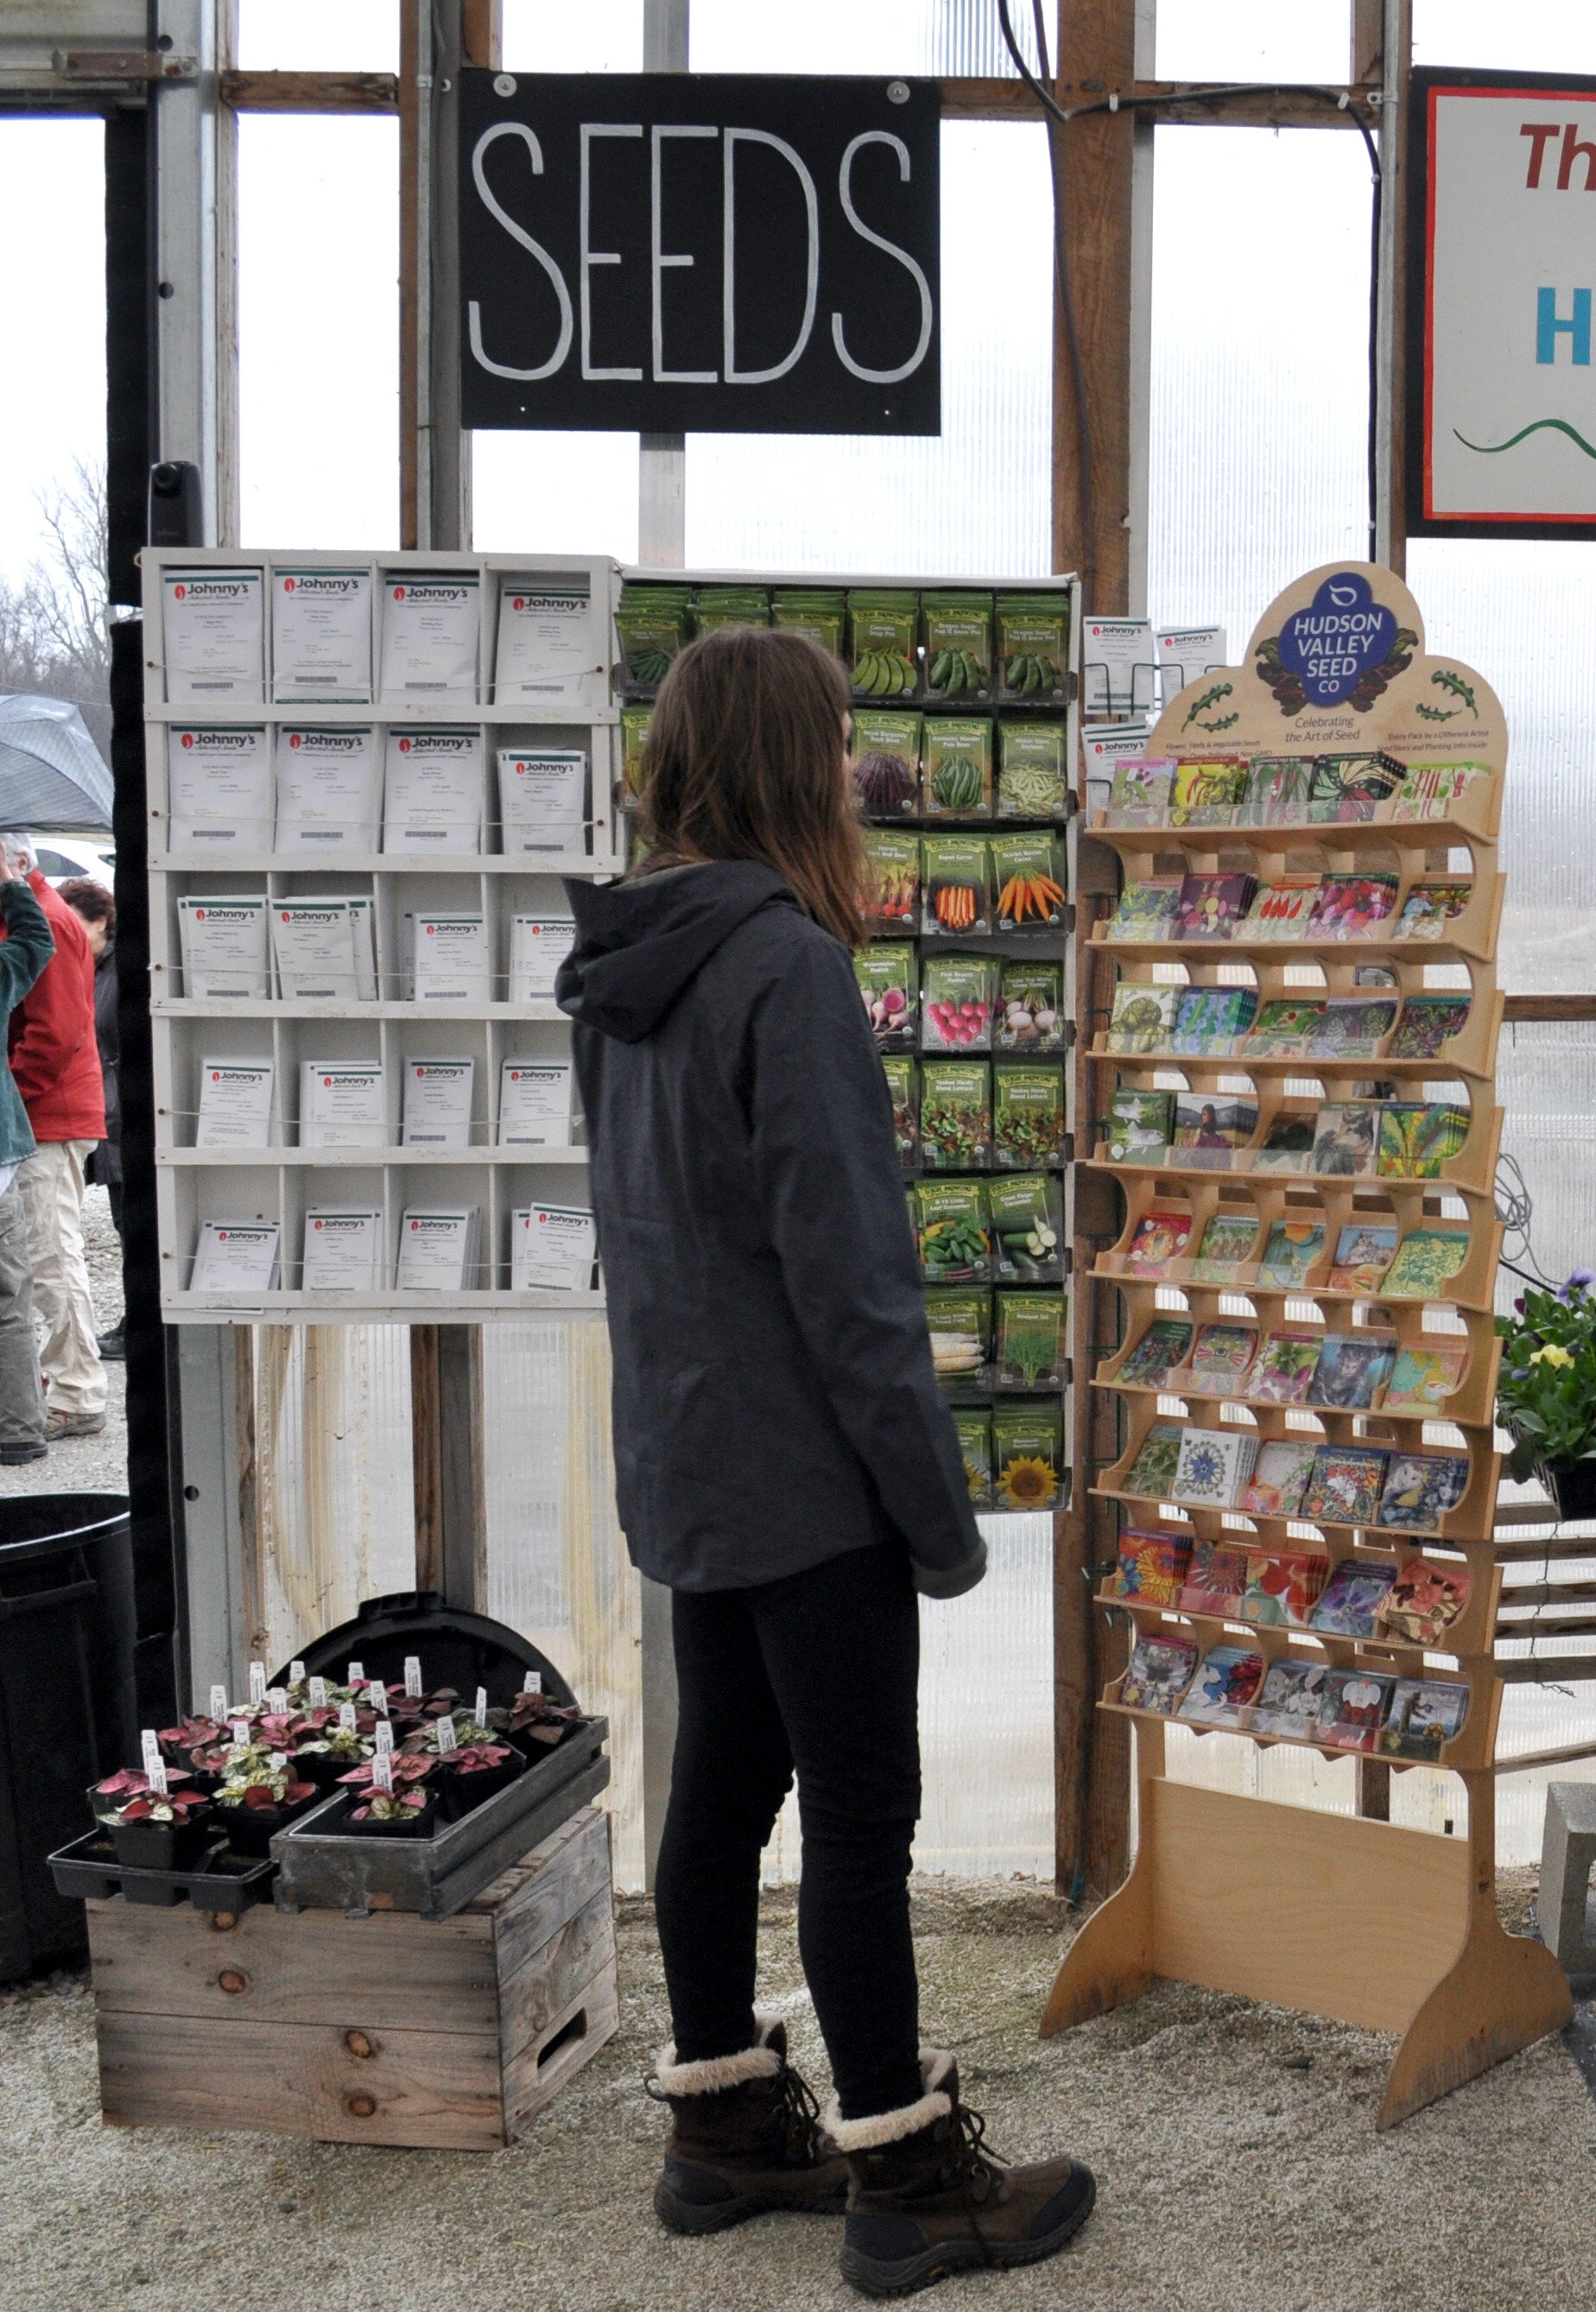
Vegetable Garden Planning - Seeds vs Transplants

romaine.JPG

It can be confusing to know which vegetables and herbs you start from seed directly in the ground and which ones you start as seedlings that have been started indoors or in a greenhouse. Here is a handy guide to help you with those decisions when planning this year’s garden.

seed rack.jpg


Plants are still growing.

willow in living room.jpg

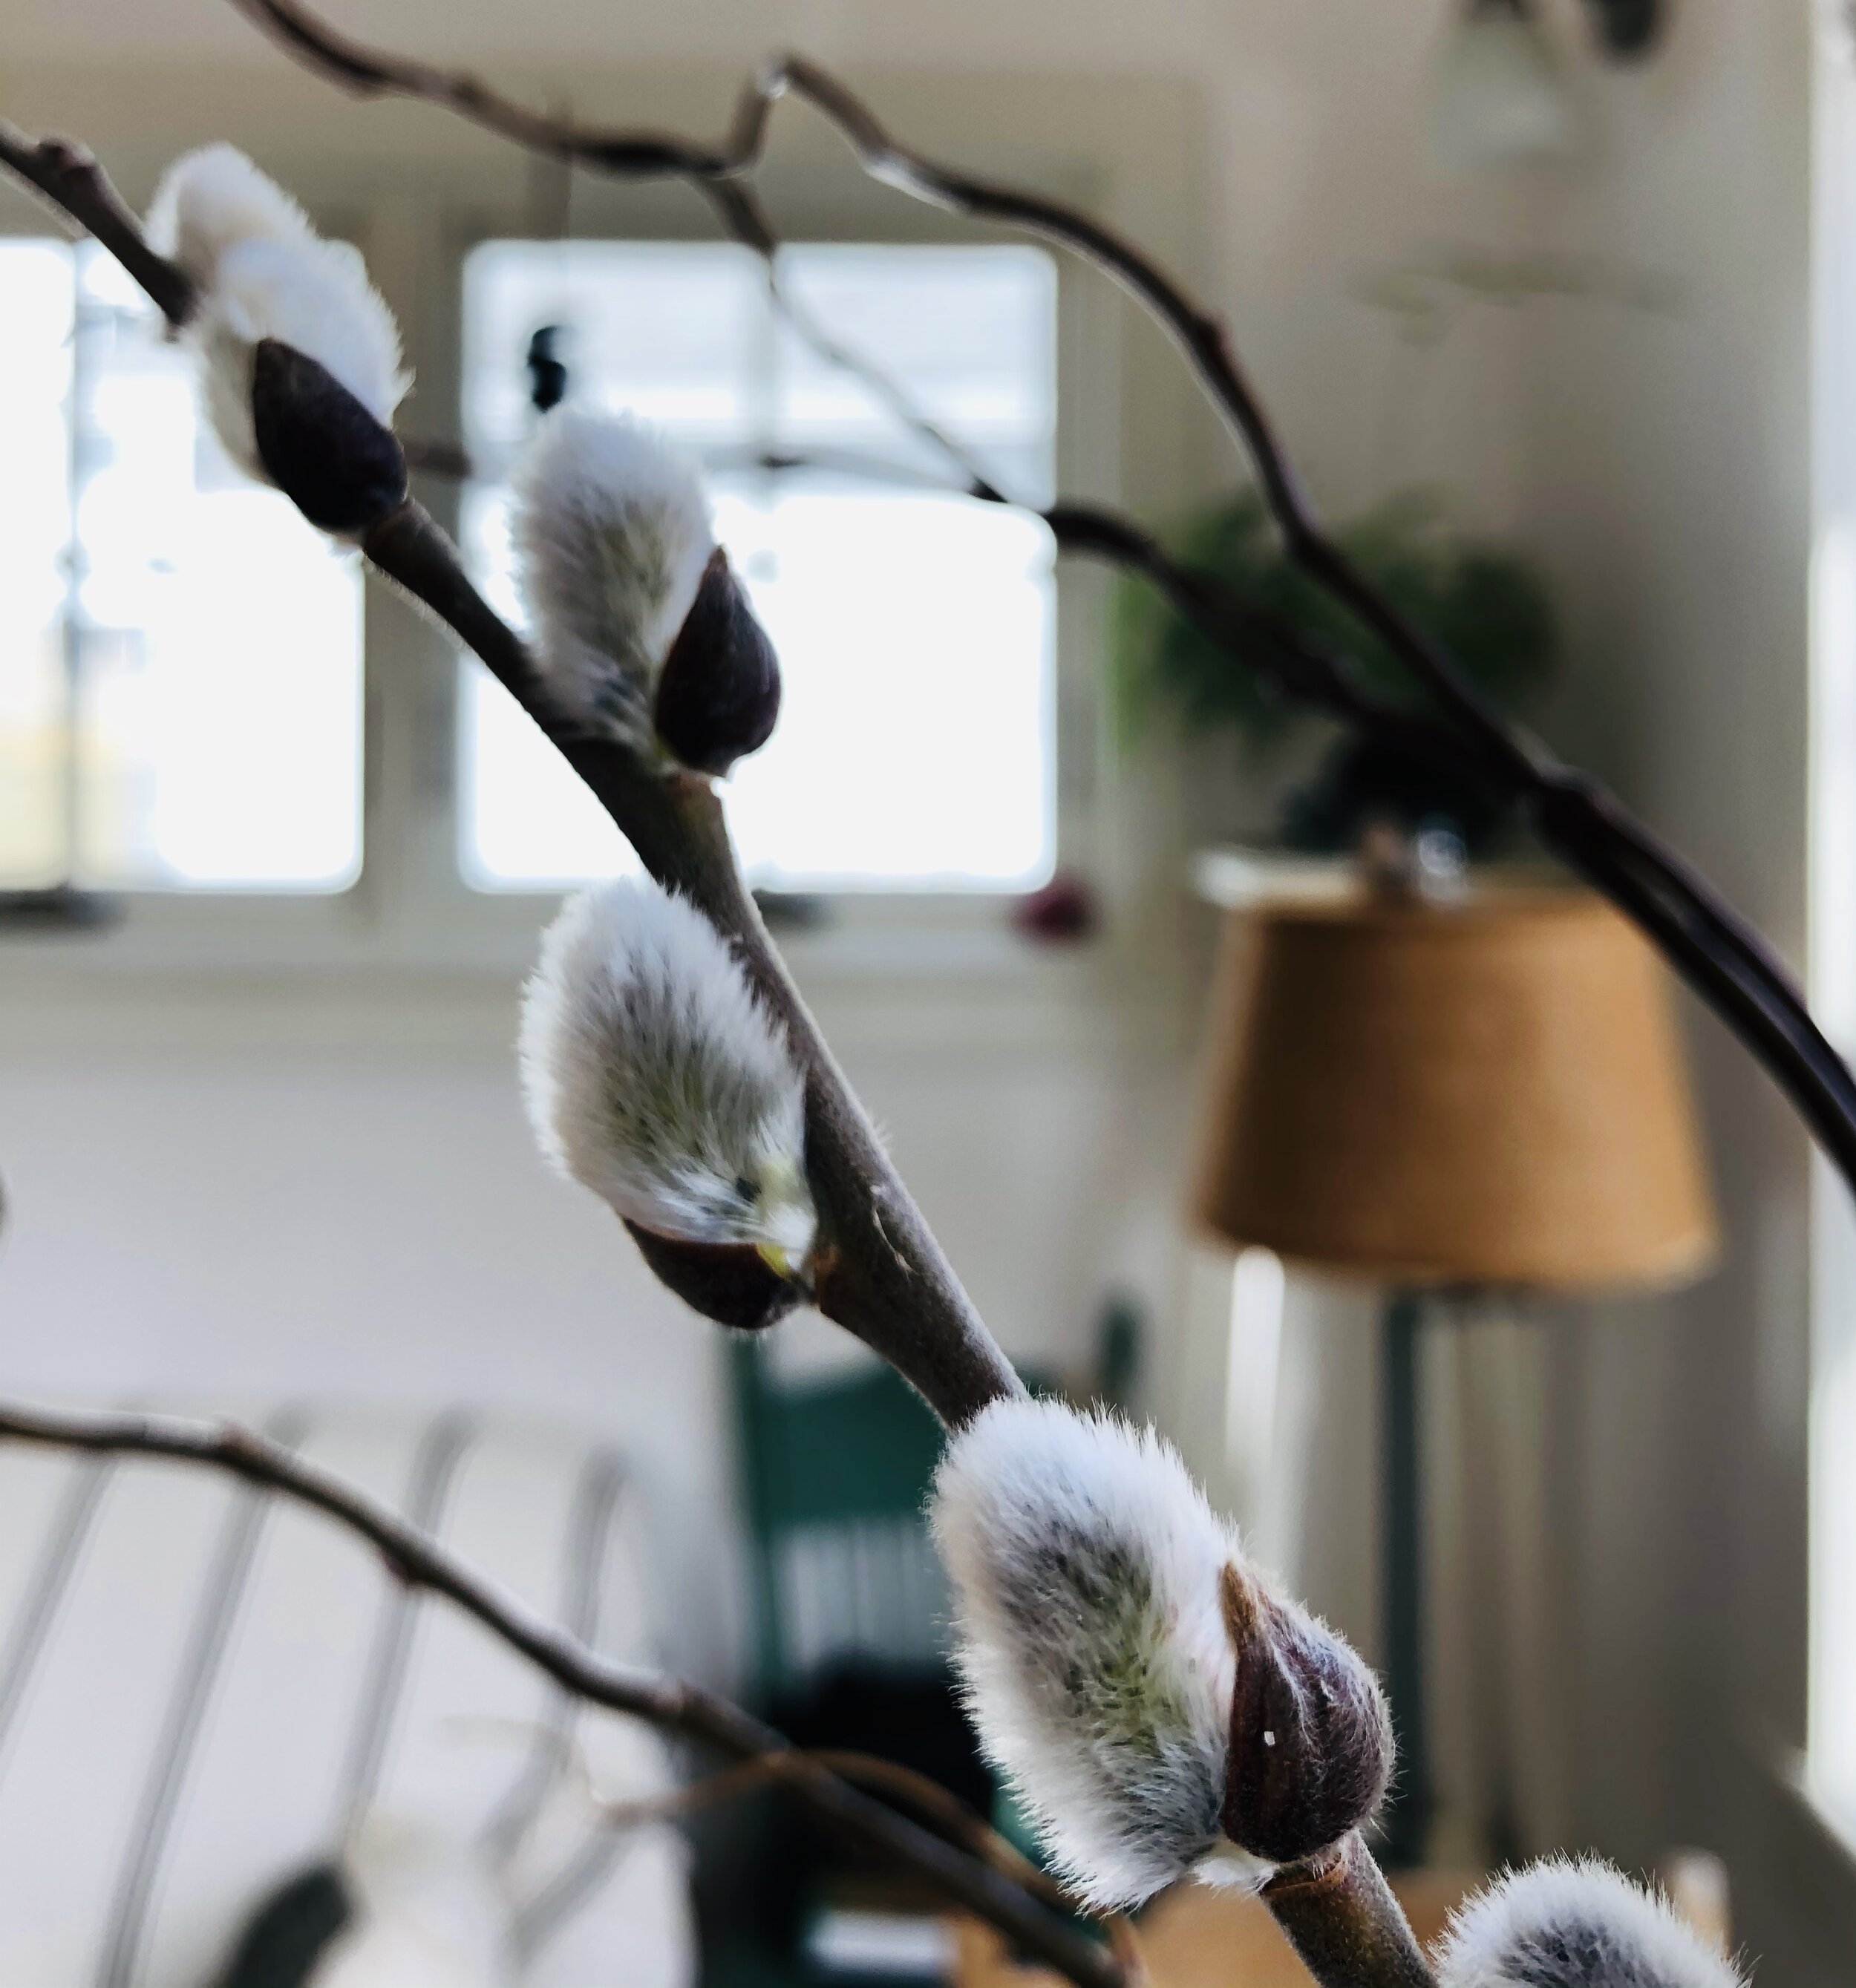
The willows stopped me in my tracks as I was leaving the greenhouses on Friday. I was on my way home, and looked up just in time to see them just bursting with life, reminding me to pause and catch my breath. I had forgotten about spring. I snipped a few stems to bring home. There is a lot more there, and I welcome you to stop by and clip a stem or two for your own house. It feels good to share. Always having clippers in the car is a handy thing.

There are so many unknowns right now about what a small business like ours is supposed to do. I am a list maker, I love a well organized drawer, I own stacks of graph paper notebooks and I love logic. These are my coping mechanisms so our house has never been so clean, nor our weeks so organized as lately, but of course that does nothing for the looming unknowns.

Here are a few things we are doing at Red Wagon right now:

  • We are growing plants as if all the same gardens will grow that grew in years past. The plant world is not adjusting or stopping. I have heard from a few of you that you would like to know if you can plan your garden as usual, and yes, you can. That is one thing I feel secure about.

  • We are adjusting our calendar of events on a week by week, day by day basis. If you are signed up for a class or seminar, you will receive an email with updates. Video conferencing, very small in person groups with lots of distance, one on one consults on the phone, cancellations and full refunds are the options we are considering.

  • We plan to open on April 17th with normal retail hours. But of course, this might change as we get closer. That evening’s cocktail party will likely be postponed. Again, we will keep you updated.

  • We will offer home delivery of plants once the weather warms up. More details coming soon.

  • We will also offer pre-picked plant orders that can be paid for online or over the phone and picked up in the parking lot. .

  • We will continue to deliver plants to our wholesale partners as long as they are open.

  • As of now, we still hope to hold our April 4th Open House. Since this is a small group, dispersed amongst 4 greenhouses and the outdoors, it seems possible to provide some much needed activity in an airy and clean space full of growing plants. Again, we will adjust as needed as we get closer.

Our amazing crew is taking all of the precautions possible to work safely - more distance, more gloves, tons of hand washing. Because we are in large open spaces, this feels doable, and frankly there is no other place any of us would rather be outside of home. We are offering paid leave should anyone need it, and because of this, I am sending out this little plea: please continue to support small businesses in any way you can. We must rely on each other.

In the meantime, please send us your gardening questions and stories, share photos of your garden, engage with us on social media, and help your neighbors as best you can. In my more fantastical, utopian moments, I dream of us as a current day, virtual land army, with plants, flowers and home grown food helping us get through anything together.

With love,

Julie

P.S. At the top of the driveway, please check out all of Family Cow Farmstand’s offerings. Their store is well stocked with gorgeous local foods in addition to their stellar raw milk. The store is self-serve and open every day. And they will be raising chickens again - shares available for sale now. These are the most delicious chickens I have ever eaten, raised in the nicest way possible by two very smart and wonderful people.

Fennel, Foeniculum vulgare, Apiaceae family

by Sophie Cassel, guest blogger, herbalist, and Red Wagon team member

fennel.jpg

With these plant profiles, my hope is to inspire gardeners to consider growing and using some of the lesser known herbs that Red Wagon propagates, both for their beauty in the garden and their myriad uses in the kitchen and medicine cabinet. Fennel definitely fits the bill here. At Red Wagon, we grow two varieties of Foeniculum vulgare- bulb fennel, which is grown as a vegetable and also known as Florence fennel, and bronze leaf fennel, which is grown as an ornamental and culinary herb with potent medicinal uses. 

If people are unfamiliar with bulb fennel in the garden or on the table, they are usually even less aware of bronze leaf fennel, but both of these varieties deserve a spot in the garden. In terms of medicinal usage, we’ll focus on bronze leaf fennel, which is actually quite a bit easier to grow than its bulbous relative, offering interest and uses throughout the growing season.

But first, we should acknowledge the long and celebrated history of fennel across cultures and healing modalities. The emperor Charlemagne reportedly required the cultivation of fennel on all imperial farms, and ever since Holy Roman conquerors introduced their favorite herbs to Anglo-Saxon Europe, western herbalists have extolled the virtues of this plant. My first introduction to fennel seeds, as a digestif following a rich Indian meal, points to its trusted use in Indian Ayurvedic medicine as well. In Longfellow’s 1842 poem “The Goblet of Life”, he too references the plant’s historic values:

Above the lowly plants it towers,

The fennel, with its yellow flowers,

And in an earlier age than ours

Was gifted with the wondrous powers,

   Lost vision to restore. 

It gave new strength, and fearless mood;

And gladiators, fierce and rude,

Mingled it in their daily food;

And he who battled and subdued,

   A wreath of fennel wore. 


Even if you’re not planning on going into battle or restoring sight to the blind this summer, fennel still deserves a place of honor in your herb garden. These days, it is chiefly used in all manner of digestive complaints like cramping, bloating, and that weighty feeling that comes after eating something that may not sit well. Like many of its cousins in the Apiaceae or Umbelliferae family (i.e. dill, coriander) fennel is considered carminative, meaning it helps to relieve gas and bloating. I have also seen this work in a similar way to alleviate the cramping that comes with premenstrual symptoms. Traditionally, the seeds of the plant have been the most trusted part for medicinal use, the feathery fronds and flowers also make an excellent tea or addition to salads and fresh summer dishes. 

From a gardener’s perspective, bronze leaf fennel is much easier to grow than its finicky vegetal sibling, bulb fennel. While bulb fennel requires consistent adequate moisture, fertility, and mulch,  bronze leaf fennel can thrive in a wider variety of soils and tolerates dry conditions. Sow or transplant once the ground has warmed, and offer plenty of sunshine, although some afternoon shade doesn’t seem to slow this plant down much. It can grow up to 2 feet high before flowering, and looks wonderful as a backdrop supporting other sturdy flowers, such as calendula or marigolds. 

Once the fronds have begun shooting skyward, you can harvest the leaves continuously for culinary use and bouquets, but make sure to let some go to flower. Insects (including swallowtails) adore the flowers, and as the they mature you can delight in the flavor of the slowly ripening seeds. Be sure to harvest dried seed before frost, unless you’d prefer a garden full of bronze leaf fennel in subsequent years because they self-seed generously. But with its copious culinary and medicinal uses, that wouldn’t really be such a bad thing. 

Using fennel for medicine is as easy as popping a pinch of the seeds in your mouth following a rich meal. I like to toast them a little before using to bring out their aroma and offer a pleasant crunch, and you can also fry the seeds in a small amount of honey to candy them and increase palatability. They also brew into a lovely tisane, steeped for 10 minutes in hot water (bonus points for your belly if you add some chamomile flowers to the brew). Fennel is very safe, and has been used for colicky babies as well as to promote lactation following birth. Fresh (or freshly dried) fennel is often considered decently palatable even to folks who have an aversion to the sticky-sweet taste of anise, another Apiaceae cousin of the plant.

Let this be the year you let fennel into your garden, your kitchen, and your heart!


References:

Ken Adams and Dan Drost, Fennel in the Garden, March 2012. https://digitalcommons.usu.edu/cgi/viewcontent.cgi?referer=https://www.google.com/&httpsredir=1&article=1267&context=extension_curall

Longfellow, H.W. Ballads and Other Poems, 1842. Found at https://www.hwlongfellow.org/poems_poem.php?pid=75 

Rohde, Eleanour Sinclair. The Old English Herbals. Originally published 1922: Longmans, Green and Co.


Grieve, M. A Modern Herbal. Originally published 1931: Harcourt, Brace & Co.

8 Plants to Grow for Your Home Medicine Chest

Thyme. Photo courtesy of Lisa Cassel Arms

Thyme. Photo courtesy of Lisa Cassel Arms

8 Plants for Your Medicine Chest

This year, make the commitment to add plant-based, home grown remedies to your life! Whether in the bathroom cabinet, the first aid kit, or the spice rack, medicinal herbs deserve a place in your home. Below are eight easy-to-grow herbs that you can grow and process to provide your family with plenty of herbal TLC. If you’re looking for more guidance on growing and using herbs this year, we’ll be discussing medicinal gardening in full on March 28th from 10-12 in the Red Wagon classroom!

  1. Yarrow (Achillea millefolium): This common roadside “weed” is actually a treasured medicinal wunderkind. The genus refers to its alleged use by the warrior Achilles, who brought the plant into battle to staunch the sword wounds of his soldiers. Swords aside, yarrow is the premier first aid herb for all sorts of cuts and scrapes. It is both styptic (staunching bleeding) and antimicrobial, so it is quite safe to put directly on a wound. When fresh, the leaves and flowers can be mashed or chewed into a juicy poultice and put directly on the skin. For year-round use, simply dry the aerial parts of the plant (as flowers begin to open), and powder the leaves and flowers. This can be stored in a first aid kit for easy access, and will keep for a couple years. Yarrow is a popular ornamental, so while the wild white variety is traditionally used medicinally, the brightly colored ornamental varieties can also be used in a pinch.

  2. Calendula (Calendula officinalis): Sunny, cheery “pot marigold” is one of the first flowers to burst forth in June, and one of the last to die back as frost looms in October. Harvesting is as simple as plucking the flowers from the stem as they open and drying them for a couple days in a warm, sunny location, then storing in a dark place. Once the plants start flowering, harvest can happen as frequently as every other day, which helps keep the plant in bloom consistently. Calendula is healing to all damaged tissue, internal and external, and can help foster immunity and a bright spirit in the depths of winter. Deb Soule of Avena Botanicals in Maine encourages everyone to “Grow a Row” of calendula as a way of supporting folks healing from abuse and trauma. 

  3. Echinacea (Echinacea purpurea, angustifolia): Many folks already have Echinacea growing as an easy native ornamental in their perennial gardens, but haven’t harvested it before. A favorite of nectar-seeking butterflies, both the flowers and roots of the plant are harvested for medicine. Pop the matured flower heads off the stalk through the late summer (leaving plenty for the pollinators), and either dry for tea or chop up and cover with vodka to make your own immune-boosting tincture. Harvest roots in late fall and add to the vodka, and in a month you’ll have enough Echinacea tincture to keep your loved ones healthy through the winter! 

  4. Tulsi (Ocimum sanctum, tenuiflorum): A relative of basil, tulsi brings joy to the garden with its heavenly scent and flower stalks that attract all manner of pollinating insects. Tulsi leaves and flowers can be harvested fresh for tea, or hung in a dry, warm place to dry, then stripped off their stems and stored for a burst of sweetness throughout the year. Though native to farm warmer climates, this plant thrives through our northern summers and is a favorite tea plant for children and adults alike.

  5. Thyme (Thymus vulgaris): We offer a few varieties of thyme at Red Wagon, and this culinary staple is equally useful as infection-fighting medicine. My favorite to dry for tea is the French variety, which is a bit more floral and sweet than the German variety. Harvest by giving the plant a “haircut” right as it begins to set blossoms, and dry in a basket or paper bag, then strip from the stem. Strong thyme tea with a bit of honey provides welcome warmth during cold and flu season, and it can be added to biscuits and other baked goods for a dash of herbaceous brightness.

  6. Rose (Rosa spp.): Growing roses can be as simple or as complicated as you like, but harvesting their bounty is easy regardless of the species you cultivate. As the flowers bloom, pluck the petals and allow to dry in a basket out of the sun. You can certainly harvest the buds, but that robs the pollinators of the nectar, and reduces the showiness of your plants. Often once the bloom has been pollinated, it will begin to drop its fragrant petals on its own, and you can come along with your basket to catch them! Rose petals brighten and sweeten any tea blend, add luxury to chocolate treats, and are a classic skin-soothing secret. To learn more about using roses in skincare, join us June 30th for a Make-and-Take skin spray class at RWP!

  7. Mint (Mentha spp): This year at Red Wagon we’re growing fifteen different kinds of mint varieties, all with distinct aromatic profiles! I’m personally a big fan of the Kentucky Colonel and Chocolate mints, but it’s tremendously fun to plant a variety (in pots if you’re concerned about spreading) and see which types work best in your kitchen. Mint dries well, and I often will combine a few varieties into a tea blend for greater depth of flavor. In addition to settling digestion and brightening the spirit, mint can be used to literally cool down in the heat of summer- a strong mint tea can be chilled, and applied with a washcloth to the face and neck after sun exposure (as well as drunk for maximum cooling!)

  8. Lavender (Lavandula spp.): What could be more classic in the garden than lavender? With its beautiful purple blossoms and sturdy upright habit, it’s the definition of classic English gardening. We have quite a few lavender varieties in the greenhouses. For harvesting, the Phenomenal (L. intermedia) type seems to be a frontrunner in terms of quantity and fragrance of blooms, but Hidcote and Provence also work well. Cut flower stalks in early bloom and make a fresh lavender wand, or dry flowers and leaves to crush for homemade sachets. I also love infusing lavender into bath salts, and drying to use in the winter for uplifting facial steams


I hope this list piques your interest in planning your herb garden this year! There’s more inspiration to be found on the Red Wagon Herbs We Grow list, so be sure to peruse before the planting season begins!

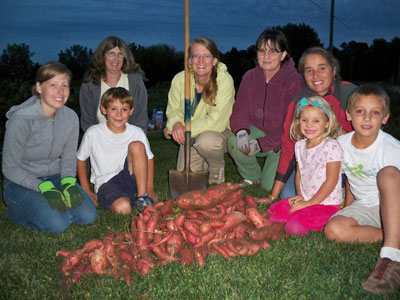
Sweet Potatoes Slip Sale 2016

sweet_potatoes_3.jpg

Sweet Potato Slip Sale

June 11th and 12th, 2016

8:00 to 6:00 pm

 Red Wagon Plants greenhouses

2408 Shelburne Falls Rd  * Hinesburg, VT

Proceeds from the sale benefit the educational programs of Vermont Community Garden Network.

For more information, call 482-4060

Sweet potatoes can be grown in Vermont. Under ideal conditions they thrive and can yield up to 5 pounds per slip. During this benefit sale, we will be selling sweet potato slips in 4" pots, with three slips per pot. These get transplanted 18" apart, in loose, well drained soil. You can also grow them in containers. They like warm, southern exposure, and can be trellised to save space.

Here are some resources for more information on Sweet Potatoes:

The Vermont Community Garden Network has information on their programs and the sweet potato sale here.

This  article on the Mother Earth News website highlights growing methods for northern gardeners and best ways to store the tubers.

 Here is a photo essay on how some ingenious customers are growing their sweet potatoes in Starksboro.

Recipe for Roasted Sweet Potato Fries with Herbs

2 large sweet potatoes, peeled and cut into 1/3 inch batons

3 TBS olive oil

salt and pepper

1/3 cup finely chopped parsley, chives, and or cilantro

2 cloves of garlic, finely chopped

1 small pinch of cayenne

1 tsp lemon juice

  • Preheat the oven to 450 F. Place 2 large cookie sheets in the oven so they are pre-heated as well
  • Toss the cut sweet potatoes with the olive oil and salt and pepper in a large bowl
  • Arrange them on the hot pans in a single layer.
  • Roast for 20 minutes, and flip them over with a spatula, and return to the oven for another 20 minutes, or until tender and browned.
  • Meanwhile, toss the herbs, garlic, cayenne and lemon juice together in the same bowl
  • When the hot fries come out of the oven, sprinkle the herb mixture on the fries and serve immediately

Growing Instructions for Sweet Potatoes

Sweet potato slips are cuttings that come from a parent vine. The slips grow best in a loose, sandy or silty soil that drains well. If sweet potatoes are grown in a rich dark soil they may discolor but are still good to eat. • Transplant the slips into garden beds during June, preferably in the late afternoon or on an overcast day. When transplanting, lay the slips on their sides with 2/3 of the slip buried a half inch under the soil. Water enough to keep the soil moist, but not saturated. • Plant the slips 10 to 18 inches apart in rows that are three to four feet apart. The rows or raised bed should be elevated 4 to 8 inches above the ground level to allow the sweet potatoes room to form. • Keep the cuttings watered while they are getting established. The leaves that were originally on the planted slips will dry up and fall off leaving just the vine stem. New leaves will emerge from the cuttings as the slips become established. • The sweet potato vines will cover the ground reaching 5 to 10 feet in length. Hoe around the vines to cultivate weeds and mulch with hay if desired. • Deer love sweet potato leaves, so be sure your planting area is fenced if deer are aproblem. A flying gold colored beetle may chew round holes in the leaves. The vines are tough and will keep growing despite insect damage. • Sweet potatoes are dug and harvested in late September through mid October, a day or two before the first predicted frost. Most of the sweet potatoes will be just below the parent plant. Each plant can produce up to six sweet potatoes. • After harvesting, dry the sweet potatoes on the ground for two or three hours. Allow them another 10 to 14 days to cure at room temperature or above, before storing the sweet potatoes at a temperature between 50 and 60 degrees F. • Unlike Irish potatoes, sweet potatoes should not be kept cold in a garage, refrigerator or outbuilding. If properly cured and stored, they will keep until April. Enjoy!

Hardening Off Those Plants

Curious about what "hardening off" means and why it's important? Here's a blog from our archives to help you prep your cold-season transplants for the great outdoors. 

Plants need to be hardened off before being transplanted. What does this mean? It is the process you take them through to get used to direct sunlight, wind, cold, heat, dryness, and any other weather conditions they will be asked to live through during their lives. When plants are started in the greenhouse, in trays or pots, their world is sheltered and comfortable; food is readily available in the compost-fortified soil, and the temperatures are carefully regulated. Once it is time to go out into the harsh world of the garden, the goods and services become a little more scarce for those baby plants and they go through a bit of withdrawal known as "transplant shock."  Hardening them off gives them a gradual adjustment to this new world.  It is best to start out by putting the plants outside for a few hours, and then bringing them back in; this gives them a small taste of direct sunlight. In any greenhouse, the plastic film filters out 10 to 25% of the sun's rays and the tender plants are literally sun-burned when they first encounter that unmediated light.  Here is how I do it at my house. When you buy plants that were grown by Red Wagon Plants, they have already been hardened off and you can put them right in the ground. The following method is important to follow if you are working with plants that you know are not hardened off yet.

Once they have gotten used to a few hours of sunlight at a time, they can stay outside overnight, but under a protective row cover.

The cover comes off in the daytime and the plants are acclimated to being where they will be planted for a few days.

If the temperatures drop down below freezing, cover them again. Cold hardy plants such as broccoli, cabbage, kale, hardy lettuces, hardy herbs, escarole, scallions, onions can take a frost without a problem, but they will do it with more grace and strength if they have been gradually introduced to those temperatures.

Once the plants have had a few cold nights, under cover, they can have a couple more nights without cover, and then are properly hardened off and ready to go in the ground.

It's also a good idea to give cold-weather transplants a little extra compost or a fish/seaweed emulsion watering at transplant time. It is hard for plant roots to uptake nutrients in cool weather and this will aid their transition as well.

Planting the Fussy Onion

Onions are some of the first things to go in the ground each spring. You may not know this, but onions are finely tuned creatures with a rigid hormonal profile. They are completely and utterly dependent on the sun's cycle to grow into the lovely round orbs we think of as onions. Those plump layers only grow in relationship to the lengthening days of spring. If onions are planted too late, they will never bulb out and become big and round. An onion that has been planted too late, let's say after the middle of May, will never quite size up, but will create a thick stem, and a barely bulbous orb. The engorged stem will not create rounded layers at all but rather look more like a slightly ovate leek. These are still fine to eat, but won't really be onions you can store through the winter.

We recommend that people plant onions in mid-April. When it is muddy, and cold, and you think there is no way a plant wants to go into the garden, well guess what? The onions really want to go into that cold earth. The way we grow onion plants for sale is that we seed about 80 plants into a 4 pack, and your job as the gardener is simple:

  • Prepare a bed in the garden - deep, well worked, rich soil is best. I prepare my onion beds in the fall, that way they are ready for onion plants first thing in the spring.
  • Gently pull the clumps of soil and roots and plants out of the 4 pack.
  • Separate each plant and shake off the excess soil. The individual plants are like tiny blades of grass, but each one will grow into a big onion plant.
  • Make a trench about 4 inches deep the length of your planting area. Onion rows can be about 8 inches apart, so depending on the size of your bed, you can plant up to 4 rows of onions in one bed and still reach across the bed to weed comfortably.
  • Plant the individual plants in the trench, about 4 to 6 inches deep. Only a few inches of the thin green stems will be above ground. You should have about 2-3 inches between plants.
  • Tamp the earth tightly around each plant.

The onions plants won't grow much at first, but they are just hanging out in the cold soil, programming themselves to grow once the soil warms up. It is these cold, long days that help make onions nice. I know, it is hard to believe that they prefer this, but they do. Southern growers, who have shorter summer days than northern growers, have entirely different onion varieties than we do. That illustrates just how much onions are day-length sensitive. A few degrees difference in latitude necessitates a whole different set of genetics.

The other things to keep in mind with onions:

  • Keep them well watered. Water and day length is what makes onions big. Some straw mulch applied in late June is a good idea for keeping the moisture even and consistent.
  • Keep them well weeded. Onions plants are slender and upright. They do not create any shade, therefore weeds like to grow near them, in the sunny under-story of the onion patch and because onions really don't want to compete for food, water and sunlight. They are not good at sharing.
  • Keep them well fed. An application of Compost Plus in May is a good idea. It will help them get big and strong.
  • Growing onions in black plastic mulch is a good option if you want to eliminate weed pressure and heat up the soil. Once onions are big, they like it hot.
  • Harvest onions once the tops start to flop over. You can eat them fresh, as "green onions" or you can cure them by laying them out in a dry, airy place, away from direct sunlight. This usually happens in late July or early August. It depends on the varieties you grow and on the kind of weather we are having.

Onions are best stored in a dark, cool, airy place. A damp basement is not a good storage spot. A cold, dry, dark attic is better. Or an unheated closet, or a garage that does not get too cold. Ideal onion storing temperature is about 35F. That is pretty cold - colder than most basements.

Some onion relatives can be planted later in the season. This includes scallions, mini-purplette onions, pearl onions, and shallots. Leeks are also tolerant of a later planting, and can be planted multiple times throughout the gardening season if you would like to harvest baby leeks. 

The onion varieties we grow each year:

Cipollini Gold Coin - a flat, disc like onion that stores very well in the winter. It is a strong flavored onion which mellows when cooked and is delicious caramelized, glazed, or roasted. One of our favorites for flavor.

Yellow Storage Cortland - a huge, good keeper which means that it stores well all winter. Dry the onion once harvested in a cool, airy spot, and you will be eating it until March or April of next year. 

Red Storage Onion Mars - also quite big, and also a good winter keeper. Slightly milder in flavor than Cortland and can be eaten raw when sliced thinly. Red Onions develop their red interior only once they have been cured. Once harvested, coll in an airy dark spot until the tops are completely dried and can be pulled off by hand. That is the curing process for all storage onions.

Sweet Onion Walla Walla and Ailsa Craig - both are gigantic sweet onions. They do very well with lots of water and mulch. Sweet onions do not keep over the winter. They do not need to be cured, but rather get refrigerated once harvested. They are delicious roasted, grilled, or eaten raw in sandwiches. 

Scallions - These can be planted in clumps of 10 or so plants. They can be planted every few weeks for a continuous harvest. If you do not want to buy scallion plants or seeds, you can eat young onion plants as scallions.

Shallots - These store very well after being cured like onions. They add a sweet and complex flavor to winter dishes, marinades, and dressings. 

Mini-purplette - these are lovely purple pearl onions that are delicious in a spring braise with salad turnips and peas. They can be planted in clumps of 4 to 6 plants and can be planted multiple times throughout the season for more than one harvest. They also make great pickles. About 1" to 2" across.

Garlic Ritual

Planting garlic in Vermont is a great way to extend the gardening season and gives you a crop that is perfect in so many dishes, stores well all winter long and even generates its own seed. It is a perfect way to tune into the cycles of the gardening season and feel like you are growing an important part of your diet. Garlic is expensive to purchase so there are savings to be had with your own garlic crop. Please follow this guide for easy, step-by-step instructions that will give you a garlic patch for life. I have been growing out my own garlic for 18 years and usually do not need to ever buy seed stock or garlic in the grocery store. The pleasures of garlic growing are abundant and I encourage you to get familiar with this wonderful and simple crop.

When to start the cycle?

Planting dates in Vermont are anytime between mid October and late October. It is best to wait until then, because if you plant too early, the bulbs will break out of dormancy too soon and this weakens the plant going into our harsh winters. If you plant the cloves during those last two weeks of October, it gives them just the right amount of time to take root and hunker down until spring, but not send out any top growth.

To plant garlic, you need to follow a few easy steps.

1. Bed preparation.

This is the act of making your garden soil ready for garlic planting. You want a nice patch of garden, that is worked deeply so that the soil is loose about a foot down in depth. If your garden is very compacted and hard, the garlic will not be able to grow well and you will be sure to end up with small heads of garlic that are tedious to peel and not all that satisfying. You can prepare the bed with a 3 prong fork by digging in straight down, tilting the handle of the fork back and forth, and loosening the hard pan. This is a good work out! Don’t hesitate to get dirty here by kneeling in the earth and breaking up the clods of soil with your hands so they are not chunky at all. Add a bit of well rotted manure or compost at this time. Not too much. For a 5 by 10 bed, maybe a 5 gallon bucket’s worth. You don’t want to over feed the garlic roots in the fall, but a little compost will add organic matter and that will help the structure of the soil, keeping it loose, able to retain some moisture without staying too wet.

Take your time and your garden will reward you. I always look at garlic planting as a soulful moment in the gardening cycle. It is saying goodbye to summer and embracing the dormancy of winter, when seeds deep below the surface slowly get ready for their spring emergence. Living in a climate with such long winters, I need these small, but important, rituals to remind me that spring will come and the cold barren winter is a necessary part of it all. The seed garlic is planted in the fall because it needs to send roots far into the earth in order to feed itself the following year. I take this as a metaphor for my own winter activities that feed me all year long - catching up on sleep, feeding my mind with more reading time, eating great, nourishing foods, and spending more time with friends and family.  I digress here, but these are the thoughts I have as I plant garlic, and after many years of doing it, I find that it is a necessary part of my mental preparation for winter.

2. Mark the rows with a hoe, or hand tool. I usually keep the rows about 12 inches apart and since my beds are about 4 feet wide, I keep 3 rows per bed and can easily reach the center. Just drag your tool - the sharp tip of a hoe or the narrow edge of a hard rake works well - through the soil to delineate the rows. You can use string and stakes if it is important to be straight, but I don’t bother with that at all.

3. Break up the garlic heads into individual cloves. Do not peel! And notice that one end is the root end and one end is the stem end. This will be important for planting right side up with the root end pointing straight down and the stem end pointing straight up.

4. Space out the cloves. Lay the cloves on the top of the soil, following the line you have just drawn in the soil.  Allow about 6 inches between all the cloves.

5. Planting, spacing, and yields

Now you can start to plant. I always kneel down and take my time to feel the earth under me at this point. It just feels good and is a way to say goodbye to the garden before winter! Then, take a bulb planting tool, or a sturdy,  sharp pointed stick, or your hand if your soil is soft and pliable, and poke a hole about 4 to 6 inches down. Shove the clove of garlic deep down, root end down, and cover up with the soil. Continue down the row and repeat until all is planted. Three  heads of garlic will turn into about 24 heads next spring - assuming your garlic has about 8 cloves per head. . And with 6” by 12” spacing, a 5’ x 10’ patch of garlic will yield about 60 heads of garlic. That is enough to enjoy one head of garlic per week, all year long, and still have some left over for planting. To plant a patch this big, you will need to plant the equivalent of 7 to 10 heads of garlic.

6. Compost and mulch. I usually add another 4” of compost or well rotted horse manure to the bed. I then leave it like that for about 6 weeks. Then in mid to late December, I cover the bed with a thick layer of straw. You can also use leaves here, but straw is the best insulator with hollow stems that trap air and keep everybody warm down below. Another advantage of straw is that it usually does not have weed seeds in it; mulch hay, straw’s poor cousin,  should be avoided since it is laden with all sorts of perennial grass and weed seeds. The straw moderates the winter soil temperature and prevents buckling and heaving which could push those garlic cloves up and out of the ground.

Let winter pass you by now, and next......

7. Spring time chores with garlic. Once the snow melts and the soil warms up a bit, your garlic will break dormancy and magically pop up out of the earth. It is important to pull back the straw to let the garlic see sunlight. If you wait a bit too long, and pull back the straw only to see a bunch of yellowing stems, don’t worry! The garlic shoots will green up in no time and will look fabulously sturdy after a week or so of direct sunlight. I usually pull the straw into the garden path, let it pile up there and then replace it around the growing garlic to block out weeds once the garlic plants are about 8 inches high. I often will add a little granular fertilizer at this time, before putting the mulch back in place. For a 5 by 10 garlic patch about 3 cups of Pro-Gro from North Country organics or one bag of Compost Plus from Vermont Compost Company is just about right. This will insure you get large, easy to peel cloves that taste great.

8. Garlic scapes will appear on stiff neck garlic around late May. These look like green curly cues with a pointy end that gracefully swoops down and around, waving in the breeze. This is the budding and flowering portion of the garlic plant. It should be removed to help the plant spend its energy on sizing up the goods below ground. If it is allowed to flower, the plants’ strength will go towards the flower and the garlic forming below ground will be the weaker for it. The good news here is that the “scapes” as they are called, are good to eat. I usually cut off the pointy tip - it is rubbery and inedible, and then slice up the round stem and use it in stir fries, stews, pasta dishes, or pickles. When cooked, it has the texture of a nice green bean and the flavor of mild garlic. It is absolutely delicious and a once a year treat that marks the beginning of summer - a harbinger of good things to come.

9. When to harvest? Garlic is ready to harvest when about 70% of its leaves have turned yellow. This is somewhat subjective, and should be taken as not a hard and fast rule, but rather a guide. You can dig up one head of garlic and look for signs of well formed skin, plump cloves, and individuation (cloves that are individually formed, and not one big mass). This is usually some time in late July. In very wet and rainy years, sometimes it makes more sense to take the garlic our of the ground a little early so that the skin does not rot in the damp earth.

10. How to harvest? Take out your three prong fork again and use it to loosen the soil around the outside edges of each garlic row. This will break up the soil enough to allow you to pull out each plant with a firm yank. (If the stems break off, it is likely you waited too long and the skin and stems are starting to rot. At that point, just dig up the cloves with a spade and they will be okay in taste; they just won’t store well. ) Lay the plants on the surface of the soil so that they start to dry off. Once all the garlic is pulled up, wipe it with a towel or rag, and get ready to tie it into bundles. I usually take about 8 plants, hold them together in one hand, and with the other hand, wrap twine around the whole bundle. Tie off the twine and then hang the bundle in a dark airy space. The rafters of a garage, shed or barn work well. If you don’t have that type of space, just find a place out of the rain, out of direct sunlight and with good air circulation - a covered porch? a dry basement with a fan running? a spare bedroom that can get a little dirty? (no shag rugs please!).

11. Curing the garlic Curing is the process of letting the garlic dry which makes the papery skin that allows the garlic to keep all winter. The stems will turn brown and brittle and the exterior of the bulbs will become dry and paper-like, just like garlic in the store. At this point, it is okay to cut off those dry stems, wipe off any remaining dirt, cut off the roots, and place your garlic in a crate to store it. This can be done anytime from 3 to 6 weeks after you initially hang up the garlic to dry.

12. Storing the garlic Once the garlic is cured, cleaned and trimmed, you are ready to store it for eating all winter long. Garlic is best stored in the dark. In an airy, dry, cool place. I use milk crates, covered with a piece of burlap, and keep the crate in a very cool part of the basement. Ideal garlic storing temperatures are between 35 and 45 degrees, but a refrigerator is too humid, so please don’t be tempted to use that as a storage method. Other good places to store garlic (and onions for that matter) are unheated attics, attached garages that don’t freeze, but are not heated, or 3 season porches that do not freeze. Root cellars are great, but most of us don’t have one. If well stored, garlic will last until April or May - almost right in time for the garlic scape harvest!

13. Finding seed stock.

Until you build up your own supplies, you will have to purchase seed garlic. There are many great resources for garlic and for finding garlic seed, I recommend Johnny’s Selected Seeds, or locally, Last Resort Farm in Monkton, Hudak Farm in Saint Albans, or any farmer at your local farmers market who has nice looking seed stock. Seed stock is basically sorted out of the garlic harvest and selected for the following the following traits:

      • good size
      • evenly formed cloves
      • strong stem
      • well formed skin
      • great flavor
      • ability to store for a long time

If you have been growing out your garlic in your garden, you can pick out the best cloves at cleaning and storing time. Set these aside in a safe place where they will not be eaten and come October, experience the joy of planting your own seed garlic.

14. Plant garlic. Repeat Step 1. above and the cycle starts all over again!

April 26th Photo Gallery

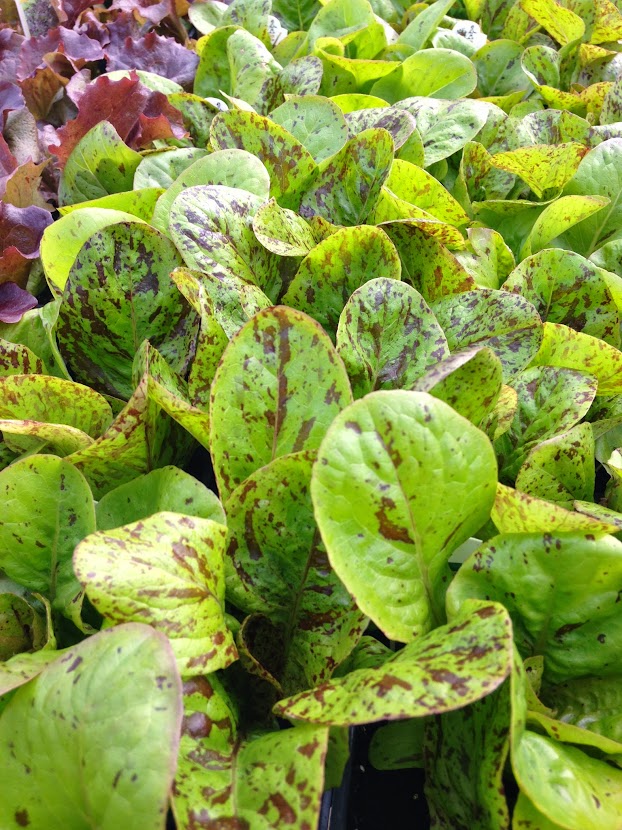
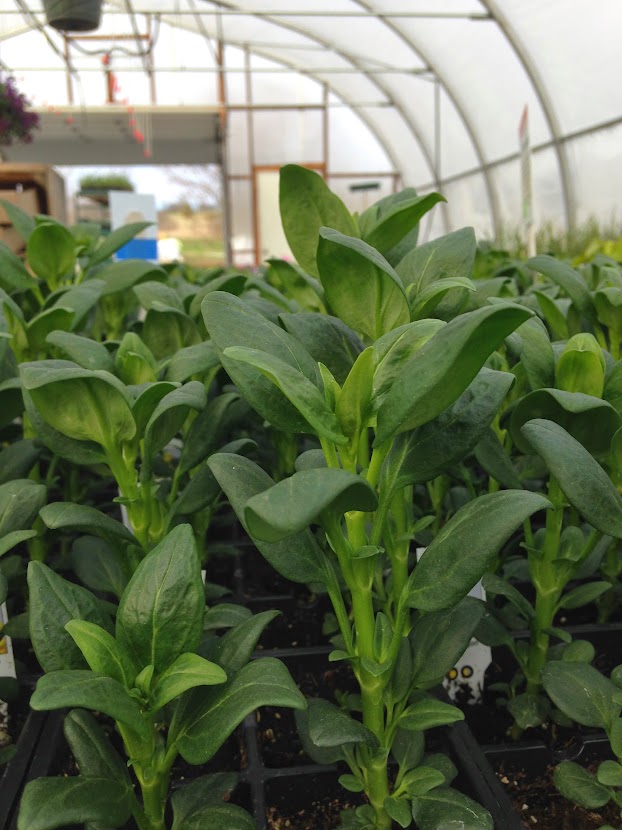
Lettuce 'Forellenschluss' 

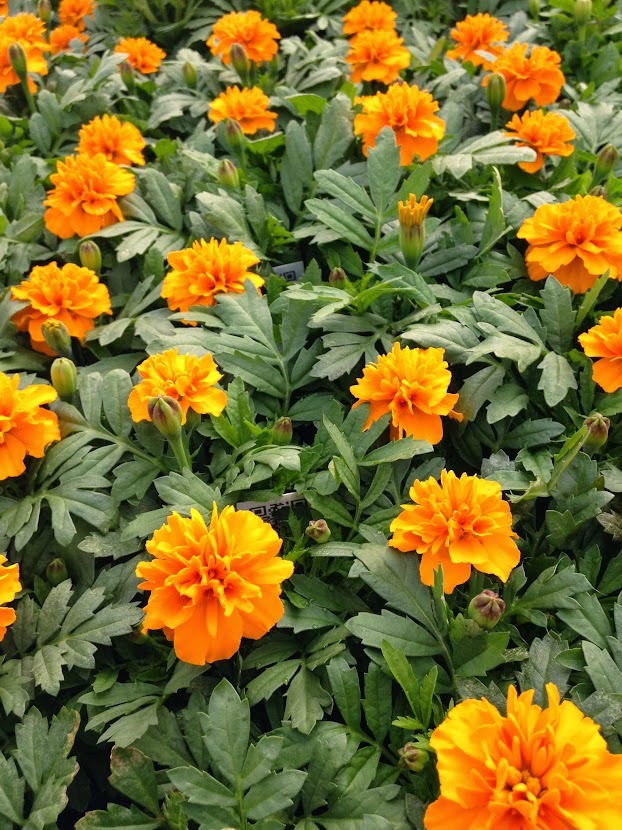
Marigold, French Bonanza

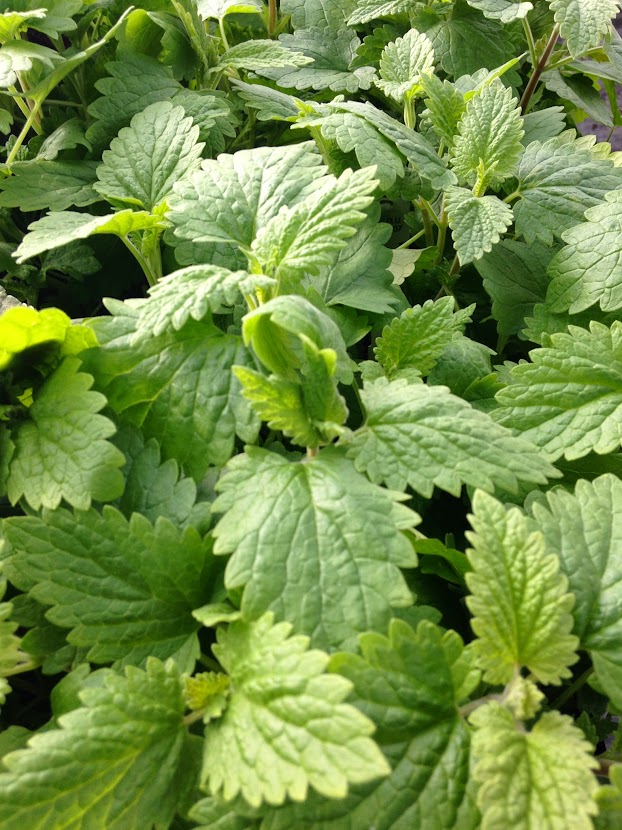
Catnip 4" Pots

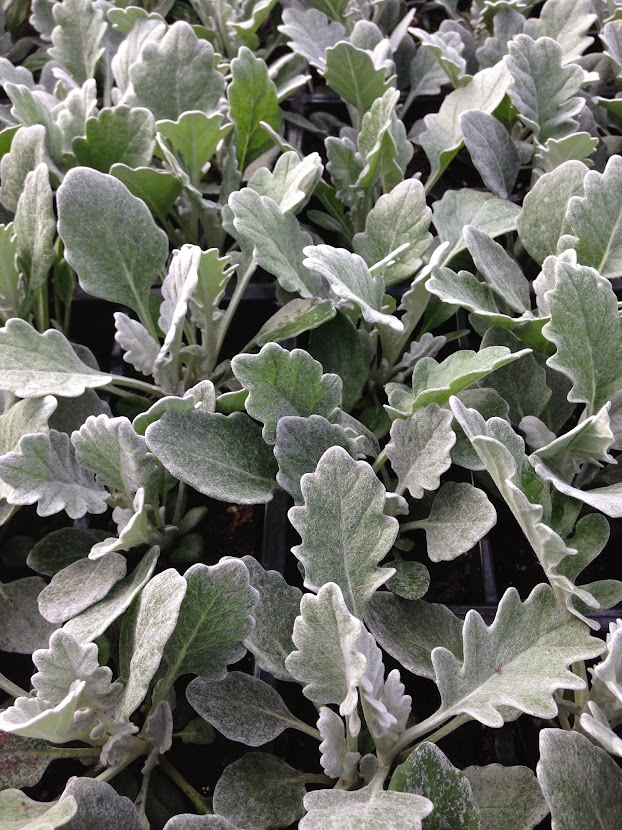
Dusty Miller 'Silver'

Snapdragon Rocket 4-Packs- Pink, Red, and Yellow

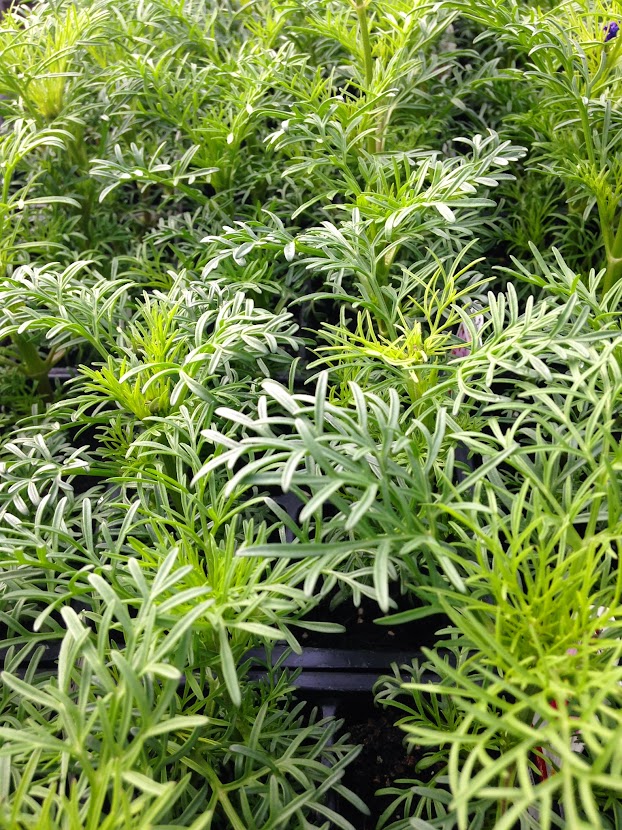
Cosmos 'Sensation Mix' 4 packs

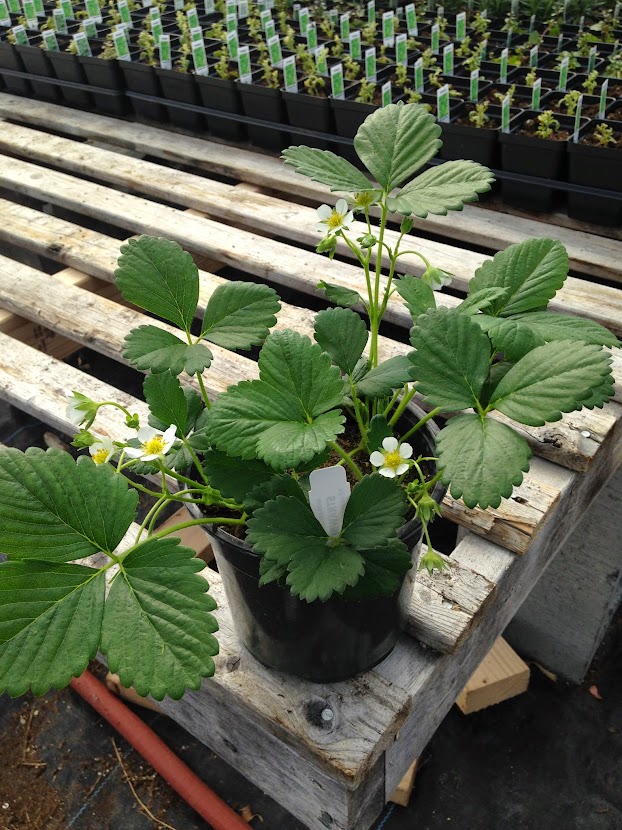
Mara des Bois Strawberry - everbearing French variety that is prized for its outstanding flavor. 

Lobelia Regatta Midnight Blue

Bidens 'Namid'

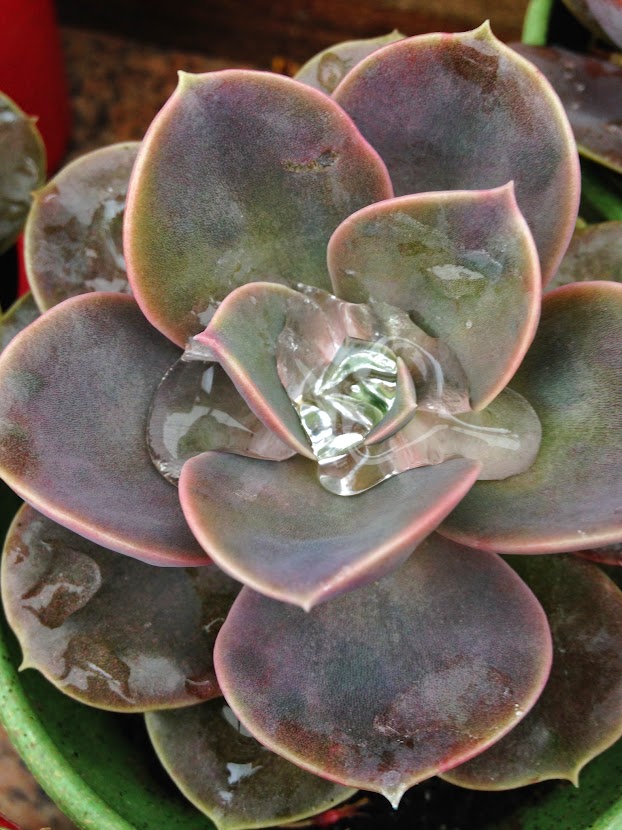
Echeveria Holy Gate

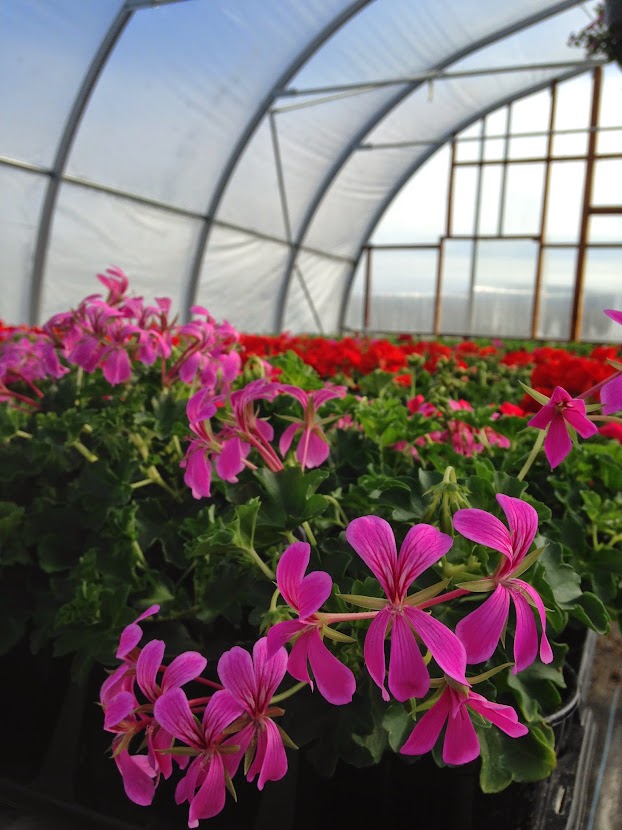
Rose Cascade Ivy Geranium

Thai Basil

Patriot Bright Red Zonal Geranium - Blurry picture, but lots of our geraniums are breaking into color like this. 

Arugula

Cold Frame with lettuce, chard, onions, kale - everything is hardening off nicely.

Spinach and most of our leafy greens are seeded fresh every week, so they are never old and root bound.

Another cold frame with chard and onions.

Penny Yellow Viola

Lilac Ice Viola

Sweet Genovese Basil, Nufar.

Mara des Bois Strawberry. This is a French variety that has been bred for maximum flavor. It came out of breenders' greenhouses in the late 90's and came on the market in the USA only in the past few years. It has the most incredibly intense strawberry flavor and is day-neutral, which means it will bear fruit this year, and will continue to do so all summer long. Very hard to find and expensive root stock. We are lucky to be able to grow it out for our customers. 

Onions, leeks, shallots, scallions on the cold frame.

Provence Lavender. Hardy to Zone 5 reliably, but have gotten a few years out of it in Zone 4. Faster to grow then Munstead Lavdender with bigger plants and flowers. 

Penny Orange Viola

Herb Thoughts

Herb garden planning is not a lot of work, but here are some thoughts I have put together on the topic. Herbs are easy to grow for the most part, but they are a big category of plants (we grow 100 varieties of herbs) and it helps to break them down and organize them into categories. This will help any gardener plant the right plant in the right place and give it the preferred amount of water, sunlight, food, and water.

Why grow herbs? For flavor, fragrance, and beauty - it is the easiest way to improve the flavor of what you cook. It is also one of the easiest ways to have a container garden on your porch or deck.  Herb gardening is intimate - you get close to the plants, smell them, taste them, see them respond to regular clippings. They are a perfect way to better understand plant physiology and the best short cut to great food made with little effort.

Propagation: Plants vs. Seeds

All herbs can be planted from plants, and some can be planted directly into the ground as seeds. The herbs that you can seed directly in the ground and expect great results are: cilantro, dill,  and chamomile. Everything else will do much better if you start the seeds in containers in a sheltered environment. You can start your own herb transplants easily if you have grow lights and a heat mat. Many herbs take a long time to germinate and many herbs are propagated only from cuttings. Making your own rooted cuttings is possible too, but that takes a little more of a sophisticated set up with misters, rooting hormone of some sort, and humidity domes. For those herbs, it is generally easier to purchase the plants.

Herbs from Seed:

  • Parsley
  • Chives
  • Cilantro
  • Dill
  • Chamomile
  • Savory (winter and summer)
  • Marjoram
  • Basil (all kinds)
  • Common Mint
  • Sage
  • Catnip
  • Chervil
  • Oregano (basic varieties)
  • Thyme (basic varieties)
  • Shiso
  • Sorrel
  • Lovage
  • Lemon Balm
  • Fennel
  • Salad Burnet

Herbs from Cuttings:

  • Rosemary
  • Lavender
  • Mints that are true to type (spearmint, peppermint, pineapple mint, etc)
  • Tarragon
  • Specialty Thymes (lemon, variegated, silver, etc)
  • Specialty Oregano (golden, ‘Hot and Spicy’, variegated, etc)
  • Specialty Sage (purple, tricolor, golden, etc)

Containers vs. in the Ground

Some plants love to be planted in the ground and others would prefer to be in pots.  Generally speaking, the herbs that like it dry and warm will prefer to be in a clay pot that breathes like Italian terra cotta. Plants that like it wet and cool might prefer to be in the ground, but they can also be grown in pots if the right conditions are given (more watering, a glazed or plastic pot, heavier potting soil, a little shade).

Herbs that like to grow easily in the ground in Vermont:

Cilantro, Dill, Parsley, Rosemary, Savory, and Chervil

Herbs that prefer to be in containers in Vermont: EVERYTHING ELSE!

This does not mean that you cannot grow herbs in the ground, it just means that in containers, it can be a little easier.

Some herbs do really well as tiny shoots for micro-greens: chervil, dill, cilantro, basil, fennel are our favorites.  And they are easy to grow indoors year round – just pat down some moist potting soil in a shallow container (only need 2” or so of soil) with holes in the bottom, press in the seeds, cover very lightly with a thin layer of soil, and keep moist. When the first set of true leaves begin to emerge, they are ready to eat. You can also grow pea shoots and sunflower sprouts this way. A south facing, sunny window is sufficient.

You can bring in potted herbs in the fall and keep them in a sunny window for use during the winter. The herbs that do best with this treatment: sage, parsley, rosemary, thyme, and savory. Basil can be brought in as well, but it won’t be terribly happy unless you have grow lights for it.  If you had some of these herbs planted in the ground, you can dig them up and slowly acclimate them to being in a pot and being indoors.

Herbs can be dried or frozen or infused in vinegar or simple syrup for year round use. Pesto or herb pastes made with oil or water can be frozen in small containers.  Drying is very simple or very elaborate – you choose! A dehydrator can be used, and the leaves can be stripped off of the stems once dried and stored in jars in a dark place. Or you can go the simple route and just harvest whole branches of the woody herbs such as thyme, oregano, rosemary, sage, and winter savory. Place the branches in woven baskets and keep in a dark, well-ventilated space. They will dry just fine on their own, and you can keep them covered with paper bags or kitchen linens and use as needed.

Related Upcoming Events

Cooking with Herbs with Molly Stevens and Julie Rubaud – a class and dinner.

South End Kitchen, Burlington, Vermont

March 19th.,  6pm

Red Wagon Plants pre-season Open House

April 4th 10 am to 3 pm. Tour the greenhouses and see behind the scenes.

Herbal Cocktail Party with Caledonia Spirits

April 17th, Red Wagon Plants 6 pm to 9 pm

Help us kick off our season with a bang!

Potatoes


All of our potato seed stock is grown by the Chapelle Family Farm, and this is our fourth year providing you with this high quality, Vermont grown, potato seed. Barbara and Robert Chappelle have been growing potatoes in Vermont for over 30 years and they are one of the quiet heroes of the vegetable farming world in Vermont. You don't hear a lot about them in the media, but they are incredibly respected for all of their hard work, and the quality of their potatoes. It is from Barbara and Robert that all the best vegetable growers in this area purchase their potato seed. And at Red Wagon, you can too! This is one of the few places home gardeners can purchase Chappelle potato seed. Here are the varieties we have chosen for you this year. 

Adirondack Blue

Adirondack Red

La Ratte Fingerling

Amarosa Fingerling

Red Norland

Chieftain

Yukon Gold

Yukon Nugget

Carola

Kennebec

Green Mountain

Russet Burbank

German Butterball


Garden Things to do in December

  • Mulch your garlic. Need a good source of organic straw? Call up Aurora Farms in Charlotte, VT. They grow grains for the Nitty Gritty Grains Company, and their bales of straw are just beautiful - no weed seeds, nice long strands with hollow stems to insulate from the cold, and best of all it is organic. You don't want to risk introducing persistent herbicide residues into the garden.
  • Plant bulbs before the ground totally freezes (quick!)
  • Plant some paperwhite bulbs for forcing. You can find out how right here. 
  • Give your houseplants a trim, a feed, a little love. Check them for pests, wipe them off with a little neem oil if you see anything crawling around. This is a great time of year to give houseplants a little shower. The heat source in your house is likely quite dry, and most of your green friends like the feeling of rain. Recreate it for them. You can sing to them, too, while you are at it.
  • Make a few holiday gifts from the garden - herb salts, lavender sachets, cranberry apple chutney, herbal vinegars, calendula skin oil, or rosemary short bread. If you don't have any of the necessary garden ingredients, you can always purchase them and see it as inspiration for growing your own next year. Pinterest and the internet are brimming over with ideas and directions for making all kinds of beautiful  holiday treats from the garden. The links above will get you started.
  • Make a garland, wreath or swag with stems, twigs, branches, seed pods, dried flowers, and other goodies from fields, woods and gardens. I love growing a hedge of Ilex verticulata and a small row of red osier dogwood for their berries and twigs make striking additions to winter greenery like balsam or pine or cedar.
  • Poke at the compost pile. Try to introduce some air into its nether parts so that it really heats up before the cold sets in. Add some fallen leaves, and a little manure from a horse farm or friends with chickens. You get the idea.
  • Look at seed catalogs! They are coming out now and the best therapy for  December Darkness is those spring dreams of budding life and sowing seeds.

Garlic time, again. The beautiful cycle.

Planting garlic in Vermont is a great way to extend the gardening season and gives you a crop that is perfect in so many dishes, stores well all winter long and even generates its own seed. It is a perfect way to tune into the cycles of the gardening season and feel like you are growing an important part of your diet. Garlic is expensive to purchase so there are savings to be had with your own garlic crop. Please follow this guide for easy, step-by-step instructions that will give you a garlic patch for life. I have been growing out my own garlic for 18 years and usually do not need to ever buy seed stock or garlic in the grocery store. The pleasures of garlic growing are abundant and I encourage you to get familiar with this wonderful and simple crop.

When to start the cycle?

Planting dates in Vermont are anytime between mid October and late October. It is best to wait until then, because if you plant too early, the bulbs will break out of dormancy too soon and this weakens the plant going into our harsh winters. If you plant the cloves during those last two weeks of October, it gives them just the right amount of time to take root and hunker down until spring, but not send out any top growth.

To plant garlic, you need to follow a few easy steps.

1. Bed preparation.

This is the act of making your garden soil ready for garlic planting. You want a nice patch of garden, that is worked deeply so that the soil is loose about a foot down in depth. If your garden is very compacted and hard, the garlic will not be able to grow well and you will be sure to end up with small heads of garlic that are tedious to peel and not all that satisfying. You can prepare the bed with a 3 prong fork by digging in straight down, tilting the handle of the fork back and forth, and loosening the hard pan. This is a good work out! Don’t hesitate to get dirty here by kneeling in the earth and breaking up the clods of soil with your hands so they are not chunky at all. Add a bit of well rotted manure or compost at this time. Not too much. For a 5 by 10 bed, maybe a 5 gallon bucket’s worth. You don’t want to over feed the garlic roots in the fall, but a little compost will add organic matter and that will help the structure of the soil, keeping it loose, able to retain some moisture without staying too wet.

Take your time and your garden will reward you. I always look at garlic planting as a soulful moment in the gardening cycle. It is saying goodbye to summer and embracing the dormancy of winter, when seeds deep below the surface slowly get ready for their spring emergence. Living in a climate with such long winters, I need these small, but important, rituals to remind me that spring will come and the cold barren winter is a necessary part of it all. The seed garlic is planted in the fall because it needs to send roots far into the earth in order to feed itself the following year. I take this as a metaphor for my own winter activities that feed me all year long – catching up on sleep, feeding my mind with more reading time, eating great, nourishing foods, and spending more time with friends and family.  I digress here, but these are the thoughts I have as I plant garlic, and after many years of doing it, I find that it is a necessary part of my mental preparation for winter.

2. Mark the rows with a hoe, or hand tool. I usually keep the rows about 12 inches apart and since my beds are about 4 feet wide, I keep 3 rows per bed and can easily reach the center. Just drag your tool through the soil to delineate the rows. You can use string and stakes if it is important to be straight, but I don’t bother with that at all.

3. Break up the garlic heads into individual cloves. Do not peel! And notice that one end is the root end and one end is the stem end. This will be important for planting right side up with the root end pointing straight down and the stem end pointing straight up.

4. Space out the cloves. Lay the cloves on the top of the soil, following the line you have just drawn in the soil.  Allow about 6 inches between all the cloves.

5. Planting, spacing, and yields

Now you can start to plant. I always kneel down and take my time to feel the earth under me at this point. It just feels good and is a way to say goodbye to the garden before winter! Then, take a bulb planting tool, or a sturdy,  sharp pointed stick, or your hand if your soil is soft and pliable, and poke a hole about 4 to 6 inches down. Shove the clove of garlic deep down, root end down, and cover up with the soil. Continue down the row and repeat until all is planted. Three  heads of garlic will turn into about 24 heads next spring – assuming your garlic has about 8 cloves per head. . And with 6” by 12” spacing, a 5’ x 10’ patch of garlic will yield about 60 heads of garlic. That is enough to enjoy one head of garlic per week, all year long, and still have some left over for planting. To plant a patch this big, you will need to plant the equivalent of 7 to 10 heads of garlic.

6. Compost and mulch. I usually add another 4” of compost or well rotted horse manure to the bed. I then leave it like that for about 6 weeks. Then in mid to late December, I cover the bed with a thick layer of straw. You can also use leaves here, but straw is the best insulator with hollow stems that trap air and keep everybody warm down below. Another advantage of straw is that it usually does not have weed seeds in it; mulch hay, straw’s poor cousin,  should be avoided since it is laden with all sorts of perennial grass and weed seeds. The straw moderates the winter soil temperature and prevents buckling and heaving which could push those garlic cloves up and out of the ground.

Let winter pass you by now, and next……

7. Spring time chores with garlic. Once the snow melts and the soil warms up a bit, your garlic will break dormancy and magically pop up out of the earth. It is important to pull back the straw to let the garlic see sunlight. If you wait a bit too long, and pull back the straw only to see a bunch of yellowing stems, don’t worry! The garlic shoots will green up in no time and will look fabulously sturdy after a week or so of direct sunlight. I usually pull the straw into the garden path, let it pile up there and then replace it around the growing garlic to block out weeds once the garlic plants are about 8 inches high. I often will add a little granular fertilizer at this time, before putting the mulch back in place. For a 5 by 10 garlic patch about 3 cups of Pro-Gro from North Country organics or one bag of Compost Plus from Vermont Compost Company is just about right. This will insure you get large, easy to peel cloves that taste great.

8. Garlic scapes will appear on stiff neck garlic around late May. These look like green curly cues with a pointy end that gracefully swoops down and around, waving in the breeze. This is the budding and flowering portion of the garlic plant. It should be removed to help the plant spend its energy on sizing up the goods below ground. If it is allowed to flower, the plants’ strength will go towards the flower and the garlic forming below ground will be the weaker for it. The good news here is that the “scapes” as they are called, are good to eat. I usually cut off the pointy tip – it is rubbery and inedible, and then slice up the round stem and use it in stir fries, stews, pasta dishes, or pickles. When cooked, it has the texture of a nice green bean and the flavor of mild garlic. It is absolutely delicious and a once a year treat that marks the beginning of summer – a harbinger of good things to come.

9. When to harvest? Garlic is ready to harvest when about 70% of its leaves have turned yellow. This is somewhat subjective, and should be taken as not a hard and fast rule, but rather a guide. You can dig up one head of garlic and look for signs of well formed skin, plump cloves, and individuation (cloves that are individually formed, and not one big mass). This is usually some time in late July. In very wet and rainy years, sometimes it makes more sense to take the garlic our of the ground a little early so that the skin does not rot in the damp earth.

10. How to harvest? Take out your three prong fork again and use it to loosen the soil around the outside edges of each garlic row. This will break up the soil enough to allow you to pull out each plant with a firm yank. (If the stems break off, it is likely you waited too long and the skin and stems are starting to rot. At that point, just dig up the cloves with a spade and they will be okay in taste; they just won’t store well. ) Lay the plants on the surface of the soil so that they start to dry off. Once all the garlic is pulled up, wipe it with a towel or rag, and get ready to tie it into bundles. I usually take about 8 plants, hold them together in one hand, and with the other hand, wrap twine around the whole bundle. Tie off the twine and then hang the bundle in a dark airy space. The rafters of a garage, shed or barn work well. If you don’t have that type of space, just find a place out of the rain, out of direct sunlight and with good air circulation – a covered porch? a dry basement with a fan running? a spare bedroom that can get a little dirty? (no shag rugs please!).

11. Curing the garlic Curing is the process of letting the garlic dry which makes the papery skin that allows the garlic to keep all winter. The stems will turn brown and brittle and the exterior of the bulbs will become dry and paper-like, just like garlic in the store. At this point, it is okay to cut off those dry stems, wipe off any remaining dirt, cut off the roots, and place your garlic in a crate to store it. This can be done anytime from 3 to 6 weeks after you initially hang up the garlic to dry.

12. Storing the garlic Once the garlic is cured, cleaned and trimmed, you are ready to store it for eating all winter long. Garlic is best stored in the dark. In an airy, dry, cool place. I use milk crates, covered with a piece of burlap, and keep the crate in a very cool part of the basement. Ideal garlic storing temperatures are between 35 and 45 degrees, but a refrigerator is too humid, so please don’t be tempted to use that as a storage method. Other good places to store garlic (and onions for that matter) are unheated attics, attached garages that don’t freeze, but are not heated, or 3 season porches that do not freeze. Root cellars are great, but most of us don’t have one. If well stored, garlic will last until April or May – almost right in time for the garlic scape harvest!

13. Finding seed stock.

Until you build up your own supplies, you will have to purchase seed garlic. There are many great resources for garlic and for finding garlic seed, I recommend Johnny’s Selected Seeds, or locally, Last Resort Farm in Monkton, Hudak Farm in Saint Albans, or any farmer at your local farmers market who has nice looking seed stock. Seed stock is basically sorted out of the garlic harvest and selected for the following the following traits:

      • good size
      • evenly formed cloves
      • strong stem
      • well formed skin
      • great flavor
      • ability to store for a long time

If you have been growing out your garlic in your garden, you can pick out the best cloves at cleaning and storing time. Set these aside in a safe place where they will not be eaten and come October, experience the joy of planting your own seed garlic.

14. Plant garlic. Repeat Step 1. above and the cycle starts all over again!

Shorter days, winding down, and it is alright.

Our greenhouses start up in February, when we begin the bustle that does not end until the final sales of early September. During that 6 moth period, we are in constant motion, putting in 14 hour days at the beginning of our season for a solid three months and gradually tapering down to a normal 8 to 10 hour day for the remainder of the year. Work moves into the office where I am planning out next year's varieties; we are also busy with greenhouse clean up and putting everything to bed for the winter.  When the maples signal that autumn is here, I am ready for a little slowing down. A little time to enjoy the fruits of the garden, to eat those fall greens that quietly draw attention amidst shades of yellow, red, and orange. I finally have time to cook, to preserve some of the bounty with the help of the canning pot, dehydrator, root cellar and freezer.

I tend to be a creature of habit and make more or less the same things each year, because I know my family loves them and because I  am not willing to give up precious time and space with experiments that might not work, that might join the sad jars and mystery freezer bags that lay untouched. I do try one or two new things each year, but only after they have been enthusiastically recommended by trusted sources.

Here are some of the tried and true that show up every year in our winter pantry:

Sauerkraut. I use this recipe from Sandor Katz, fermentation guru, author, and person of note who just recently spent some time teaching his craft in Vermont.

Plain and easy,  roasted and frozen tomatoes. I wrote about this one last year, and you can read that here. This is the easiest way to make tomatoes that will taste great in a sauce mid-winter. I have more time to cook in the winter, so I don't bother making sauce to freeze or can during the height of summer. But if i have these in the freezer, I can turn them into sauce, soups, add them to braises, etc.

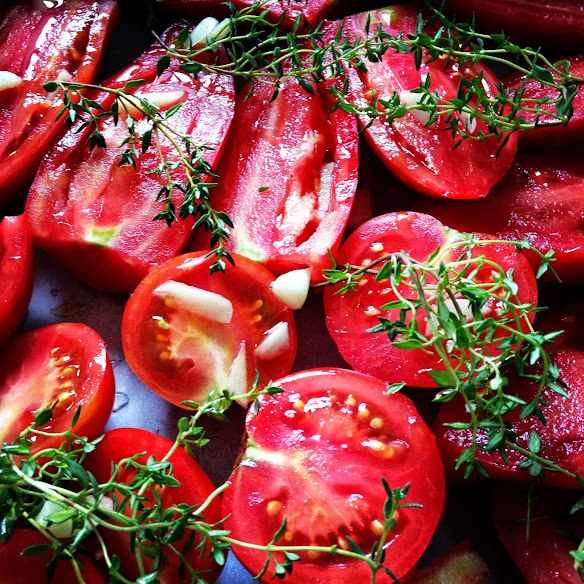
Fancier, slower, seasoned roasted tomatoes. These are a different beast. The tomatoes are slowly roasted, like 8 hours of slow, in a 240F oven with olive oil, garlic, herbs. I sometimes do different batches and label them as such so that they can be used in various dishes during the winter. For example, I make some that are sprinkled with just oregano, or just cumin. But most of them are made with olive oil, thyme, and garlic. And a little sea salt.

Here are some of the tried and true that show up every year in our winter pantry:

Pollinator Habitat Restoration for the Home Gardener, Part 2: Butterflies and Hummingbirds

By Hope Johnson (Part 2 of a series. See Part 1 to learn about promoting bee habitat)

Of 339 species of hummingbirds, only two inhabit the area East of the Mississippi-the very rare Rufous and common Ruby-throated hummingbirds. There are many butterfly species in our state  (see Vermont Center for Ecostudies’ Vermont Butterfly Survey and The Butterfly Site’s List of Butterflies of Vermont).

Both Hummingbirds and butterflies are attracted to nectar-rich flowers.  Butterflies prefer purple and yellow flowers and hummingbirds are attracted more to red and blue. Site your nectar plants in an open area of the yard, and be sure to include host plants which provide forage for caterpillars. Remember, some butterflies don’t live on nectar from flowers but instead feed on soft and over-ripe fruit. (See The Nature Conservancy’s Gardening with Vermont Native Plants.)

Wondering what to plant? Here's a list of Top Ten flowers for Hummingbirds and Butterflies:

1.  Yellow cosmos

2. Phlox: Meadow phlox, P. maculata and Garden phlox P. paniculata.

3. Cardinal flower, Lobelia cardinalis

4. Goldenrods, Solidago spp.,  attract monarchs.

5. Butterfly weed, Asclepius tuberosa.

6. Purple coneflower, Echinacea purpurea.

7. Columbines, Aquilegia spp.

8. Scarlet sage, Salvia splendens.

9. Red buckeye, Aesculus pavia, small tree.

10. Spiderflower, Cleome.

What else do butterflies and hummingbirds need? Water! Hummingbirds naturally use the smooth leaves of deciduous trees such as dogwoods, eastern redbud and sugar maple as birdbaths, but also appreciate misting sprinklers. For drinking, butterflies require a thin film of water such as around puddle edges or in slight depressions on rock surfaces.

What else can we do to provide habitat? Butterflies roost in trees and some hibernate in the winter. Leave sites for overwintering such as sheltered spots where caterpillars or pupae can survive the cold weather. Leaf and plant debris shelter chrysalises and pupae and provide a hibernation box in areas devoid of natural debris. Native shade trees provide protection from hot sun, heavy winds and driving rain. Consider a hedgerow for protection from prevailing winds. Perennials with wide leaves such as hosta provide cover for butterflies. In the East, nest sites for hummingbirds include common native trees such as oaks, hickories junipers, hemlocks and pines. Open branching shrubs such as spicebush (Lindera benzoin), hawthorns (Crataegus spp) and willow (Salix spp) are preferred for perching sites. You can provide a source of nesting materials by putting out a suet feeder filled with natural fibers such as cotton fluff and small feathers.

Lastly, avoid use entirely of insecticides in gardens intended for butterflies. These include malathion, Sevin and diazinon. Bacillus thuringiensis is lethal to caterpillars. Most butterfly caterpillars do not cause the leaf damage like that made by tent caterpillars and gypsy moths. Let those butterfly caterpillars do their thing and watch as these pollinators enjoy your garden!
References

Attracting Native Pollinators: Protecting North America’s Bees and Butterflies, The Xerces Society Guide, Storey Publishing, 2011.

Attracting Butterflies and Hummingbirds to Your Backyard, Roth, Sally.   Rodale, Inc., 2001.

Website: How to Attract Butterflies to Your Garden, National Wildlife Federation, nwf.org.


Heat of Summer Garden Watering Tips

2014 has been a fabulous garden season, don't you think? Once we got over that initial cold period - a.k.a. November through April - it seems like we have had abundant sunshine and weekly rains. Moving towards August, we are seeing some drier weather in the Champlain Valley and needing to take a few precautions to make sure that plants stay healthy.  Whenever customers ask me a question about watering, I always have to stop myself from giving them a 45 minute lecture! Watering is something I do for hours a day, every day. I think about watering probably more than any other single task in our greenhouse business. It is a meditative and lovely way to spend part of each morning, and it is the best way I know to commune with plants, to get to know them, to check on them and see what else they might need in order to thrive. I will spare you the 45 minute lecture, and instead give you a few tips that will make your plants healthy and will save you time every time you water.

1. Mulch - whenever you can, lay down some old hay, straw, burlap bags, wet cardboard, newspapers or bark mulch around your plants. This will not only help keep weeds down, but it will also help keep moisture near the root zone.

2. When you water, aim the stream of water under the plant's foliage. Getting leaves wet is not the goal of watering...getting the roots drenched is what you are going for. I know this seems obvious, but so many people just water the top part of the plants and don't actually get the soil wet. It takes a lot of water right at the base of the plants to actually soak the soil. If you waste all the water on the leafy part of the plant, it sheds off, with the leaves acting like an umbrella and keeping the root zone dry. Not exactly efficient. Get the hose nozzle or tip of the watering can under all that foliage and you will be giving the plants what they want and where they want it.

3. Use a good nozzle on the end of your hose. We recommend this style:

They are made by Dramm and can be found locally at garden centers and on-line here. These nozzles are great for pots, window boxes, raised beds and small gardens. They are gentle enough so that soil doesn't wash away, but allow enough volume of water to flow out so that you don't have to wait too long for the ground to be saturated.  If you have a larger garden, consider investing in soaker hoses or even an over head sprinkler to save time. Overhead sprinklers do get the leaves wet, but they are cheap, can be moved easily, and can water a large area in a relatively small amount of time. If you have long rows and a garden that is organized in straight lines, you can invest in drip irrigation, like what professional growers use. You will need a pressure regulator and a filter with it, but most supplier are happy to help you put together a simple system. We recommend Drip Works - they do a great job at explaining drip irrigation systems and are committed to helping gardeners save water and time.

4. Ideally, keep the foliage dry and water in the mornings. This will allow the foliage to dry out before evening falls. Wet foliage on warm nights is an invitation to fungal diseases. Powdery mildew and other assorted pathogens love those conditions. It is an old wives tale that watering mid-day will burn the plants. In 20 years of farming and owning a greenhouse business, I have never seen a plant burned by water. I am not sure what that would even look like! I have seen all kinds of diseases sprout up literally over night from damp leaves in warm, dark, humid conditions.

5. If you water with a watering can, take that rosette off! The stream of water, uninterrupted by all those little holes, will make watering the base of the plant much easier. The only time you need that rosette is when you are germinating seeds and don't want a stream of water to wash away all those seeds.

6. If you have plants in containers, water them every single day in hot, dry weather. If they dry out too much, it is very hard to re-hydrate them. Also, keep them deadheaded and fertilized and they will cope much more easily with the heat. If you are going away for a few days, place each container in a pan or dish and add an inch or two of water so that they do not dry out (but only for a couple of days - they will drown if watered like that every day).  And please don't be stingy with the water - the averaage 10" to 12" hanging basket needs about 1/2 to 1 gallon of water per day during these hot dry days. That is a lot of water!

Overall, I love this time in the gardening season. The hot weather crops like tomatoes, peppers, cucumbers and corn are ready but we still have some nice spring crops like peas, scallions, and lettuces.  Watering can be relaxing, and it can provide you with some nice bonding time with your plants. Let us know if you have any questions.