autumn gardening

Giving Thanks with Braised Thyme and Turnips

A few years ago, I worked for the Intervale Center as a farming consultant for the New Farms for New Americans program run by the Association of Africans Living in Vermont. My job was to help new Americans, primarily refugees from Bhutan, Somalia, and Burundi, in finding markets for their beautiful produce and to help them understand and navigate the vagaries of our cold climate, on-line seed purchases, calendar planning, etc. Most of the time, probably all of the time, I was the one doing the learning. It is an experience I look back on fondly and feel thankful that I was able to get to know these smart gardeners and farmers. Every time I walk into Stone Soup in Burlington and see braised Hakueri turnips at the hot bar, I think of Michel and François who established a long term relationship with the restaurant by growing these perfect and tender roots. They still grow and sell them for Avery and Tim at Stone Soup, and it all started with a face to face meeting, in 3 languages, a seed catalog, and a warm feeling or two.

A fitting Thanksgiving side dish, don't you think?

Braised Hakurei Turnips with Thyme

Serves 6 as a side dish

1.5 pounds Hakurei turnips, the small white ones. About 2 bunches

6 healthy sprigs of thyme (about 1/2 a clamshell package or 1/3 of a bunch)

1/2 cup water

1/4 tsp salt

2 tablespoons butter

1 tablespoon honey

Salt and pepper to taste

Cut off the greens, but save them for another use. They are delicious!

Wash and scrub the turnips and cut into halves or quarters, depending on size. If very small (1 to 1.5 inch in diameter, leave whole). Each piece should be about 2 bites worth.

Add turnips to a medium saucepan with water and salt and thyme.

Bring to a boil, and immediately lower the heat to medium-low. A strong simmer, low boil. Leave the pot covered for 6 to 10 minutes. When the turnips are tender but not mushy, uncover the pot, add the butter and honey, and gently shake the pan to mix. Cook another 5 or so minutes until the water is mostly evaporated and the turnips are cooked through but not falling apart. Remove the thyme sprigs.

Taste for salt and pepper and season accordingly.

Want to grow your own? 

If you haven't grown your own white turnips, consider it for next year. They are easy to grow, last long into the fall, and are sweet and delicious. While rutabaga and traditional purple-topped turnips have their own charms, these white "salad" turnips are delicate, sweet, and can be eaten raw or cooked.

For a fall crop, sow seeds of Hakurei turnips directly into a shallow furrow in the garden in mid-August. They prefer loose, deep soil that drains well. A little compost is always a good idea, but not too much as it can stain them or create crooked  growth. When the plants are a couple of inches tall, thin to 1 plant every 2 to 3 inches. Keep well watered. That's it.  They are a perfect crop to follow an earlier planting of peas or beans or lettuces or greens.

Sage Brown Butter and Ricotta Gnocchi

Here is a quick dinner that sounds difficult to make. But it is really easy. Sage is still looking great in our garden with the long, warm fall we have had and it pairs beautifully with butter in about 5 minutes of gentle cooking. The ricotta gnocchi is a little more involved but not much, and if you have ever tried to make potato gnocchi and felt discouraged, redemption is at hand. These are super simple to make.  We first ate these when our friends Marjorie and Marian of Orb Weaver Farm made them for us, and we have been hooked ever since.

Ricotta Gnocchi with Sage Brown Butter

Ingredients:

  • 2 cups whole-milk ricotta (1 pound) Have you had the yummy one from Mountain Home Farm?
  • 2 large eggs, lightly beaten
  • 1 1/2 cups grated Parmigiano-Reggiano (3 ounces), divided
  • 1/4 teaspoon grated nutmeg
  • 1 1/4 cups all-purpose flour
  • 1/2 stick unsalted butter
  • 10 to 15 whole sage leaves, depending on size. About 1/4 cup.
  1. Stir together ricotta, eggs, 1 cup cheese, nutmeg, and 1/4 teaspoon each of salt and pepper. Add flour, stirring to form a soft, wet dough.
  2. Shape dough on a well-floured surface with lightly floured hands into 2 ropes that are about 1 inch thick. Cut crosswise into 1-inch pieces with a lightly floured knife. Place in 1 layer on a lightly floured parchment-lined baking sheet while you work.
  3. Cook gnocchi in 2 batches in a pasta pot of boiling salted water (3 tablespoons salt for 6 quarts water), adding a few at a time to pot and stirring occasionally, until cooked through (cut one in half to check), 3 to 4 minutes per batch. Lift out with a slotted spoon and drain in colander.
  4. Meanwhile, cook butter with sage in a 12-inch heavy skillet over medium-low heat until golden brown, about 5 minutes.
  5. Gently toss gnocchi with brown butter in skillet and sprinkle with remaining 1/2 cup cheese. Season with salt.

For a great photo explanation of this, click on any of these pictures for a link to the "Inspired Taste" website. They do a great job of explaining the simple process. 

Garlic Ritual

Planting garlic in Vermont is a great way to extend the gardening season and gives you a crop that is perfect in so many dishes, stores well all winter long and even generates its own seed. It is a perfect way to tune into the cycles of the gardening season and feel like you are growing an important part of your diet. Garlic is expensive to purchase so there are savings to be had with your own garlic crop. Please follow this guide for easy, step-by-step instructions that will give you a garlic patch for life. I have been growing out my own garlic for 18 years and usually do not need to ever buy seed stock or garlic in the grocery store. The pleasures of garlic growing are abundant and I encourage you to get familiar with this wonderful and simple crop.

When to start the cycle?

Planting dates in Vermont are anytime between mid October and late October. It is best to wait until then, because if you plant too early, the bulbs will break out of dormancy too soon and this weakens the plant going into our harsh winters. If you plant the cloves during those last two weeks of October, it gives them just the right amount of time to take root and hunker down until spring, but not send out any top growth.

To plant garlic, you need to follow a few easy steps.

1. Bed preparation.

This is the act of making your garden soil ready for garlic planting. You want a nice patch of garden, that is worked deeply so that the soil is loose about a foot down in depth. If your garden is very compacted and hard, the garlic will not be able to grow well and you will be sure to end up with small heads of garlic that are tedious to peel and not all that satisfying. You can prepare the bed with a 3 prong fork by digging in straight down, tilting the handle of the fork back and forth, and loosening the hard pan. This is a good work out! Don’t hesitate to get dirty here by kneeling in the earth and breaking up the clods of soil with your hands so they are not chunky at all. Add a bit of well rotted manure or compost at this time. Not too much. For a 5 by 10 bed, maybe a 5 gallon bucket’s worth. You don’t want to over feed the garlic roots in the fall, but a little compost will add organic matter and that will help the structure of the soil, keeping it loose, able to retain some moisture without staying too wet.

Take your time and your garden will reward you. I always look at garlic planting as a soulful moment in the gardening cycle. It is saying goodbye to summer and embracing the dormancy of winter, when seeds deep below the surface slowly get ready for their spring emergence. Living in a climate with such long winters, I need these small, but important, rituals to remind me that spring will come and the cold barren winter is a necessary part of it all. The seed garlic is planted in the fall because it needs to send roots far into the earth in order to feed itself the following year. I take this as a metaphor for my own winter activities that feed me all year long - catching up on sleep, feeding my mind with more reading time, eating great, nourishing foods, and spending more time with friends and family.  I digress here, but these are the thoughts I have as I plant garlic, and after many years of doing it, I find that it is a necessary part of my mental preparation for winter.

2. Mark the rows with a hoe, or hand tool. I usually keep the rows about 12 inches apart and since my beds are about 4 feet wide, I keep 3 rows per bed and can easily reach the center. Just drag your tool - the sharp tip of a hoe or the narrow edge of a hard rake works well - through the soil to delineate the rows. You can use string and stakes if it is important to be straight, but I don’t bother with that at all.

3. Break up the garlic heads into individual cloves. Do not peel! And notice that one end is the root end and one end is the stem end. This will be important for planting right side up with the root end pointing straight down and the stem end pointing straight up.

4. Space out the cloves. Lay the cloves on the top of the soil, following the line you have just drawn in the soil.  Allow about 6 inches between all the cloves.

5. Planting, spacing, and yields

Now you can start to plant. I always kneel down and take my time to feel the earth under me at this point. It just feels good and is a way to say goodbye to the garden before winter! Then, take a bulb planting tool, or a sturdy,  sharp pointed stick, or your hand if your soil is soft and pliable, and poke a hole about 4 to 6 inches down. Shove the clove of garlic deep down, root end down, and cover up with the soil. Continue down the row and repeat until all is planted. Three  heads of garlic will turn into about 24 heads next spring - assuming your garlic has about 8 cloves per head. . And with 6” by 12” spacing, a 5’ x 10’ patch of garlic will yield about 60 heads of garlic. That is enough to enjoy one head of garlic per week, all year long, and still have some left over for planting. To plant a patch this big, you will need to plant the equivalent of 7 to 10 heads of garlic.

6. Compost and mulch. I usually add another 4” of compost or well rotted horse manure to the bed. I then leave it like that for about 6 weeks. Then in mid to late December, I cover the bed with a thick layer of straw. You can also use leaves here, but straw is the best insulator with hollow stems that trap air and keep everybody warm down below. Another advantage of straw is that it usually does not have weed seeds in it; mulch hay, straw’s poor cousin,  should be avoided since it is laden with all sorts of perennial grass and weed seeds. The straw moderates the winter soil temperature and prevents buckling and heaving which could push those garlic cloves up and out of the ground.

Let winter pass you by now, and next......

7. Spring time chores with garlic. Once the snow melts and the soil warms up a bit, your garlic will break dormancy and magically pop up out of the earth. It is important to pull back the straw to let the garlic see sunlight. If you wait a bit too long, and pull back the straw only to see a bunch of yellowing stems, don’t worry! The garlic shoots will green up in no time and will look fabulously sturdy after a week or so of direct sunlight. I usually pull the straw into the garden path, let it pile up there and then replace it around the growing garlic to block out weeds once the garlic plants are about 8 inches high. I often will add a little granular fertilizer at this time, before putting the mulch back in place. For a 5 by 10 garlic patch about 3 cups of Pro-Gro from North Country organics or one bag of Compost Plus from Vermont Compost Company is just about right. This will insure you get large, easy to peel cloves that taste great.

8. Garlic scapes will appear on stiff neck garlic around late May. These look like green curly cues with a pointy end that gracefully swoops down and around, waving in the breeze. This is the budding and flowering portion of the garlic plant. It should be removed to help the plant spend its energy on sizing up the goods below ground. If it is allowed to flower, the plants’ strength will go towards the flower and the garlic forming below ground will be the weaker for it. The good news here is that the “scapes” as they are called, are good to eat. I usually cut off the pointy tip - it is rubbery and inedible, and then slice up the round stem and use it in stir fries, stews, pasta dishes, or pickles. When cooked, it has the texture of a nice green bean and the flavor of mild garlic. It is absolutely delicious and a once a year treat that marks the beginning of summer - a harbinger of good things to come.

9. When to harvest? Garlic is ready to harvest when about 70% of its leaves have turned yellow. This is somewhat subjective, and should be taken as not a hard and fast rule, but rather a guide. You can dig up one head of garlic and look for signs of well formed skin, plump cloves, and individuation (cloves that are individually formed, and not one big mass). This is usually some time in late July. In very wet and rainy years, sometimes it makes more sense to take the garlic our of the ground a little early so that the skin does not rot in the damp earth.

10. How to harvest? Take out your three prong fork again and use it to loosen the soil around the outside edges of each garlic row. This will break up the soil enough to allow you to pull out each plant with a firm yank. (If the stems break off, it is likely you waited too long and the skin and stems are starting to rot. At that point, just dig up the cloves with a spade and they will be okay in taste; they just won’t store well. ) Lay the plants on the surface of the soil so that they start to dry off. Once all the garlic is pulled up, wipe it with a towel or rag, and get ready to tie it into bundles. I usually take about 8 plants, hold them together in one hand, and with the other hand, wrap twine around the whole bundle. Tie off the twine and then hang the bundle in a dark airy space. The rafters of a garage, shed or barn work well. If you don’t have that type of space, just find a place out of the rain, out of direct sunlight and with good air circulation - a covered porch? a dry basement with a fan running? a spare bedroom that can get a little dirty? (no shag rugs please!).

11. Curing the garlic Curing is the process of letting the garlic dry which makes the papery skin that allows the garlic to keep all winter. The stems will turn brown and brittle and the exterior of the bulbs will become dry and paper-like, just like garlic in the store. At this point, it is okay to cut off those dry stems, wipe off any remaining dirt, cut off the roots, and place your garlic in a crate to store it. This can be done anytime from 3 to 6 weeks after you initially hang up the garlic to dry.

12. Storing the garlic Once the garlic is cured, cleaned and trimmed, you are ready to store it for eating all winter long. Garlic is best stored in the dark. In an airy, dry, cool place. I use milk crates, covered with a piece of burlap, and keep the crate in a very cool part of the basement. Ideal garlic storing temperatures are between 35 and 45 degrees, but a refrigerator is too humid, so please don’t be tempted to use that as a storage method. Other good places to store garlic (and onions for that matter) are unheated attics, attached garages that don’t freeze, but are not heated, or 3 season porches that do not freeze. Root cellars are great, but most of us don’t have one. If well stored, garlic will last until April or May - almost right in time for the garlic scape harvest!

13. Finding seed stock.

Until you build up your own supplies, you will have to purchase seed garlic. There are many great resources for garlic and for finding garlic seed, I recommend Johnny’s Selected Seeds, or locally, Last Resort Farm in Monkton, Hudak Farm in Saint Albans, or any farmer at your local farmers market who has nice looking seed stock. Seed stock is basically sorted out of the garlic harvest and selected for the following the following traits:

      • good size
      • evenly formed cloves
      • strong stem
      • well formed skin
      • great flavor
      • ability to store for a long time

If you have been growing out your garlic in your garden, you can pick out the best cloves at cleaning and storing time. Set these aside in a safe place where they will not be eaten and come October, experience the joy of planting your own seed garlic.

14. Plant garlic. Repeat Step 1. above and the cycle starts all over again!

Shorter days, winding down, and it is alright.

Our greenhouses start up in February, when we begin the bustle that does not end until the final sales of early September. During that 6 moth period, we are in constant motion, putting in 14 hour days at the beginning of our season for a solid three months and gradually tapering down to a normal 8 to 10 hour day for the remainder of the year. Work moves into the office where I am planning out next year's varieties; we are also busy with greenhouse clean up and putting everything to bed for the winter.  When the maples signal that autumn is here, I am ready for a little slowing down. A little time to enjoy the fruits of the garden, to eat those fall greens that quietly draw attention amidst shades of yellow, red, and orange. I finally have time to cook, to preserve some of the bounty with the help of the canning pot, dehydrator, root cellar and freezer.

I tend to be a creature of habit and make more or less the same things each year, because I know my family loves them and because I  am not willing to give up precious time and space with experiments that might not work, that might join the sad jars and mystery freezer bags that lay untouched. I do try one or two new things each year, but only after they have been enthusiastically recommended by trusted sources.

Here are some of the tried and true that show up every year in our winter pantry:

Sauerkraut. I use this recipe from Sandor Katz, fermentation guru, author, and person of note who just recently spent some time teaching his craft in Vermont.

Plain and easy,  roasted and frozen tomatoes. I wrote about this one last year, and you can read that here. This is the easiest way to make tomatoes that will taste great in a sauce mid-winter. I have more time to cook in the winter, so I don't bother making sauce to freeze or can during the height of summer. But if i have these in the freezer, I can turn them into sauce, soups, add them to braises, etc.

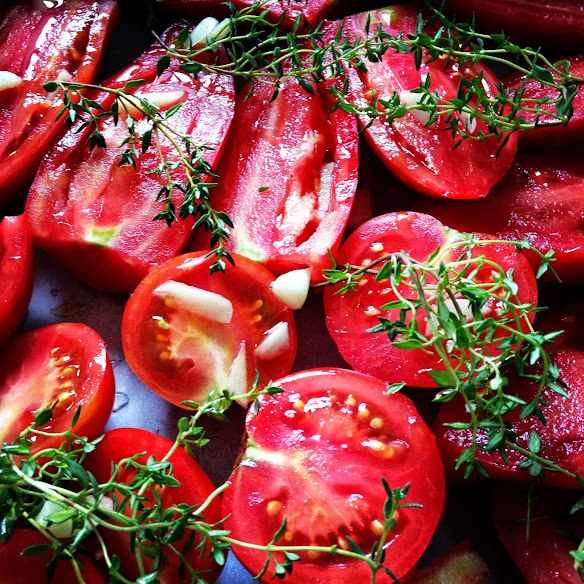
Fancier, slower, seasoned roasted tomatoes. These are a different beast. The tomatoes are slowly roasted, like 8 hours of slow, in a 240F oven with olive oil, garlic, herbs. I sometimes do different batches and label them as such so that they can be used in various dishes during the winter. For example, I make some that are sprinkled with just oregano, or just cumin. But most of them are made with olive oil, thyme, and garlic. And a little sea salt.

Here are some of the tried and true that show up every year in our winter pantry:

Rosemary

Rosemary is a great herb for winter use. It can be grown as a houseplant, it can be used fresh, dried, or frozen, and it adds a warming, deep flavor to roasted vegetables, all kinds of braised meats, roasted chicken, pork, lamb or beef, and can be used in soups and dips. Here are a few ideas that will help you make friends with this uplifting and aromatic herb all winter.
As a houseplant, rosemary is best brought indoors as late as possible. It can take some really cold temperatures, down into the teens, and still look rugged and healthy. When you do bring it indoors, give it a large pot, and keep it away from direct heat sources (woodstove, radiators) and place it in a window with indirect light (east or north facing). In winter time, in your house,  rosemary would like to have cooler temperatures and moist air. You can give it moisture by spraying the foliage with a spray bottle of water every couple of days. And only water the soil when it is very dry.  You are trying to recreate a foggy, cool San Fransisco winter.
When you harvest fresh rosemary or buy it in the store, the sprigs can be kept in the fridge, in a plastic bag that is not sealed tightly for up to 3 weeks. It can also be left out on the counter in a basket, where it will dry nicely and can be used all winter. Once fully dried, pull the leaves off of the stem and place in a jar, in a dark, cool place.
Here are some ideas for using the rosemary:
Toss a sprig under any meat you might roast - a holiday turkey, ham, chicken, lamb, roast beef, or pork loin. While roasting, the rosemary will add wonderful flavor to the pan juices and the gravy made from those pan juices.
Finely chop the leaves and add them to the onions that are sauteed for making stuffing or other casseroles.
Infuse some whole milk or heavy cream over low heat for about 15 minutes with a sprig of rosemary, and use this in making creamed soups....squash, tomato bisque, broccoli, any kind of vegetable potage, potato-leek, etc, These soups will all benefit from the earthy, woodsy fragrance and flavor of the rosemary-infused cream or milk. 
For a rosemary dipping or basting oil, finely chopped 1 or 2 TBS rosemary, mix with 1 or 2 cloves finely chopped garlic, salt and pepper and add in 1/2 cup of good olive oil. Serve in a small bowl and drizzle with a 1/2 TSP of balsamic vinegar and use as a dip for bread or raw veggies.
The same mixture can be used to baste a roasting chicken, or drizzled on roasted root vegetables (before roasting, you can toss the veggies with the herb oil), or used as a sautee oil for greens such as kale and chard.
Rosemary can also be used as a fragrant addition to hot baths, massage oils, and home made cleaning products. It is one of the most versatile herbs we can grow, and even though it prefers a California climate, with a little persuasion and help, it can adapt beautifully to our Vermont weather.
We've been harvesting lots of rosemary this fall, and you can find it locally at Healthy Living and City Market and in the Boston area through Farmers to You.
Happy gardening and cooking,
Julie

Stick Season Tasks

  • Plant bulbs. Watch this video with Charlie Nardozzi if you don't know how.  Gardener's Supply in Burlington, Williston and on line, has a great selection of flowering bulbs that will wow you in the spring.

  • Mulch your perennials with leaves. No need to think of leaves as waste...they are loaded with carbon and a perfect way to add organic matter to your gardens. They will offer some winter protection too.  Here are some other leafy ideas.
  • Cut back annuals if you have not done so yet. Or leave the sturdier ones such as sunflowers and amaranths since they make lovely perches for song birds. Not everything needs to be so tidy.


  •  Build a raised bed for next year
  • Weed and cut back perennial beds.
  • About all that food you diligently canned and froze all summer - start eating it!

  • Let us know what varieties worked well for you. You can contact us through this website.
  • If you want to make a new garden for 2013, now is a great time to mark it, remove the sod, and amend with compost.
  • Turn the compost pile.


  • Clean off tools, oil them, put them away neatly, and feel good about it all.


  •  Store garlic and onions in a cool, dark, dry place.
  • Make a pot of potato leek soup.
  • Mulch your leeks and root crops, if you have some in the ground still, with straw, so that you can harvest them after frost comes.

  • Sit by the fire if you have one, light some candles if you don't, and enter the time of contemplation and restoration.


The Kitchen Garden: Abundant Harvest in Small Spaces

The following is a hand out that accompanied a workshop I presented at the NOFA conference Feb 12, 2012. -Julie


An abundant harvest in a small space can seem like a challenge, but by understanding a few concepts, you can make the most of your small garden so that it meets your needs and brings you joy. Observing plants is the best way to develop garden awareness; making good choices is the best way to avoid “garden guilt.” Abundant harvests have to do with efficiency:

  • The efficiency of the plant taking up nutrients
  • The efficiency of the amount of time it takes for the plant to mature.
  • The efficiency of minimized waste.
  • The efficiency of using your space to its maximum potential.

These are not hard and fast rules, but can be applied at your discretion in any area of the garden you would like to improve. These ideas can work for the spontaneous or lazy gardener (like me) or for the hyper-planner who maps it all out on graph paper ahead of time (like my neighbor). Think of it as cooking without a recipe - once you know a few techniques and concepts, you can explore and have decent results most of the time. And there is no such thing as garden failure - it is just a lesson waiting to be learned. The big factors:

  • Soil - texture, nutrients, compost, fertilizer
  • Shape - raised bed, containers, or “in ground”, bed prep
  • Water - drip, overhead, by hand, on timers, etc
  • Cultivation - weeds, mulching,  pests and diseases, season extension, spacing and timing, succession planting, shape of plants
  • Harvest - understanding life cycle of plants, post-harvest handling, when to try for multiple harvest or when to cut your losses, cleaning up plant debris.

Soil should be loose and rich and deep.  In a container it should be a pre-mixed potting soil, not garden soil. If the container is large (1 gallon or more) it should have some drainage material in the bottom. Many things work well for this - styrofoam packing peanuts, crushed up plastic pots, gravel, etc. If a pot is very lare (3 gallons or more) the drainage material can be a little deeper, up to the bottom third of the pot. It is a good idea to cover the drainage material with a piece of burlap, an old pillow case, or some other type of screen or fabric to keep the soil from washing down into the material that should remain porous.

In a raised bed, it can be a combination of materials including pre-made finished compost, leaf mold (rotted leaves - make a pile in the fall, it’s good to go in the bottom of the raised bed in the spring), peat moss, rotted manure/bedding (a good source is horse farms), garden soil,  sand and pre-mixed top soil / compost combinations. The key is to have a mixture of ingredients to re-create the complexity of a living soil system.

In the garden, the soil should be worked deeply with a 4 or 5 pronged fork, and loosed by hand or with a hoe. Even if you use a rototiller in the garden, the plants will benefit from having the soil loosened more deeply than where the rototiller tines reach. It is a good idea to shovel out the paths of the garden and put the extra soil onto the beds. This essentially makes a raised bed and will allow the roots to grow quickly and deeply in their search for food. Nutrients can come from compost, granular fertilizer, “Compost Plus” and/or  mineral inputs. It is a good idea to get a soil test in your in-ground garden or raised bed. If you are using materials in the raised bed that you know are of good quality, you can skip this, but if your plants look deficient during the growing months, you may opt to do a test after all.  Applying granular fertilizer or “Compost Plus” is best done after the plants have had a chance to grow out - either a month or so after seeding or two weeks or so after transplanting. Water is best done through drip irrigation - either soaker hoses or drip tape. A good source of drip tape is Dripworks. Next best watering choice is by hand since you can aim the hose nozzle at the soil, and not get the foliage wet. Third best choice (and not a good one, sorry) is overhead sprinklers: they require less of your time and labor, but they get the foliage wet. Two reasons to avoid getting the foliage wet with overhead irrigation (sprinklers and incorrect hand watering):

  1. it rots the plants, and disease can set in. Dry plants tend to be healthier plants.
  2. the plants take up water with their roots, not their leaves. You waste a lot of water and the leaves act as a nice umbrella for the roots, making it wasteful. You have to water more than necessary for the roots to actually start drinking. Getting the plants wet and watering the garden are two different things, and it is best not to confuse them.

Watering is best done in the morning - it gives the plants a chance to dry off before night time and supports their busy daytime growth. Watering at the end of the day is not recommended since disease spreads most during humid summer nights.  You can water the garden during the middle of the day, and the plants will still have time to dry off by sunset. Cultivation is simply the act of caring for plants. In larger scale farming, to “cultivate” means to scuff up the soil in such a way that you are removing weeds, usually involving a tractor and some sort of implement. Here we use the term “cultivate” in a broader sense meaning a general discussion of the cultural requirements of common garden plants. The “cultural requirements” of a plant are all the things that a plant needs from humans in order to thrive. For example, the site, the water, the tilth or texture of the soil, the space and  the nutrients are all a part of a plant’s cultural needs. To understand what a plant needs, you have to look at these factors:

  1. what is it’s shape? Shape of plants, physiological structure, and type of cells that make up the roots and the foliage all give you clues to what the plant needs. Thin fibrous roots dry out more than thick, tuberous roots (think of an onion plant vs. a tomato plant). Waxy, shiny leaves are more drought tolerant than matte, thin leaves (think of a succulent like aloe vs.a leafy plant like lettuce). Large plants with broad leaves have very different requirements than skinny tall plants (think brcocolli vs onion). The canopy a plant creates is also a clue - plants with a small canopy (onions, celery, leeks) do not cast much of a shadow. This makes them very vulnerable to weeds. Plants that create a large canopy (squashes, cabbages, broccoli, eggplant) cast a large shadow which slows down weed growth. Understanding the shape or growth habit of a plant also helps you maximize the potential of your small garden.
    1. A tall, vining plant can be trellised.
    2. A low growing, sprawling plant can be planted on the edge where it spills onto a lawn.
    3. A tall, skinny plant can be tucked into tight spots.
    4. A pretty, decorative plant can be planted in the flower bed.
  2. how hungry is it? Plants that need a lot of fertility are often referred to as “heavy feeders”. One common point amongst most heavy feeders is their life span. A baby lettuce plant that is in the ground for 20 days is going to be a light feeder. A giant, prize winning pumpkin in the ground for 130 days is going to be a heavy feeder. Plants that produce fruit such as tomatoes, zucchini, squash, peppers and eggplant are best fed when in a vegetative state (all green leaf growth, earlier in the first 45 days of transplanting); once those plants are in their fruiting state, it is best to lay off the fertilizer or compost which support green growth, not fruit growth. The plant has only so much energy, and if it is putting it into leaf growth, it won’t also put it into fruit growth. It is a balancing act since the green growth needs to happen quickly and in a lush manner in the earlier part of the season in order to support healthy fruiting in the latter part of the season.
  3. how thirsty is it? As in the discussion of shape, a plant’s water needs have to do with its structure, but also with weather and soil type. A garden in sandy soil will always need more water than a garden in clay soils. You can look for cues of thirstiness in a plant and water just as needed. These clues include very slight curling of leaves, a blue-like hue that creeps in (this is very sublte), or a very subtle droop in the way flowers are angled. This type of “reading the garden” takes some observation to understand, but gardening is a lifetime project with countless places to learn. Fruiting vegetables tend to taste better with less water. Leafy vegetables tend to taste better with more water. It is entirely possible to water tomatoes only once every two weeks, even in a drought, and get very tasty fruit. If you did that with lettuce, it would be bitter at best, but more likely it would simply be dead.
  4. how well does it share? A plant that knows how to share light, water, and nutrients with its neighbors is a plant that does well in small spaces. Radishes are a good example. They can be sown alongside just about any other crop, and they do quite well because of their short life span, lower light requirements, and broader leaves that shade out weeds. Radishes can share. Other examples of plants that cooperate nicely: arugula, baby lettuce, scallions (they are skinny and can go in nooks), cilantro, curly parsley or smaller varieties of Italian parsley, strawberries and wild strawberries, and pansies. Notice....with the exception of scallions, all these plants are low growing, have broad leaves that create a canopy that shades out weeds, and can tolerate a bit of shade that might be thrown by a neighboring canopy.
  5. how well does it compete? Plants that compete well are plants that are not easily thwarted by dry conditions, weedy conditions, temperature extremes, or low nutrition. You can always increase your harvest and increase your efficiency by knowing which plants have these characteristics. It basically allows you to prioritize garden tasks -you can make the less competitive plants a priority, and save the more tolerant, tough plants for a day when you have a little more time.  Working smarter in the garden can increase the harvest, and save you some “garden guilt”, just by knowing when to say “it’s okay if that is weedy, it can wait until the weekend.”

Succession planting is another way to increase your yields. This is the act of planting multiple generations of plants so that you have a continuous harvest. The trick with succession planting is to know a few numbers

  1. the date of the average last frost in spring
  2. the date of the average  first frost in fall
  3. the amount of time it takes for a plant to be harvestable (a.k.a. “days to maturity)

and two cultural factors:

  1. is the crop frost tolerant or not?
  2. is it a “multiple harvest” crop or a one time harvest?

Once you know these numbers and the frost tolerance of a plant, you can make some simple calculations based on your season length to determine how many generations of a particular plant you can grow. For example, head lettuce has about a 40 day life cycle from transplant time to harvest time, and it can tolerate a light frost. This means you can start transplanting it in early May (in Burlington, average last frost is last week of May)  or so, and you can repeat the planting of it every week or so, until early September. (in Burlington, average first frost is first week of October). Head lettuce is something you harvest only once, so if you want a nice head of lettuce every two days or so, you would plant 4 heads of lettuce a week, every week from early May to early September. This will give you a continuous harvest from early June until mid-October. If you are the kind of gardener who “puts in the garden” on Memorial Day and then you never replant, it is likely that you have a big glut of produce at certain times, and then none that is fresh and good at other times. By planting multiple generations of plants, you insure high yields and great flavor. A patch of bush green beans only produces good quality beans for about 2 to 3 weeks. After a while, the beans are tough and sparse on the plant. If you replant a new patch every couple of weeks, you will always have high-yielding, tasty beans. Abundant harvest happen on healthy plants at their prime, and gardens in small spaces require a certain amount of decision making. You always have a choice to pull out tired plants and to replant with new seeds or plants - this is often the most efficient way to have better yields. Mulch is a great way to keep weeds at bay, and to keep moisture near the root zone. It can also build soils, heat the soil, or cool the soil - all depending on your goal and what the plant needs. You can mulch paths and/or growing beds. Raised beds that are constructed out of wood can also be mulched and the paths around the raised beds can be mulched to minimize lawn mowing if you would like. If you use materials that naturally break down such as paper, cardboard, burlap bags, straw or bark, the mulched paths can become mini compost piles. By layering in materials that block out weeds, you are creating a layer of organic matter that will decompose over the course of a year and can then be shovelled onto the growing beds the following spring. Some mulch materials carry weed seeds so beware. They can still be used effectively in the garden, but best as a layer that is covered up with another barrier such as cardboard or burlap. As it breaks down and heats up over time, the weed seeds lose their viability and will not be a problem the following year. Plastic mulches heat the soil and are great for the heat-loving, fruiting crops. Harvest and post-harvest handling are other factors that affect the yield in your garden. Being able to plan or predict when you harvest a crop depends on your knowing the life cycle or days to maturity of that crop. It is entirely possible, to plan a garden harvest around certain dates or to plan for having no harvest during vacation times. An abundant harvest is one that happens when you want it. An unwanted harvest is a hassle - you have to get your neighbors to help, or find volunteers for a school garden, etc. Sometimes that works, but it is possible to minimize unwanted work, and under-appreciated produce by timing the plantings and knowing how much to plant of each crop. There are many charts on the internet that can help you gauge the garden harvest and how much to plant of each crop and when. Johnny’s Selected Seeds has some wonderful on-line tools, as does our own Red Wagon Plants website. Post-harvest handling includes everything from time of day you harvest, how you pack it into your basket or boxes, and how you store it. Morning is generally the best time to harvest since the field heat has not had too much time to affect the leafy green plants. Fruiting plants can be harvest later in the day. Again, this is a place where you can make a choice by harvesting the right plant at the right time of day. If you only have a few minutes to harvest in the morning, do the leafy greens. The fruiting plants can usually wait until later in the day or even a couple of days. Once a plant is cut or picked, it is best to wash it and refrigerate it right away. Again, this is related to an abundant harvest because anything that improves quality reduces waste. Lettuce that is wilted and dirty in the bottom of the fridge drawer is just not as appealing as lettuce that is crisp, clean and ready to eat. A small garden is not a productive garden if what you harvest ends up under-utilized. A good trick is to harvest the lettuce, and when you get in the house, soak it in a basin or large bowl of cold water right away. This takes out the field heat, the leaves absorb some water making them more crisp, and the dirt drops down to the bottom. Lift the leaves out, re-soak once or twice depending on the amount of dirt, and then spin the leaves in a lettuce spinner or by layering between some clean towels. Lettuce treated this way is sure to get eaten, promise! Plants like broccoli, beans, and tomatoes produce more the more they are harvested. Broccoli will generally make one big head, and then produce what is called side shoots all summer long. These shoots are the perfect size for cooking or eating raw and the more you remember to cut them, the more the plant will produce. Often a broccoli plant that goes into the garden in late April will continue to produce side shoots into mid-December - talk about a high yield! Most fruiting plants (tomatoes, cucumbers, squash, peppers and eggplant) will also produce more the more they are picked. These do not need immediate refrigeration, and tomatoes and basil should never go in the fridge. A basket full of cukes and zukes can stay on the counter until a time later in the day when you have had a chance to make room in the fridge or have time to make pickles,etc. Again, a high yield can be a burden or a blessing, depending on how it fits into your life. With a little planning, a very small garden such as a 4’ x 8’ raised bed can include 2 tomato plants, a cucumber plant and a season’s worth of greens. This is often plenty for a single person or a couple. Abundant harvesting is about making choices that lead to efficiency and no waste., beauty and no guilt.  If you use your minimal space for vegetables that you will not use, then the space is wasted, if instead that small space is regularly turned over with fresh plants, and old plants are removed, then you will have a high yield of well loved produce. It is always a better choice to remove the garden debris (think bolted lettuce, cabbage stumps, woody radishes) than to let it limp along, tempting disease and pests.

Some good sources of information

  • Our website has an extensive list of resources in the “Garden Journal”
  • Johnny’s Selected Seeds, High Mowing Seeds, Territorial Seeds, Seed Savers Exchange and Botanical Interests are all reputable seed companies with lots of educational materials on their websites and in their catalogs. These are great sources of free information.
  • Cornell Extension has a website for home gardeners that is very helpful
  • Elliot Coleman’s books are geared towards vegetable farmers but have very clear explanations of succession planting, timing and spacing
  • Barbara Damrosch, The Garden Primer is my favorite all around basic gardening book
  • UVM Extension offers soil tests, a plant pathology lab, and a pest identification lab
  • Burlington Permaculture
  • Charlie Nardozzi offers a garden coaching program and gives weekly talks on VPR about gardening.
  • Friends of Burlington Gardens offers support to school gardens, community gardeners, and anyone interested in learning how to grow food. They offer a season long course at Ethan Allen Homestead that provides brand new gardeners all the support necessary to achieve success in their first year.

.

Herb Spiral Workshop


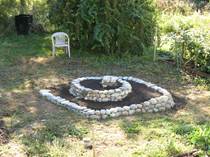
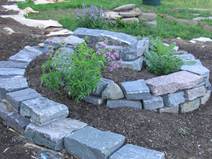
Our retail greenhouse is co-owned with a wonderful business also located at the same site. It is Queen City Soil and Stone, owned by Charley Macmartin of Burlington. Not only is Charley one of the nicest people you could ever meet, he is also the talent behind all of the stone work you see in our parking area and our lovely display garden. Charley uses the retail greenhouse as the home of his winter workshop series for homeowners and landscape professionals who want to learn or perfect dry wall masonry. The first workshop in this series is a perfect one for the Red Wagon Plants community since it is focusing on herb spirals. These simple and elegant structures are a great way to plant lots of herbs close to your kitchen door and in such a way that you give each herb the type of micro-climate it craves. Herb spirals provide various conditions in one small space - dry and sunny, shady and moist and everything in between.

Here is Charley's description of the upcoming workshop :

Queen City Soil & Stone’s series on garden stone features continues in November with a workshop on herb spirals. An herb spiral is a stone wall twisted in on itself creating a garden bed of varying soil depth and planting possibilities from kitchen herbs to strawberries to cut flowers. The workshop will be held at Red Wagon plants in a heated greenhouse on Saturday, November 12, from 9am to 2pm.

The cost of the workshop is $50 and space is limited. To sign up, call Charley MacMartin at (802) 318-2411.


The workshop will be hands-on:  building an herb spiral, discussing herb spiral design and learning about the plantings that a spiraling garden bed allows.


Garden Chores this Weekend

The time to get things done in the garden is shrinking. My good intentions are to get lots done this weekend. Here is what I have lined up for this weekend in the garden: Fill the new raised beds that I just put in the back yard.

Get soil ready for garlic planting.

Finish planting shrubs along the fence line between our yard and our neighbors' new barn. I am planting Ilex verticulata, or winterberry. The bright red berries are a nice contrast against the wooden building and will bring lots of birds to the yard.

Add compost to some new flower beds for next year.

Turn the compost pile.

What do you have planned?

Garden Breakfast for a Cold and Rainy Day

The weather's turning and so is my attitude towards the kitchen. In summer, I would rather be outside, just like you, and it can be hard to make time for all that garden produce to make it into anything but some quick salads and grilled dishes (at the beach, no less).  Here is a great dish that works for breakfast, brunch, lunch, dinner and pretty much anything in between. I made a big batch last Sunday and it kept us happy pretty much all day.

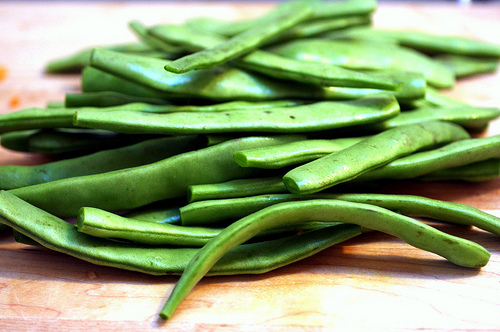
A green bean and ham hash - take some of those older green beans from the garden (the ones that did not get killed by the frost because they were hiding under the cover of leaves) and chop them up into 1/3 inch pieces. I like Romano beans for this, the wide and flat kind that is loaded with extra flavor and can be cooked a long time if you like a slowly simmered green bean, which I do, in case you are asking.  Chop up an onion, some garlic, and a potato. Chop everything pretty small, this is hash, not stir-fry. Heat a tablespoon or so of olive oil, add the onion, garlic and potato and cook until starting to soften, about 8 minutes over medium heat to high heat. I also added pimenton, a smoked paprika, at this point. If you don't have any, a little sweet paprika and cumin might be nice. Keep stirring the onions, garlic and potatoes every minute or so, but letting it all stick a little and brown is okay - that is how you build flavor. Once the potato is softened somewhat, add the chopped or sliced green beans, some chopped ham (I bought an incredible petite ham from Bread and Butter Farm last week) and a good splash of cooking sherry, white wine, broth or water (my order of preference for the liquid). Scrape the pan so the browned bits get incorporated into the liquid, lower the heat, and put a lid on the pan. At this point, the vegetables are both sauteeing and steaming. Wait about 10 minutes hear, stirring once or so and adding another splash of liquid if it is getting very dry. Add salt and pepper to taste, after 10 minutes, and a splash of cream, half and half, or milk - the dairy helps bind all the flavors and keeps the vegetables from getting dry.  Stir and sautee another 5 mintues or so, adding another splash of dairy as needed, and that is it.  This is great served with an egg on top, over easy or over hard, or scrambled on the side. But really, it is great on its own with nothing else and will keep you going for the whole day. So you can go out and pick apples, take a hike, put the garden to bed, and all the other stuff that still keeps you outside a little longer. Winter is not here yet!

High Priority - Roasted Ratatouille for the Freezer

I have to admit that I don't love frozen vegetables for the most part. So if you have a favorite way to freeze a vegetable from your garden, please share it with me. Here is one I like and eat willingly out of the freezer come the dark days of winter. I want to share this simple thing with you in hopes you might have a similar beloved thing to pass on to me. For some reason, this year has not been a year when I put up a lot of food for winter. A few jars of tomatoes and this amazing thing I will now show you are the only things I have done. No beans, no salsa, no jams, no chutneys. Well there is still time, so maybe I will play catch up and do a plum chutney with the amazing plums passed on to us by our friend, Yvan.

This recipe starts in the spring. I basically plan part of my garden just so I can have all the right veggies to make this. You need

  • onions

  • garlic

  • peppers

  • eggplant

  • tomatoes

  • zucchini or summer squash

The garlic gets planted the previous fall, the onions go in in late April, and everything else goes in June 1. I like to freeze about 10 to 20 quart bags of this ratatouille, so I usually plant about 6 pepper plants (3 Ace and 3 Italia) ,  6 San Marzano tomatoes, 6 eggplants (usually a combination of Listada di Gandia, Orient Express, and Hansel), and 1 zucchini plant ( I do two plantings, one June 1 and one July 1 that way the plants are always healthy). Most households do not need more than 1 zucchini plant. Really.

Harvest all the veggies, wash them well. And start chopping. This year, I was a bit lazy and bought a few disposable pans to do the roasting. It made for easy clean up, but the veggies did not caramelize as much as they would have on metal or pyrex. Lesson learned.

So basically you just chop up all the vegetables into 1" chunks or so. The proportions are different every year, but it is usually about 1 part onions, 1 part peppers, 3 parts eggplant, 2 parts tomatoes, and 2 parts zucchini. I chop everything separately and then add it to the pans. I then drizzle olive oil over every thing. Add lots of salt, good sea salt is best, and then handfuls of chopped herbs to each pan. I like a blend of thyme, oregano, and rosemary. But other combinations work well.

Preheat the oven to 375F and slide in the pans. Turn and toss every 20 minutes, until everything is cooked and starting to caramelize. The overall cooking time really depends on the amount you are doing, the type of pan you are using, the thickness of the vegetable layer in each pan, etc. Basically, cook it until the whole house smells really good and the veggies are very soft and starting to brown. If I were making this for a meal to be eaten that night, I would do a single layer, in pyrex, and let it get golden brown. This is much harder to do in big batches in a home oven, and since freezing compromises texture and flavor anyhow, I think of these roasted veggies as additions to other recipes all winter long, not the main showcase in a meal.

Once everything is cooked, let it cool down completely, and then carefully scoop it into plastic quart-sized freezer bags. I usually use a measuring cup and one of those funnels for jars, since it makes life a little easier. Once frozen, the veggies can be used in pasta sauces, on pizza, in lasagnas, in soups and stews, as fillings in calzones, or as a topping for polenta, etc. You get the picture. It's such a nice way to have a little taste of summer in the winter and uses up so much of that amazing garden produce. Even in a summer like this one, when I have had to take some time away from gardening and preserving, I made sure to do some of these roasted veggies for the freezer.

This blog post was written by Julie Rubaud.

Frost Dates in Vermont - South Hero is the Winner!

Here is a great chart that analyses all the temperature data collected in Vermont over the years and gives us the probability of dates for first and last frosts around the state. South Hero and the lake Champlain Islands have Vermont's longest growing season (measured by number of frost-free days according to N.O.A.A).  Take a look and prepare your garden for those first frosty nights. Here is what I do at my house to prepare for those first frosts:

If it is a really early frost, (September in Hinesburg), I will harvest all the ripe fruit on the heat loving plants (squashes, tomatoes, peppers, eggplant, etc) and if the plants still look healthy and have lots of unripe fruit, I will cover the plants with row cover. You can use sheets, blankets, plastic sheeting, etc. If the frost is coming at a later point, I often won't bother with the plant protection - just harvest all the fruit (green tomatoes can ripen indoors) and call it a day!

I don't bother to protect lettuce unless the first frost is very cold and very early. Lettuce can handle a few light frosts, so it is usually not a problem early on. Later in the season, I set up some simple wire hoops and keep the lettuce under row cover for the remainder of the season. This allows fresh lettuce to be harvested for salads well into November. It is good idea to seed or plant fresh lettuce in late summer and early fall so that the protected plantings of fall are fresh and tender. It is not really worth it, from a culinary perspective, to keep old or bitter lettuce alive. Plus it won't do as well if it is past its prime and won't fend off the cold like a younger planting can.

Hardy greens like kale, mustard greens, collards, etc do not need row cover and can live, unprotected, into December. You can always put some sort of protection over them in November to increase the harvest period past December, but it can be difficult to do with the taller plants. The wind dessicates them and makes them unappealing, and without a larger structure like a cold frame or mini-greenhosue, it can be difficult to give them adequate shelter.

All these attempts at fall crop protection will leave you grateful for the sweet rewards of fresh salads, tomatoes coming out of the cellar ripened and tasty, and nutritious leafy greens sweetened by the kiss of cold.

The Overwintered Garden

“Overwintered” is a term used to describe a vegetable that is planted in the spring, summer or fall of one year in order to be eaten in the spring of the following year. This is a great way to extend the growing and eating season in our Vermont climate. Overwintered crops generally are dormant all winter long and then come back to life with the lengthening days and warming temperatures of spring.

Overwintered Spinach - Not all vegetables can survive our VT winters, but the few that can include spinach, parsnips, leeks, garlic, and parsley. Spinach for early spring eating (mid to late April) should be sown in the first two weeks of September. Once it germinates, allow it to grow without harvesting or touching it. You can eat a little if you want, but ideally you will leave as much of the plant in the ground as possible. Once very cold weather hits, in early to mid-December, you can protect the spinach under a layer of straw, or leaves, or a few layers of thick row cover (Reemay or Agribon can be found at Gardeners’ Supply Company or ordered online at Johnny’s Selected Seeds). In the early spring, as soon as the ground has thawed out, remove the layers of protection and you will see the spinach slowly coming to life, long before any other plants begin to stir. It won’t look like much at first, but will quickly grow to be the size of spinach planted during normal times. It will be extra sweet from having survived the cold and will be incredibly rewarding - a truly vibrant food. This is such a delicious treat for early spring and really worth the trouble.

Overwintered Parsnips- parsnips are a long season crop. They are best when planted in very early spring and harvest the following year. This allows them to grow to a good size and then sweeten up with the cold temperatures. Plant the strange looking seeds in shallow trenches, ¼ inch deep (that is NOT very deep!). Keep well watered and well weeded all summer long. In the fall, you can harvest a few of the larger parsnips to eat September through December, but be sure to elave a few for spring time meals. Once the ground is frozen, in later December, mulch heavily with a layer of straw. The straw moderates the soil temperatures and prevents the soil from buckling and heaving with the freeze and thaw cycles. Pull off all of the mulch as soon as the ground thaws, and then in late April and early May, you can dig up huge, sweet roots that are a lovely addition to spring time soups, roasted vegetable dishes and purees.

Leeks are another crop that is planted very early in spring - mid to late April is ideal. The small and slender plants are planted in trenches, about 6 to 8 inches apart in rows that are 12 inches apart. Keep leeks well watered and weeded. Once they are about 10” tall, you can fertilize them with a good organic fertilizer such as Pro Gro from North Country Organics or Compost Plus from Vermont Compost Company. Then hill up the plants with soil from in between the rows. A good hoe makes this job much easier. The more you hill, the larger the plants will be. This allows for more of the white, edible portion to grow. Hilling also helps to keep the moisture even, another condition which encourages bigger growth. You can hill leeks one more time before fall, in early August or so if you choose to. If you cannot eat all of your leeks in the fall, leave a few in the garden for overwintering. Mulch well with straw (about 6” in depth) and let sit in the garden all winter long. On warmer winter days, you may be able to still harvest some of the leeks if the ground has not frozen solid under the mulch. With whatever leeks are left in the ground come snow melt, pull off the mulch and wait to see what happens. Not all leeks will have successfully lived through the winer, but about 40 to 60% should if you have followed these steps. You will see some yellow and rotting foliage with fresh green growth poking through. These are the leeks that have made it through winter. Let them size up a bit before harvesting. They will come back to life and can be picked and eaten in later April or mid-May. You will have to peel back some of the outer layers, but underneath will be a luscious, silky treat. So sweet in spring, and a great addition to soups, vegetable tarts, or braised meats.

Other crops: I have had good luck with late seedings of lettuce, scallions, cilantro and dill. These all overwintered fine and were good for a few salads in very early spring before they decided to go to seed. The lettuce varieties that I have found to be most well adapted to overwintering are Merveilles des Quatres Saisons, a beautiful French heirloom variety,  and Tango, a green oakleaf. You can also plant shallots and garlic in fall for early harvests. Green garlic is an immature head of garlic that tastes milder than its full grown version.  Parsley is a biennial and will also come back to life in the spring before it goes to seed. Biennials make a flower in their second year, so this is normal plant behavior! Remember, every winter is different. This type of growing requires flexibility, observation, and a willingness to experiment. Exact planting and harvest dates are not easily determined because they are a function of weather, where you garden is sited, and micro climates. The best way to understand overwintering is to start doing it, and see what works well for you. Observe each crops natural life cycle, and learn to work with it in the context of our long and cold winters. There is no better way to say “Hello, Spring!” than by harvesting your first salads in April when green life is just beginning to stir.


Fall Planting Guide

Mid-August is rolling around, and with it comes some vegetable planting possibilities that will feed you late into autumn and early winter. This is a great time to clean out some of the garden beds that have finished producing and replant them with some fresh crops for late season harvest. Here are a few options that you might want to consider incorporating into your later summer gardening routine.

A note on flea beetles and row cover. Flea beetles are little, black and jump around on your plants while making tiny little holes. They love anything in the brassica family - cabbage,broccoli, arugual, mustards, collards, etc. Row cover is a white fabric used to keep out insects and/or to warm up the soil and air around the plants. It does not hurt to use row cover to speed things along and to keep out the flea beetles. Broccoli - seed a small amount directly into garden beds, or buy transplants up to mid-August. If you are direct seeding into a garden bed, remember to thin or prick out and replant the broccoli babies so that they have proper spacing (15” or so). Cabbage - same as broccoli. Choose shorter day varieties. Seed packets usually list the days to maturity for all crops. In early August, you can usually get away with planting a 60 day cabbage that will be ready in early October. Kale - this is a great time to put in a few more kale plants or seeds, they will size up before snow flies, and will withstand lots of wintery weather. The good thing about kale, is that once it is full grown, it will just stand around in the garden waiting to be picked. It does not get “too old” or bolt (jump into seed production mode). This makes it a great early winter crop and a joy to harvest under snow fall. Collards can be treated this way as well. Arugula - a nice addition to salads, this tender green with a mustard-like flavor is also a great survivor of cold temperatures. It can withstand many hard frosts and will continue to add a little spike to your salads well into November and December. You can put row cover on it to keep away the flea beetles and to give it a little extra protection from cold winds that can dry it out. If it starts to turn a little purple in the colder temps, don’t worry about it, it is still fine to eat. This is just a symptom of not being able to absorb phosphorous in cold conditions. Turnips - a short season salad turnip can still be sown in August. I like the Hakurei variety from Johnny’s. It is delicious raw in salads, sliced thinly or finely diced, or sauteed in a little butter with fresh herbs (winter savory makes a special appearance at my house, often in this dish in particular). People who think they hate turnips will just be shocked when they taste these buttery slices that just melt in your mouth. Spinach - in the first half of August, it is a good idea to plant a large patch of spinach. It will germinate in the cooler night time temperatures (spinach does not like to germinate in the heat) and will last a long time in the field in the cool temperatures of October and early November. Carrots - fall carrots are best seeded right around July 4th. This gives you a chance to do an early batch of carrots for late spring, early summer eating, and then a second (or third) batch for fall eating. Fall carrots are considerable sweeter than spring seeded carrots and are definitely worth the trouble. Boc Choi - this is another crop that does really well in the cooler temperatures of fall. It is not a heat lover, and therefore should only be planted in April and May and then again in mid to late August for fall harvest. This benefits from row cover if you have a lot of flea beetle pressure. There are quite a few different versions of boc choi, and if you like the crunchy texture and delicate flavor of this crucifer, then please consider trying baby boc choi, red boc choi, or full sized boc choi. While it is easier to start with plants, it is certainly possible to direct seed this crop. Beets - fall time beets are sweet, tender, and do not have that “dirt” taste of beets grown in full summer heat. Last planting date for fall beets is around August 10th. They should be direct seeded in the garden and then thinned to one plant per 2 to 3 inches. You can space the rows 10 to 12 inches apart and fit about 3 rows in an average bed with a 4 ft width. The greens are tasty too, and the little delicate plants you pull out when thinning are a great addition to sauteed greens, soups, or even salads if very young.

Cilantro and Dill - these herbs can be planted directly in the garden from seed as late as mid-August. They grow well in the cold, and actually prefer it. The cold slows them down and prevents them from going to seed. Plant a good sized patch since you can harvest the plants well into December. They can take a frost, a snow fall and still will bounce right back.

Mustard Greens - these can be planted just like arugula. See instructions above.

Radishes - are a great addition to the late season garden. They can be planted right up to early September, and will maintain a high level of quality right up until it snows.

Lettuce - you can direct seed certain varieties of lettuce for fall harvest. Some do better than others in the cold. I like to plant Merveilles des Quatres Saisons and Tango for their beauty, taste, and cold hardiness.

Parsley - this herb can take very cold temperatures, so make sure, in mid-July or so that you have a nice patch of this going into fall and later summer. If this is an herb that you use frequently, it does not hurt to plant two or three different patches over the course of later April to mid - July. It is a slow grower, so after mid-July you can only plant it from transplants, not seed.


Things to Plant Now. You Will be Glad You Did.

August is rolling around, thundering ahead,  and with it comes some vegetable planting possibilities that will feed you late into autumn and early winter. This is a great time to clean out some of the garden beds that have finished producing and replant them with some fresh crops for late season harvest. Here are a few options that you might want to consider incorporating into your later summer gardening routine.

Broccoli

- seed a small amount directly into garden beds, or buy transplants up to mid-August. If you are direct seeding into a garden bed, remember to thin or prick out and replant the broccoli babies so that they have proper spacing (15” or so).

Cabbage

- same as broccoli. Choose shorter day varieties. Seed packets usually list the days to maturity for all crops. In early August, you can usually get away with planting a 60 day cabbage that will be ready in early October.

Kale -

this is a great time to put in a few more kale plants or seeds, they will size up before snow flies, and will withstand lots of wintery weather. The good thing about kale, is that once it is full grown, it will just stand around in the garden waiting to be picked. It does not get “too old” or bolt (jump into seed production mode). This makes it a great early winter crop and a joy to harvest under snow fall. Collards can be treated this way as well. A note on flea beetles: It does not hurt to use row cover to speed things along and to keep out the flea beetles. They are little biting insects that make little holes in the leaves and generally slow down a plant’s growth by stressing it a bit. All vegetables in the brassica family are susceptible to flea beetles - broccoli, kale, cabbage, mustards, arugula, collard greens, and boc choi are all in this family.

Arugula -

a nice addition to salads, this tender green with a mustard-like flavor is also a great survivor of cold temperatures. It can withstand many hard frosts and will continue to add a little spike to your salads well into November and December. You can put row cover on it to keep away the flea beetles and to give it a little extra protection from cold winds that can dry it out. If it starts to turn a little purple in the colder temps, don’t worry about it, it is still fine to eat. This is just a symptom of not being able to absorb phosphorous in cold conditions.

Turnips

- a short season salad turnip can still be sown in August. I like the Hakurei variety from Johnny’s. It is delicious raw in salads, sliced thinly or finely diced, or sauteed in a little butter with fresh herbs (winter savory makes a special appearance at my house, often in this dish in particular). People who think they hate turnips will just be shocked when they taste these buttery slices that just melt in your mouth.

Spinach

- in the first half of August, it is a good idea to plant a large patch of spinach. It will germinate in the cooler night time temperatures (spinach does not like to germinate in the heat) and will last a long time in the field in the cool temperatures of October and early November.

Overwintered Spinach - overwintering means keeping a vegetable alive through the winter for spring harvesting and eating. Not all vegetables can survive our VT winters, but the few that can include spinach, parsnips, leeks, garlic, and parsley. Spinach for early spring eating (mid to late April) should be sown in the first two weeks of September. Once it germinates, allow it to grow without harvesting or touching it. You can eat a little if you want, but ideally you will leave as much of the plant in the ground as possible. Once very cold weather hits, in early to mid-December, you can protect the spinach under a layer of straw, or leaves, or a few layers of row cover. In the spring, as soon as the ground has thawed out, remove the layers of protection and you will see the spinach come to life, long before any other plants begin to stir. This is such a delicious treat for early spring and really worth the trouble. A future post will be just about overwintered vegetables, so if this is something you have been wanting to try in your garden, check back here in a few days!

Cilantro and Dill

are good herbs for fall planting since their cold-hardiness is unmatched, and it will give you something to add to autumn salsas, salads, and pickles. Just sprinkle some seed into a shallow trench, press them in, and lightly cover with soil. The planting depth is very shallow here, just 1/4 inch or so. One of the most common problems with crops seeded directly into garden soil, is that they get planted too deeply. Remember this basic rule of thumb: the seed needs to be planted only 2 times deeper than its own size. Cilantro and dill will live until the first snow! They thrive in the cold. They are true soldiers of season extension.

Let us know if you feel inspired to try your hand with some of this season extension - we love to hear about it!

Gratitude

I woke up today feeling grateful and recharged with a blue sky blasting through the window and a full night of sleep behind me (the first in a while.) Here are a few pictures I took with the early morning sun casting a bittersweet glow on everything. What to make of that late fall look? Winter is coming, summer has produced all it can, and it is time to settle back and enjoy the dark days ahead. The dormant days ahead work for the seeds that need it in order to crack into life come spring - it can work for us too. It is a just fine time of year for sinking into the couch, making soups, catching up on reading, and over all feeling gratitude for the cycles of the seasons, the sweetness in the people around us. While the basement is full of jars of applesauce, tomatoes, jams, chutneys and pickles, I also try to keep a few things going in the garden as long as possible.

Like these .....

The straw keeps the soil from freezing around the leeks so that I can harvest them even in deep snow. The lettuce, arugula, cilantro and dill behind them will keep going a little while longer. I can cover them up with row cover, but most likely they will be eaten before I even need to do that. I will plant 2 or 3 times more next year so that I can have enough to take us through December.

I love this close up of dill with all of its fine texture.

Dill is one of the hardiest herbs to grow in cold weather and gives such brightness to late fall salads, potatoes, eggs, and fish. I use it quite a bit this time of year after pretty much ignoring it all summer long except for using it in a pickle jar or two or three.

I always bring in a few baskets of herbs. I don't do anything to them except cut them, pile them into a basket and leave them around the house. They smell great and love to go to work by the handful when I am making soups, broths and stocks. I don't think they object to being stuffed into a poultry cavity every now and then either. There is nothing like using herbs in big bunches of branches to feel like I am living a rich and luxurious life.

I want to say thanks to compost too.

Parts of the garden are ready for spring, and parts still have a ways to go, but there is so much satisfaction in seeing the raised beds awaiting next year. Soil building organisms busy making teeming, hot life. The ones who really get some of the credit for this are these lovelies......

Enjoy your next few days of rest if that is your luck and your lot. And thank you, deeply, for being a part of all this beauty and grace, coldness, sunshine, poop, and all.

The Very Fragrance

Hope Johnson, whom many of you know from our retail greenhouse, brought me this plant this summer, while muttering something about "bringing coals to Newcastle" and said it was a red morning glory she had started from seed.....well here it, a few months later, and just a beautiful morning riser. It only opens for a short while, maybe if it had been planted with mroe of a south eastern exposure it would stay open longer, but I just love it. It is a dark pink, not a true red (this often happens with flower color description), and the flowers are about the size of a silver dollar. Should we grow and sell this next year?

These Kennebecs have provided me with the most satisfying harvest of my potato growing life. They were planted in the best soil in my garden, the site of an compost pile, and I did not even hill them. They were virtually maintenance free save for some periodic weeding.

This corn was transplanted in late July from seeds that had been started in mid-July. I somehow did not make time for corn any earlier this year. As Elise and I transplanted, I kept wishing for some October corn and a warm fall. Well wishes do come true: while the ears are not terribly big, the flavor is sweet and the texture is just right. This has been going into a fabulous corn salsa recipe I have been canning.

This makes it all worth the toil. I heard this line from a Rilke poem yesterday:

Is not impermanence the very fragrance of this world?

A good thought for autumnal transitions.

Leek Fest

I have just used up the last of my leeks. That means we ate about 225 leeks this fall. That is a lot of leeks. We grow two different kinds for two slightly different purposes.

My favorite for flavor and beauty is Bleu Solaize, a French heirloom variety that is just majestic in the garden. It stands about 2 feet tall and has thick, blue-green leaves that make for a dramatic, palm-like display in the kitchen garden or tucked into a mixed ornamental bed. The leaves even turn a pretty violet color once cold weather hits. I think they would make a lovely back drop for some bright red ladybird poppies or mixed in with some verbena bonariensis and short sonata cosmos.  What really makes Bleu Solaize special though, is its ability to survive very cold temperatures.  If I still had some in the garden, I would start mulching them with straw right about now (early December) and would be able to harvest them all winter and even into early spring. I guess next year I will have to plant even more leeks.

The other variety we grow is King Richard (known as "King Dick" around the greenhouse work bench).  I love this variety because it is ready to eat long before the Bleu Solaize (you can start to eat them at the baby stage - see recipe below), it does not require hilling, and it easy to clean.  It has been bred to be "self-blanching" which means that the white, edible part is extra long in proportion to the green part and does not have to be buried in soil to stay white, so overall the leek stays cleaner and there is much less waste or compost to deal with. All of this ease in growing and cooking is at the cost of flavor.  These leeks are sweet and mild, but just don't pack the same rich, leeky flavor of the Bleu Solaize. I still like them a ton, though, and this is why we grow TWO kinds of leeks!

Growing and Care of Leeks:

Our plants come in 4 packs and there are about 100 plants per pack. This may seem like a lot, but since they hold in the garden for such a long time, it is really a moderate amount that can be eaten over a 3 to 6 month period. I start out by making a trench with the edge of my hoe, about 3 inches deep. You should allow for 6 inches of space per leek in rows that are about 8 to 12 inches apart. So for one 4 pack of leeks, I usually prepare three row that are 18 feet long. You can pack them in a little tighter if you don't have the space. You can also plant them in once long row, which makes them easier to hill.  You can also plant crops with a short life span (radishes, arugula, lettuce, spinach) right near them since leeks take a long time to size up and use all their alloted space.  When planting the leeks in their trench, it is important to bury them about as far down as you can and leave only a few inches of the delicate green top showing. They are really slow to grow, so you can save space by planting them in a nurse bed, where you just pack them in pretty tightly and wait a month or so to transplant them to their rows in the garden. Just keep them well watered either way. Leeks and onions need lots of water to get established and off to a good start.  And keep them well weeded too; the slow growth rate of leeks makes them very susceptible to weed pressure. Once the leeks are about a half inch in diameter, you can hill them by gently piling loose soil around their base a few inches up the plant. This is alos a great time to add compost and some straw mulch.  Once mulched and composted, the leeks become pretty much care-free other than some watering every now and then. The mulch and the compost help retain moisture, so it they are a critical component of having nice, large leeks.

Some of my favorite leek recipes

First of all, here is a nice video of how to wash leeks. It's pretty quick once you are used to it.

Leeks in Vinaigrette

3 to 4 leeks per person (if they are small) or 1 or 2 leeks per person if they are large.
about a tablespoon of this vinaigrette
Garnishes: a table spoon of capers per plate, half a chopped hard boil egg, finelly chopped tarragon, parsley or chives
Arrange leeks on indivudual serving plates, drizzle with dressing and top with garnishes.

Braised Leeks

Place washed and trimmed leeks in an oven-proof casserole dish in a single, snug layer.
Pour in enough stock (chicken, beef, veggie - your choice) to fill in half way up the leeks.
Tuck in a few sprigs of thyme, rosemary, or savory in between the leeks.
Salt and pepper  liberally, dot with a few small nuggets of butter.
Cover with tin foil and bake in a preheated 350 degree oven until soft, about 45 to 60  minutes depending on the size of your leeks.
Uncover the leeks, sprinkle with a little freshly grated parmesan and place under a preheated broiler until browned and bubbly.  You can skip the cheese and broiler phase if you want to be more wholesome about it.

Potato Leek Soup

In a large soup pot, place the following ingredients:

3 washed and trimmed leeks, roughly chopped
2 small/medium potatoes, roughly chopped
1 gallon or so of broth of your choice (chicken, beef, or veggie)
a few sprigs of rosemary or thyme
a few cloves of garlic, finely chopped
Let everything simmer on medium/low heat  until very tender, about one hour or so. Remove herb sprigs and puree in a blender or with a hand held immersion blender (much easier method).
Salt and pepper to taste.
Stir in a little heavy cream if you are feeling decadent.
Garnish with fresh pasley or chives, finely chopped.

A Time of Acceptance

I love garlic planting time.  You can really learn a lot about your soil when it is fall and the garden has spent a summer being tended (or not).  This is the second burst of good intentions, the first one being the entire month of May when ideas run ecstatically through the garden plan .  Garden cleanup is a confessional time in the gardening calendar. It is a time to look at mistakes, assess and swear to never make them again, renew your commitment to gardening, and prepare to let the passage of a long winter slowly rekindle your optimism for that spring burst.   Or you can  just learn to live with your shortcomings and realize that the garden is a very forgiving place, where perfection, motivation, and execution don't have to be the priorities.  In other words, it's time to take the pressure off.  There is so much of it in our lives, why not let the garden be a place where we accept and embrace imperfection. Garlic planting is a perfect way to mark the impending doom of winter and the shortening days.  Tucking those fat cloves deep into the earth, I feel unbounded optimism, a deep sense of satisfaction that I am punctuating the calendar with an earthy tradition, full of meaning and metaphor.  The garden is a great place to create your own traditions that are in step with changing seasons; it's a place of rituals that are private and intimate,  between you and your dirt. When I plant garlic, I imagine winter as a time to prepare for spring, as a passage in the circular cycle.  The thought of those cloves, tucked into their bed and nestled in straw, remind me that it is alright to take time to just rest and renew come those cold and bleak days.

I always start by selecting a site for the garlic that will benefit both the garden, the garlic and future crops.  Garlic brings a full  9 months of cultivation to the garden, much more than other vegetable plantings.  With it also comes a deep soil work up, a thick layer of composted manure, and another thick layer of straw.  These are all great ways to treat your soil and whatever is planted in that spot, in your garden's future, will feel the love.  As part of my garden rotation, I spend the winter imagining what will be planted where the garlic once stood, which crop will benefit from the extra organic matter and nutrients and care that the garlic received.  Many people think that garlic is a healing food with all sorts of immune boosting properties....I think it does the same type of work in the garden.  Once again, I am reminded of the way gardening is a microcosm of life and of the body, following the cycle not just of the seasons, but also, of growth and acceptance.

The Rototiller and the Gym

straw in the garden

Every year, around October, I join a local gym and start to do arduous things indoors.  I don't love to exercise indoors, but it's a way to keep myself from going a little batty and  it means I can't use our foul weather as an excuse.  This year though, I am waiting a little longer to submit myself to the four walls and the machines and instead I am tilling my garden by hand.  With a fork.  You may be asking, what, pray tell has come over her? Well, two things....rototilling is bad for your soil and, yes,  I like the workout.  Those rototiller tines break up the titlth and structure of your soil, churning everything up too finely and forcing all of the organic matter to decompose too quickly, thereby not leaving the nutrients in the ground for next year's plants.  It also only works the top layer of the soil and leaves an untouched hard pan just a few inches below the surface--not ideal for root crops or any plant with a tap root. You can read about no-till agriculture here and here.  It is the newish trend in organic farming systems that copy how things were done a long time ago, before big farm machinery,  and has been proven to reduce carbon emissions by using fewer fossil fuels, and by storing carbon in plants rather than by losing it to the atmosphere when plant matter breaks down too quickly.  All this sounds like a great reason to park the rototiller permanently, but the truth is, I do it for other reasons as well.  I don't own a rottotiller; I don't like having to ask someone to do it, and I like the messy workout.  Here's how I did it this year. Back in the spring, I invested in about 20 bales of straw.  My garden is broken up into an odd assortment of rectangles connected with meandering paths.  It is a place that encourages inefficient wandering and discourages straight ahead speed. I love my garden for these qualities that make it an antithesis to the hassle and bustle of most days. And it's another reason a machine just doesn't work for me: I don't want one big rectangle with a bunch of straight rows.  Rather, I like my garden to have a series of mini gardens with their own mini rows and blocks. It makes for a beautiful patchwork quilt of vegetables.  So when I started to plant everything back in April and May, I covered up the paths and all the bare soil around the plants with lots of straw.  This did a great job of keeping down weeds and limiting the amount of water the plants needed.  I added more straw and pulled a weed here and there, but for the most part, found that the initial investment more than paid for itself in time spent swimming.

Now that the plants are done, I am going through and cutting down dead stalks, composting them in a corner along with some of Rosie and Pokey's donkey manure.  For crops that can be planted in fairly coarse soil, I will just leave the straw in place and come next spring, I will push the straw away, add a big scoop of compost, incorporate compost and soil, dig a little hoel,  and plant right into that.  I will add more straw too since so much of it will break down over the winter.

For prepping areas where I am going to be seeding first thing in the spring, I'll need a finer bed preparation which will be done in two phases.  Fall phase, now, is to push away the straw, churn up the soil with a four pronged pitchfork, smash it up a little, rake it smooth, and place the straw back on top.  This keeps the soil in place and does not allow erosion to do its thing.  Come April, I will push the straw back yet again, hoe and rake the bed to make the top layer of soil fine and not too chunky, and plant some seeds in little furrows.  The straw just waits in piles along the edge of the rectangle and gets spread out again once the seeded plants are about 6" to 8" high.  This requires a little weeding around the plants in between straw replacement times, but it's not too much.

This sounds like a lot of work, but it saves time come spring to prep as much of the garden as possible now.  I really like the benefit of seeing the soil texture improve year to year and each little rectangle of my garden seems to have its own characteristics.  It all feels very wholistic, a little messy, and not at all perfect.  I don't feel bad when some weeds get through the system because I will just pull them out or chop them down and layer them into the accumulated straw.  It's about your mulch being part of your fertility plan and it is about gadening without guilt.  The gym can wait another month while I play in the dirt a little longer.