gardening in vermont

Three ways to trellis and prune tomato plants

Staff garden cherry tomatoes grown with a string and clip method in a greenhouse

First of all: Why trellis and prune tomato plants? Many gardeners let their tomatoes grow without ever trimming a branch or adding any support. This may produce some great fruit, but here are a few reasons why I recommend trellising and pruning your tomato plants:

Ease of harvest - Trellised and pruned tomato plants make for easier harvest. Easier access to the fruit also means you’re less likely to damage the plants when reaching in to get a ripe tomato. Less damage means less diseases and you’re less likely to miss ripe fruit that is hidden behind overgrown foliage.

Disease prevention - Good airflow, through spacing of plants, and pruning away some branches and leaves, is the best prevention for fungal diseases. Other diseases spread when leaves come in contact with soil, so keeping your tomato plants up off the ground and trimming the lower leaves will greatly reduce this from happening.

More fruit that ripens - You can force a tomato plant to put its energy into ripening existing fruit by removing some of its foliage. This is especially helpful at the end of the season. Three to four weeks before the first expected frost, I clip the head off of my tomato plants, so they will put their energy into turning the last fruits red.

The Cage

This is the most common way to keep tomato plants upright in a home garden. Typically the cages used are too short for tomatoes and better suited for pepper plants. It can be a good option if you have limited garden space and are only growing a few tomato plants. Find the tallest cage possible, ideally 5 ft or more. The sturdier the wires, the better. Square folding cages are made of sturdier wire and won’t fall over easily. They are also more expensive.

Set up your cage right after planting your tomato starts in the ground, this way you’re less likely to damage the plant. Push the bottom wires as far down into the soil as possible.

Since tomato cages are rather short, I aim for a branched plant or choose determinate varieties that won’t grow as tall. I prune all leaves and suckers from the bottom of the plant up until right beneath the lowest flower cluster. Once that fruit is harvested, I continue pruning leaves up to the next flower cluster, always working my way from the bottom up. Always leave some foliage to shade the fruit to prevent sunscald. When the plant gets very dense inside the cage, I prune out some weaker suckers and leaves that are pointing inward. Anything that looks diseased or discolored is always my first choice for cutting off.

Basket Weave

This is a great method if you are planning to have a row of tomato plants. You could use it with as few as 2 plants and up to the full length of your garden. Mark your tomato planting holes in a straight line about 18 inches apart. Then drive a 8 ft t-post (or other tall, sturdy stake) between every 2 or 3 plants and at the ends of the row. Anchor the outer posts so they won’t pull towards each other under the weight of the plants. I usually add two shorter stakes at an outward angle to the end posts. Once your structure is in place, plant the tomatoes. When they are about a foot tall, I start weaving. Attach one end of your string to one of the end posts and start weaving between the plants: Right of the first plant, left of the second and so on. When you reach a post, loop the string tightly around it. When you reach the other end of your row, tie a knot to the last post, run the string between anchor and last post a few times and tie it off. Now do the same with an opposite weave. Each plant will now be held up by string on either side. I weave every 6-10 inches, which is about once a week. Take leaves out as described with the cages. I usually thin each plant to 6-8 strong leaders and remove all other suckers. This creates a kind of espalier look where all fruit is easy to reach and there is lots of airflow.

String and Clip

My wild veggie garden on August 1st 2021 with tomatoes trellised along front of house

The easiest pruning and harvesting will be achieved with a string and clip set-up. I grow tomatoes along the south side of my house and attach the strings with hooks to the overhang of the roof. This picture was taken August 1st - Tomatoes get tall if you let them! 

If you have a greenhouse, this is a great method. Or you can build a frame of 2x4s as was done in our display garden last year. As with any of these methods, you want to sink the posts as deep in the ground as possible. I have grown tomatoes in pots on a patio and attached their strings to a nearby building. The string doesn’t have to be perfectly vertical either, you’ll just want to anchor the bottom of the string in the ground, so any wind won’t tear the plant out. In our display garden set-up we ran a horizontal string a few inches above the ground between the wooden frame and attached the trellising strings to it. You could use tent stakes or tie the string to a stick and poke it into the ground.

Next you’ll need tomato clips. These are made of plastic and can be used for many years until they break. They clip tightly to the string and then encircle the stem of the tomato plant without strangling it. I recommend clipping every 10-12 inches, beneath a leaf. Don’t place them directly under a cluster of flowers/fruit as the weight of the plant could eventually snap them off. 

If you don’t have tomato clips, you could tie a piece of string tightly to your supporting string and then loosely around the tomato stem.

Pruning with this method is pretty straightforward: Each vertical string gets one leader. This means you’ll prune off all side branches. You can grow two leaders per plant, but they each need their own support string. Let your freshly planted tomatoes grow for a bit before you choose the strongest side branch as a second leader. Typically it will be the branch right beneath the lowest set of flowers.

The string and clip method can also be used for cucumbers!

Cucumbers in a greenhouse using string and clip method

Pruning best practices

  • Tomatoes are very susceptible to fungal diseases that can be spread from one plant to the next through your hands or tools. Avoid pruning and harvesting when the plants are wet as water can be a great vector for diseases. 

  • Use sharp clean snips when pruning. Don’t touch the wounds and avoid tearing off branches as the large open wounds created can be entry points for diseases. Start with the healthiest plants and prune diseased plants last. You can also disinfect your snips between plants or after each pruning session. A bleach solution or alcohol works great for this.

  • When watering, direct your hose at the base of the plant, not the foliage itself. Mulching can be a good way to prevent water from splashing soil onto the bottom leaves when watering or from rain.

  • Some diseases live in the soil and can overwinter there. I recommend a good clean up of all tomato plant material at the end of the season to minimize future disease issues.

I prune and trellis once every week. All it takes is a few minutes per plant. If you have never done anything to your tomato plants but are curious to try, start with one plant and see how it compares to the others.

This post was written by Kat Consler, RWP’s tomato pruning genius.

Grow a Purple Food Garden

Purple Napa cabbage ‘Merlot’

If you thought that color-coordination was reserved for the flower garden, try expanding your palette (and your palate) this year. These purple-hued veggie and herb varieties combine to make a dramatic edible display, whether grown together or interspersed in the garden. In addition to being stunners in the garden, highly pigmented foods tend to contain high levels of antioxidant anthocyanins, elevating healthful eating from garden to plate.

Early in the season, tuck vivid purple alyssum alongside herbs and salad greens like ‘Red Batavia’ lettuce, one of our favorite head lettuces for its vibrant color and sweet tender leaves. The alyssum will continue to bloom even as spring lettuces are replaced by summer herbs. Purple basil and purple shiso are both grown in a similar manner- pinch back after transplanting to encourage bushier growth, harvest leaves for culinary use or allow them to flower for a more ornamental look. Purple basil is used just like green Genovese basil, and shiso is a popular Japanese herb with a flavor like cumin and clove. Use the leaves to make lettuce wraps or color radish pickles a vibrant red.

If you have the room and patience, cauliflower offers a fun payoff, and the ‘Graffiti’ variety boasts a wild purple head peeking out from blue-green leaves. Cauliflower can be sown in spring as long as they are kept watered through summer (and maybe offered some purple shade using ‘Hopi Red Dye’ amaranth); sow mid-summer for a fall harvest.

While traditional red cabbage always deserves a place in the garden, this year we are thrilled to be growing purple Napa cabbage, which offers all the versatility and crunch of green Napa in a stunning wine color. We can’t wait to chop it into colorful slaws and kimchi later this year.

Freshly dug garden potatoes are easy to grow and very rewarding, and digging up ‘Adirondack Blue’ potatoes really feels like unearthing buried jewels from the garden. The reddish-purple skin reveals violet flesh that holds its color even when cooked, making for stunning roasted or mashed potatoes.

Another unusual addition to the purple garden is the ‘Colorado Star’ artichoke, whose spiny 1-3’ tall plants produce a relatively high yield of buds in a range of purple hues. This artichoke variety matures earlier than others, making it a good option for our relatively short season. Grow them as an annual, and combine with purple-topped Verbena bonariensis and flavorful bronze fennel to create height and architectural interest in a garden that transcends the boundaries between edible and ornamental.

Verbena bonariensis

This blog post was written by Sophie Cassel, Red Wagon’s wholesale coordinator and community outreach team member. Sophie is an herbalist and educator. You can find her workshops here.

Turning Towards the Garden

As always, the garden has been a refuge during difficult times for many of us. And the fresh snow that just came through does not have to hinder that practice. We can retreat into planning mode, escape into the creative process and find solace in what is to come. The garden is a place for hope and renewal.

Chad Donovan, Red Wagon horticulturist and all around great human, showed me some pictures he took earlier this winter after he stomped around in the snow to map our 2022 display gardens. He is reworking the layout so that it is well suited to classes, tours and work parties. I just loved his process and had never seen that before and am eager to share it with you. What a creative way to map out the garden in real space, and to see just how it fits into the landscape. And it is a fun thing to do with kids or grandkids. Speaking of those, have yours been on school vacation this week? Maybe you would you like to plan your veggie garden with them in mind. Some of our favorite ways to do that can be found here, in a blog post Sophie wrote about some of our favorite vegetable varieties to grow for little helpers who want to snack while they “work”.

Every garden should be built with use and practicality in mind, with beauty not far behind. The month of March is a great time to work on garden plans and designs. We are here to help, and have lots of resources to offer you in that vein.

Ellen Ecker Ogden, who designed the beautiful garden in the middle image above (illustration by Ramsay Gourd, from Ellen’s book The Complete Kitchen Garden), will be teaching an online course for us on The Art of Kitchen Garden Design. She will highlight some of her favorite ways to approach the vegetable garden with an artistic eye so that you can create a space that is welcoming and special. You can register for her class and see our 2022 curriculum by clicking the button below.

If you are just starting out with vegetable gardening, our owner, Julie Rubaud, will be teaching an in-person class geared towards first time gardeners on March 19th. You can find out more here.

We also have our complete 2022 plant list up on the website. You can find that here. Making a plant list is a great place to start with garden planning, and Sarah M. has been very diligent in updating our website so that it reflects all of the 1200+ varieties we are growing. Please take a look and tell us about your favorites! We love feedback on varieties, so also tell us which ones are duds in your experience.

Veggie Gardening with Kids

If you’re planning to do a lot of gardening with young ones this year, consider some of our most popular “kid’s sized” vegetables. These varieties are easy to grow and crank out prolific, tasty produce that take well to consistent harvesting by eager garden helpers. With this list, you’ll have something snackable  in the garden every month of the growing season.

Mexican sour gherkin

If your family loves cucumbers, both Picolino cucumbers and Mexican sour gherkins should find a spot in your garden this year. Picolino are a prolific and crisp cocktail cucumber, harvested at just 4-5” long for maximum sweetness and crunch. Mexican sour gherkins are also known as “mouse melons” and their inch-long fruits resemble something out of a fairy tale. They have a tart, lemony flavor and firm bite that kids love. Both varieties produce long vines and tendrils, so offer plenty of support with a trellis and watch them climb up, up, and away. They could even grow on a little teepee. Remember that they also benefit from consistent harvesting, which make them perfect for a daily scavenger hunt to find the ripe fruits.

Lunchbox peppers are so named for their snackable size, maturing at just 2-3” long and coming in shades of yellow, orange and red. These peppers are super sweet, and their small size also encourages more prolific fruiting per sturdy plant. While perfect for fresh eating, lunchbox peppers do equally well sauteéd and stuffed.

There’s no better seed to sow with kids than radishes. Sown directly in the garden early in the spring and carefully thinned to 1-2”, radishes offer a relatively quick payoff of bright pink roots with a sweet, pleasantly peppery flavor. Watered adequately and harvested early, radishes can be seeded in the veggie garden all season long. Try a mix of French breakfast and cherry red varieties for a range of harvest times and colors. 

Alongside your radish patch, set in some sprouting broccoli (also known as broccolini). It’s well known that broccoli is a favorite green with kiddos, and these sprouting types offer a “cut and come again” approach that is much more consistent and satisfying than waiting half the season for one full-sized crown. Broccolini are also more heat tolerant, although they’ll want plenty of water and decent soil. The sweet stems and florets are easily incorporated into mixed grills, crudité platters, and mixed into classic mac n’ cheese. These broccoli shoots are so sweet, they are also perfect to eat out of hand in the garden.

Baby Bear pumpkins mature to about half the size of a typical pie pumpkin, late in the season. They have very sturdy handles that make them appealing to children because they are easy to hold and don’t risk losing their stems. While they make excellent decorative pumpkins, Baby Bear has a sweet flesh that is perfect for pie making, and semi-hulless seeds that make a tasty roasted snack.


Of course, no children’s garden would be complete without cherry tomatoes, and Sungolds continue to win out with their bright orange color and candy-sweet flavor that kids can’t get enough of. Be sure to provide trellising and harvest consistently to prevent fruits from cracking. One plant will provide enough for snacks, but plant more for drying, freezing, canning, roasting or adding to salsa and sauces.

This blog post was written by Sophie Cassel, Red Wagon’s wholesale coordinator and community outreach team member. Sophie is an herbalist and educator. You can find her workshops here.

Mid-August News, Shuffling Priorities and Plant of the Week

Heliopsis - one of our quart sized perennials that we are giving away with every purchase this week.

Heliopsis - one of our quart sized perennials that we are giving away with every purchase this week.

The days are numbered for drinking coffee in the garden while the sun comes up. If you enjoy that kind of thing, I hope that you are getting plenty of it. I find myself doing a mental inventory much of the day, re-organizing the list of things I have to make time for while summer lasts. Lots of swimming, lots of outdoor meals, and that precious early morning coffee in the garden.

The fall garden calls, and I continue to plant more veggies each week for late season harvest. This week: spinach, scallions, lettuce. I was at the Shelburne Farmers’ Market this week, and bought 2 heads of lettuce for my mom. I had failed to plant lettuce a while back and am now in between generations. I am vowing to have every green thing I want ready in the garden between now and December. It is possible. This Succession Planting article is helpful if you want to learn more about working the edges of the season to your advantage.

New in the greenhouse this week: spinach, chard, cabbages, sprouting broccoli, kohlrabi, kales, and lots of new chicories and lettuces. All are cold hardy, and all will create bounty in the fall garden.

Our Plant of the Week is really a Deal of the Week. It is mid-August and we are closing on August 29th, so highlighting just one plant doesn’t seem fair. This week, with every purchase of $25 or more, we will offer you a free quart sized perennial. There are lots to choose from: yarrow, salvia, coral bells, catmint, heliopsis (pictured above), rattlesnake master, boneset, and more. I hope you take advantage of this deal and pop in a few new perennials when you stock up on those fall veggies.

We have had a few requests for a recipe I have been making for years, slow roasted tomatoes for the freezer. if you are curious, you can read about it here. This is one of the main ways I preserve tomatoes. Super easy - just roast tomatoes, garlic, herbs, olive oil, salt and pepper overnight at a very low temperature, and then, in the morning, slide the mix into freezer bags for good winter eating. I also do a version with eggplant, peppers, onions, tomatoes etc as a roasted, deconstructed ratatouille. That also freezes quite well.

I hope to see some of you in the next couple of weeks. I will be working in the greenhouse this Friday afternoon - come say hi!

Thank you for your support and your garden enthusiasm,

Julie

Herb Salts, Plant of the Week, Garden and Kitchen Update

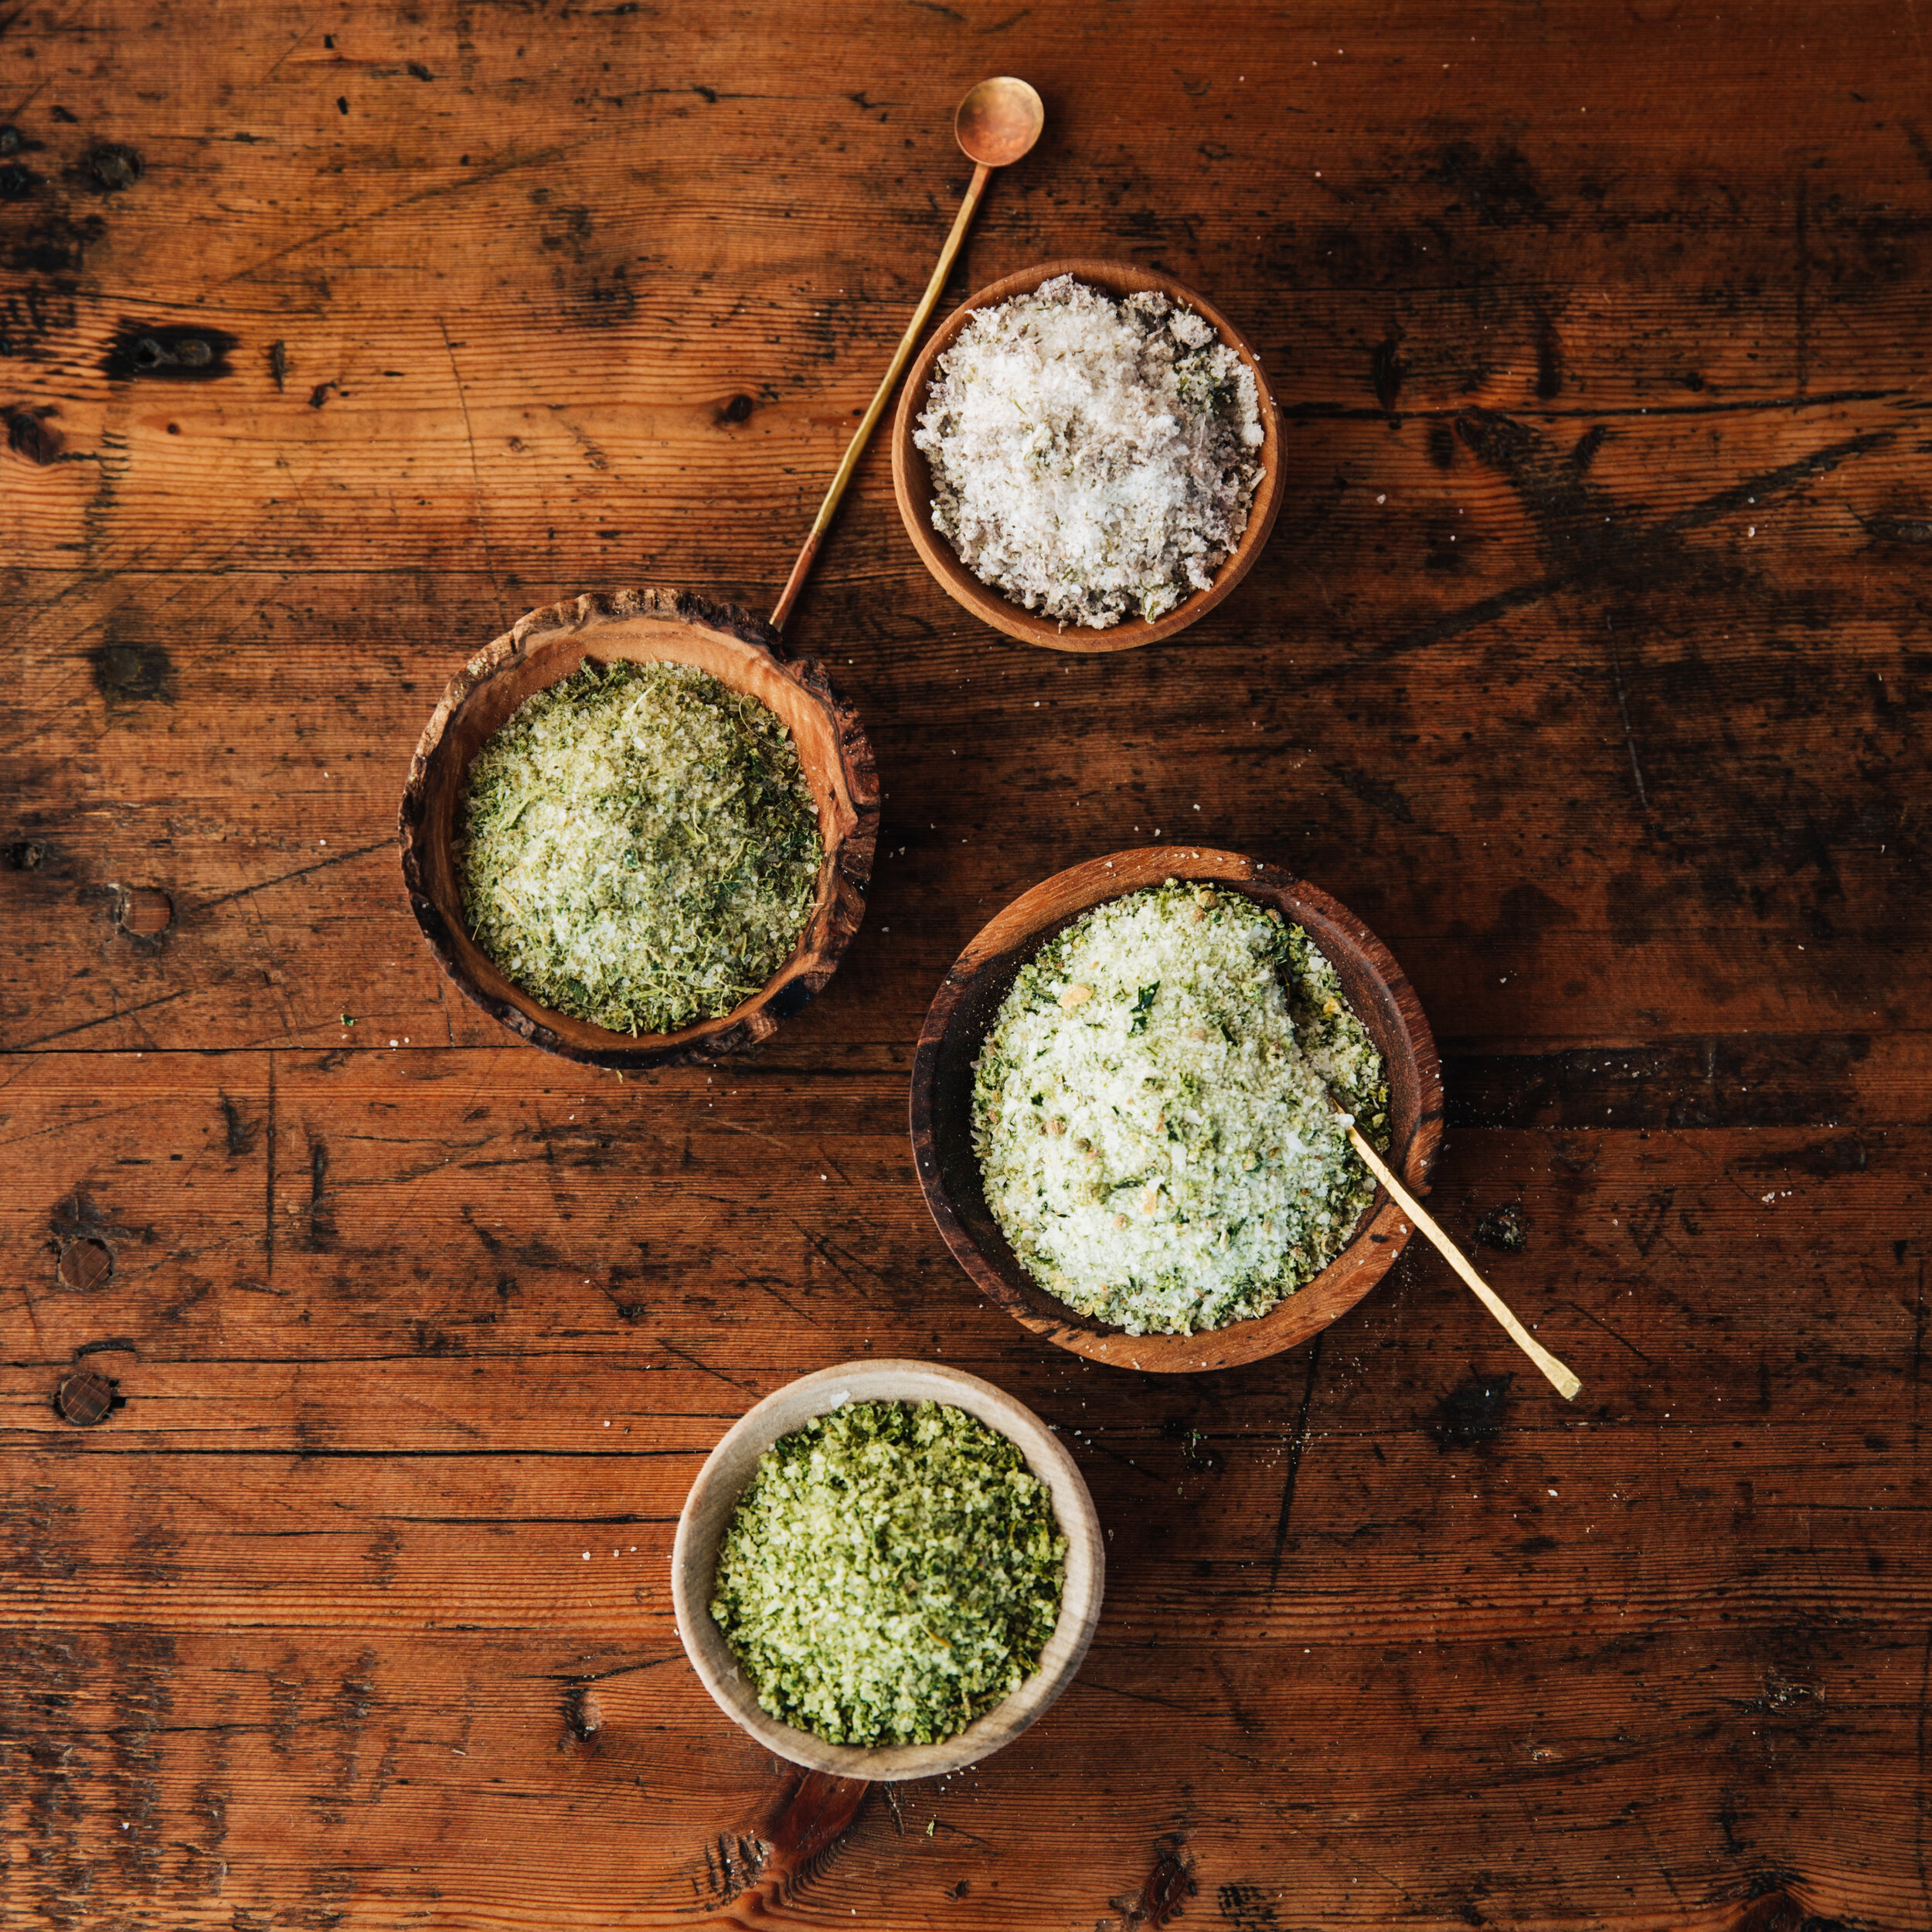
herb salt bowls from above.jpeg

YUM. We are very excited to share this week’s Plant of the Week deal. Any remaining berry plants we have, are available for the Buy One, Get One Free promotion. This includes the following:

  • Strawberries - Alpine strawberries in 4-packs that can be used for edible landscaping, and as a perennial ground cover in sun to part-shade; and ‘Mara des Bois’, French ever-bearing strawberries that are in hanging baskets, but can be planted in the ground for years of enjoyment.

  • Raspberries- a few varieties, including summer bearing and fall bearing

  • Elderberries- hardy, easy to grow native plants that are good for making plant medicine as well as attracting wildlife, creating a hedgerow, and for their fragrant flowers that can be eaten or turned into tea or cordials.

  • Blackberries - a hardy, thornless variety that produces huge blackberries

  • Gooseberries - an old-fasihoned fruit that is great for jams and preserves

August is a great time to plant berries of all kinds, and leaves them plenty of warm days to establish healthy root systems so that will support them for years to come. Our “Plant of the Week” promotion lasts until Sunday, or while supplies last, whichever comes first. Quantities are limited.

In the Garden

The next few weeks are the funnest part of the gardening calendar in my mind. The weeds are under control, we are in harvest mode, and there are lots of empty spots to fill in with plants for the autumn bounty. Going in this week: more escarole, radicchio, lettuce, scallions, spinach, cabbage, broccoli and sprouting broccoli.

I have harvested garlic, shallots and sweet onions. If you haven’t done it yet, you probably should this week. The storage onions - yellow, red, and cipollini - look almost ready in our garden. I will check them later in the week, and if I see that lots of the tops are laying down, I will pull them all out of the soil. I usually wait for about half of them to be fallen over as a sign that they are mature enough to cure well and develop those papery skins that allow them to stay firm in storage all winter long. If you are not sure if your onions are ready, send a photo and we can help you decide.

In the flower garden, Lily has been deadheading her zinnias and recommends making a bouquet to give to someone. It feels good. She has a new baby niece who turned one week old today, and was the lucky recipient of said bouquet. So adorable.

Sara says to check for hornworms in the tomato patch. The earlier you catch and destroy them, the less chance of a full on invasion. Good luck.

In the Kitchen

I have started freezing and canning in earnest, with a big batch of Roma beans taking center stage this weekend. If you have not grown these or eaten them, I encourage you to put them on your list for next year’s garden, or stop by a farmers’ market or farm stand to stock up while summer is still with us. Trillium Hill Farm in Hinesburg has them currently.

Eggplants and peppers are finally abundant in the garden (the rain slowed them down) and I just made a simple dinner with roughly chopped peeled eggplant, shallots, peppers of all kinds, halved cherry tomatoes, torn herbs, minced garlic, a glug of olive oil, and chunks of feta. I laid everything out on a sheet pan and roasted it for about 45 minutes at 375F. What an easy summer dinner, served warm on the deck, or at room temperature for a picnic by the lake. Preferably with an icy cold rosé and a baguette from O’bread or this easy recipe for pita from King Arthur. I spent a good part of the pandemic winter making pita, and I am not mad about that new skill.

Our herb salts and vinegars are now available! We have been busy harvesting and chopping herbs, and curing them in salt for maximum flavor and fragrance. I recommend them all right now, especially to elevate simple garden meals of cucumbers, tomatoes, greens, and grains into something special every night of the week. They are also great for the grilling and entertaining you might be doing outdoors while the getting is good. You can find them at our Hinesburg greenhouses, at City Market, Hunger Mountain Coop, Farmers to You, Intervale Food Hub, Sweet Roots Farm, Trillium Hill Farm, and Philo Ridge Farm. And here online. We are set up to ship herb salts and vinegars. Maybe you would like to make someone’s day by sending some as a gift?

Enjoy the week, enjoy each other.

Julie

Virtual Workshop Schedule for Spring 2021

We are so excited to share our spring workshop line up with you. This year, our three main workshops will be supplemented with an exciting array of follow up opportunities: related plant and seed collections; garden visits with presenters; tools and other merchandise that complement the topic; and late summer and fall workshops to help with harvesting, preserving and maintaining the food, medicine and gardens you will create with us this year.

Your success in the garden is our goal. Plain and simple. We will provide you with everything you need to make it work.

Julia Parker Dickerson: Introduction to Pollinator Gardens 

Saturday, March 20th from 10:00AM -11:30AM 

Delve into the importance of pollinator gardens, and prepare to create your own wildlife haven. Julia has so much inspiring, hands on experience transforming public spaces into beautiful oases for our beneficial insects and friends. Participants in this workshop can recreate this at home with our plant and seed collections and garden visits with Master Gardener Julia and members of the Red Wagon Team. Cost $15.  

Julie Rubaud: Onions 101 

Tuesday, March 23rd from 5:30PM -6:15PM 

Back by popular demand! Everything you need to know to grow, harvest and store onions. Onions need to go in the ground early. Find out why and all the other tips and tricks to growing and storing onions, leeks, and shallots. Never buy another onion! Cost $10.


Julie Rubaud: Gardening for Abundance - Vegetables 

Saturday, March 27th from 10:00AM -11:30AM 

Gain guidance and tips in creating a garden to support your definition of abundance this year. We will focus on storage crops, growing for preserving, and sharing with local food pantries. Red Wagon will offer additional support with plant and seed collections that will be available for purchase during the season, garden visits with Julie and other Red Wagon team members, and late summer and fall workshops that support your canning and freezing and dehydrating activities. We will help you partner up with local food pantries if you would like to share the abundance. Cost $15.  

Julie Rubaud: Strawberries 101 

Tuesday, March 30th from 5:30PM -6:15PM 

Plants? Bare root? What is the difference? Come find out! We are bringing back this popular workshop to help new gardeners learn all about growing strawberries. They are easy to grow as long as you know what they like and have realistic expectations. Jam, frozen berries, and countless fresh fruit can be had from the home garden. Cost $10.


Sophie Cassel: The Medicinal Herb Garden - Growing for Beauty and Wellness 

Saturday, April 3rd from 10:00AM -11:30AM 

An introduction to why and how to create and utilize your own medicinal herb garden. Sophie’s workshops are fun and filled with practical easy to follow instruction. Her understanding of medicinal plants is vast and enthusiastic. Participants can follow up with this class by purchasing our medicinal plant collections, scheduling garden visits with Sophie, and singing up for follow up workshops in late summer and fall to help you process your medicinal herb garden into products for home use. Cost $15.


Chad Donovan: Pests and Disease of the Garden 101

Tuesday, April 13th from 5:30PM -6:15PM 

Learn to prevent, identify and treat regular pests. Pro tips for garden success! Chad brings his decades of gardening and greenhouse experience to you in an accessible and easy to understand format. He is responsible for our the overall health of our plants in our greenhouses and herb farm, and does an incredible job explaining how home gardeners can achieve similar results. Cost $10.


Ben Mayock: Basketry for the Garden: Weaving the Carrying Tray

Tuesday, April 17th from 10:00AM -12:00PM 

A hands-on experience weaving your own 'Carrying Tray' garden basket with local artist and basket maker, Ben Mayock. After a winter of private Zoom workshops with Ben, we are so excited to share our experience with all of you. Space is limited, and will require a pick up of the materials prior to the workshop. Materials can be shipped for an additional cost if you are not local. Cost $55. 


Julie Rubaud: Tomatoes 101

Tuesday, May 11th at 5:30PM -6:15PM 

Back by popular demand! This is the day we release our tomato plants and answer all your questions. Julie will go over her favorite varieties, the best practices for planting and trellising and some of her favorite preservation methods. We grow 75 tomato varieties - find out why and which ones are right for you. Cost $10.

Calendula

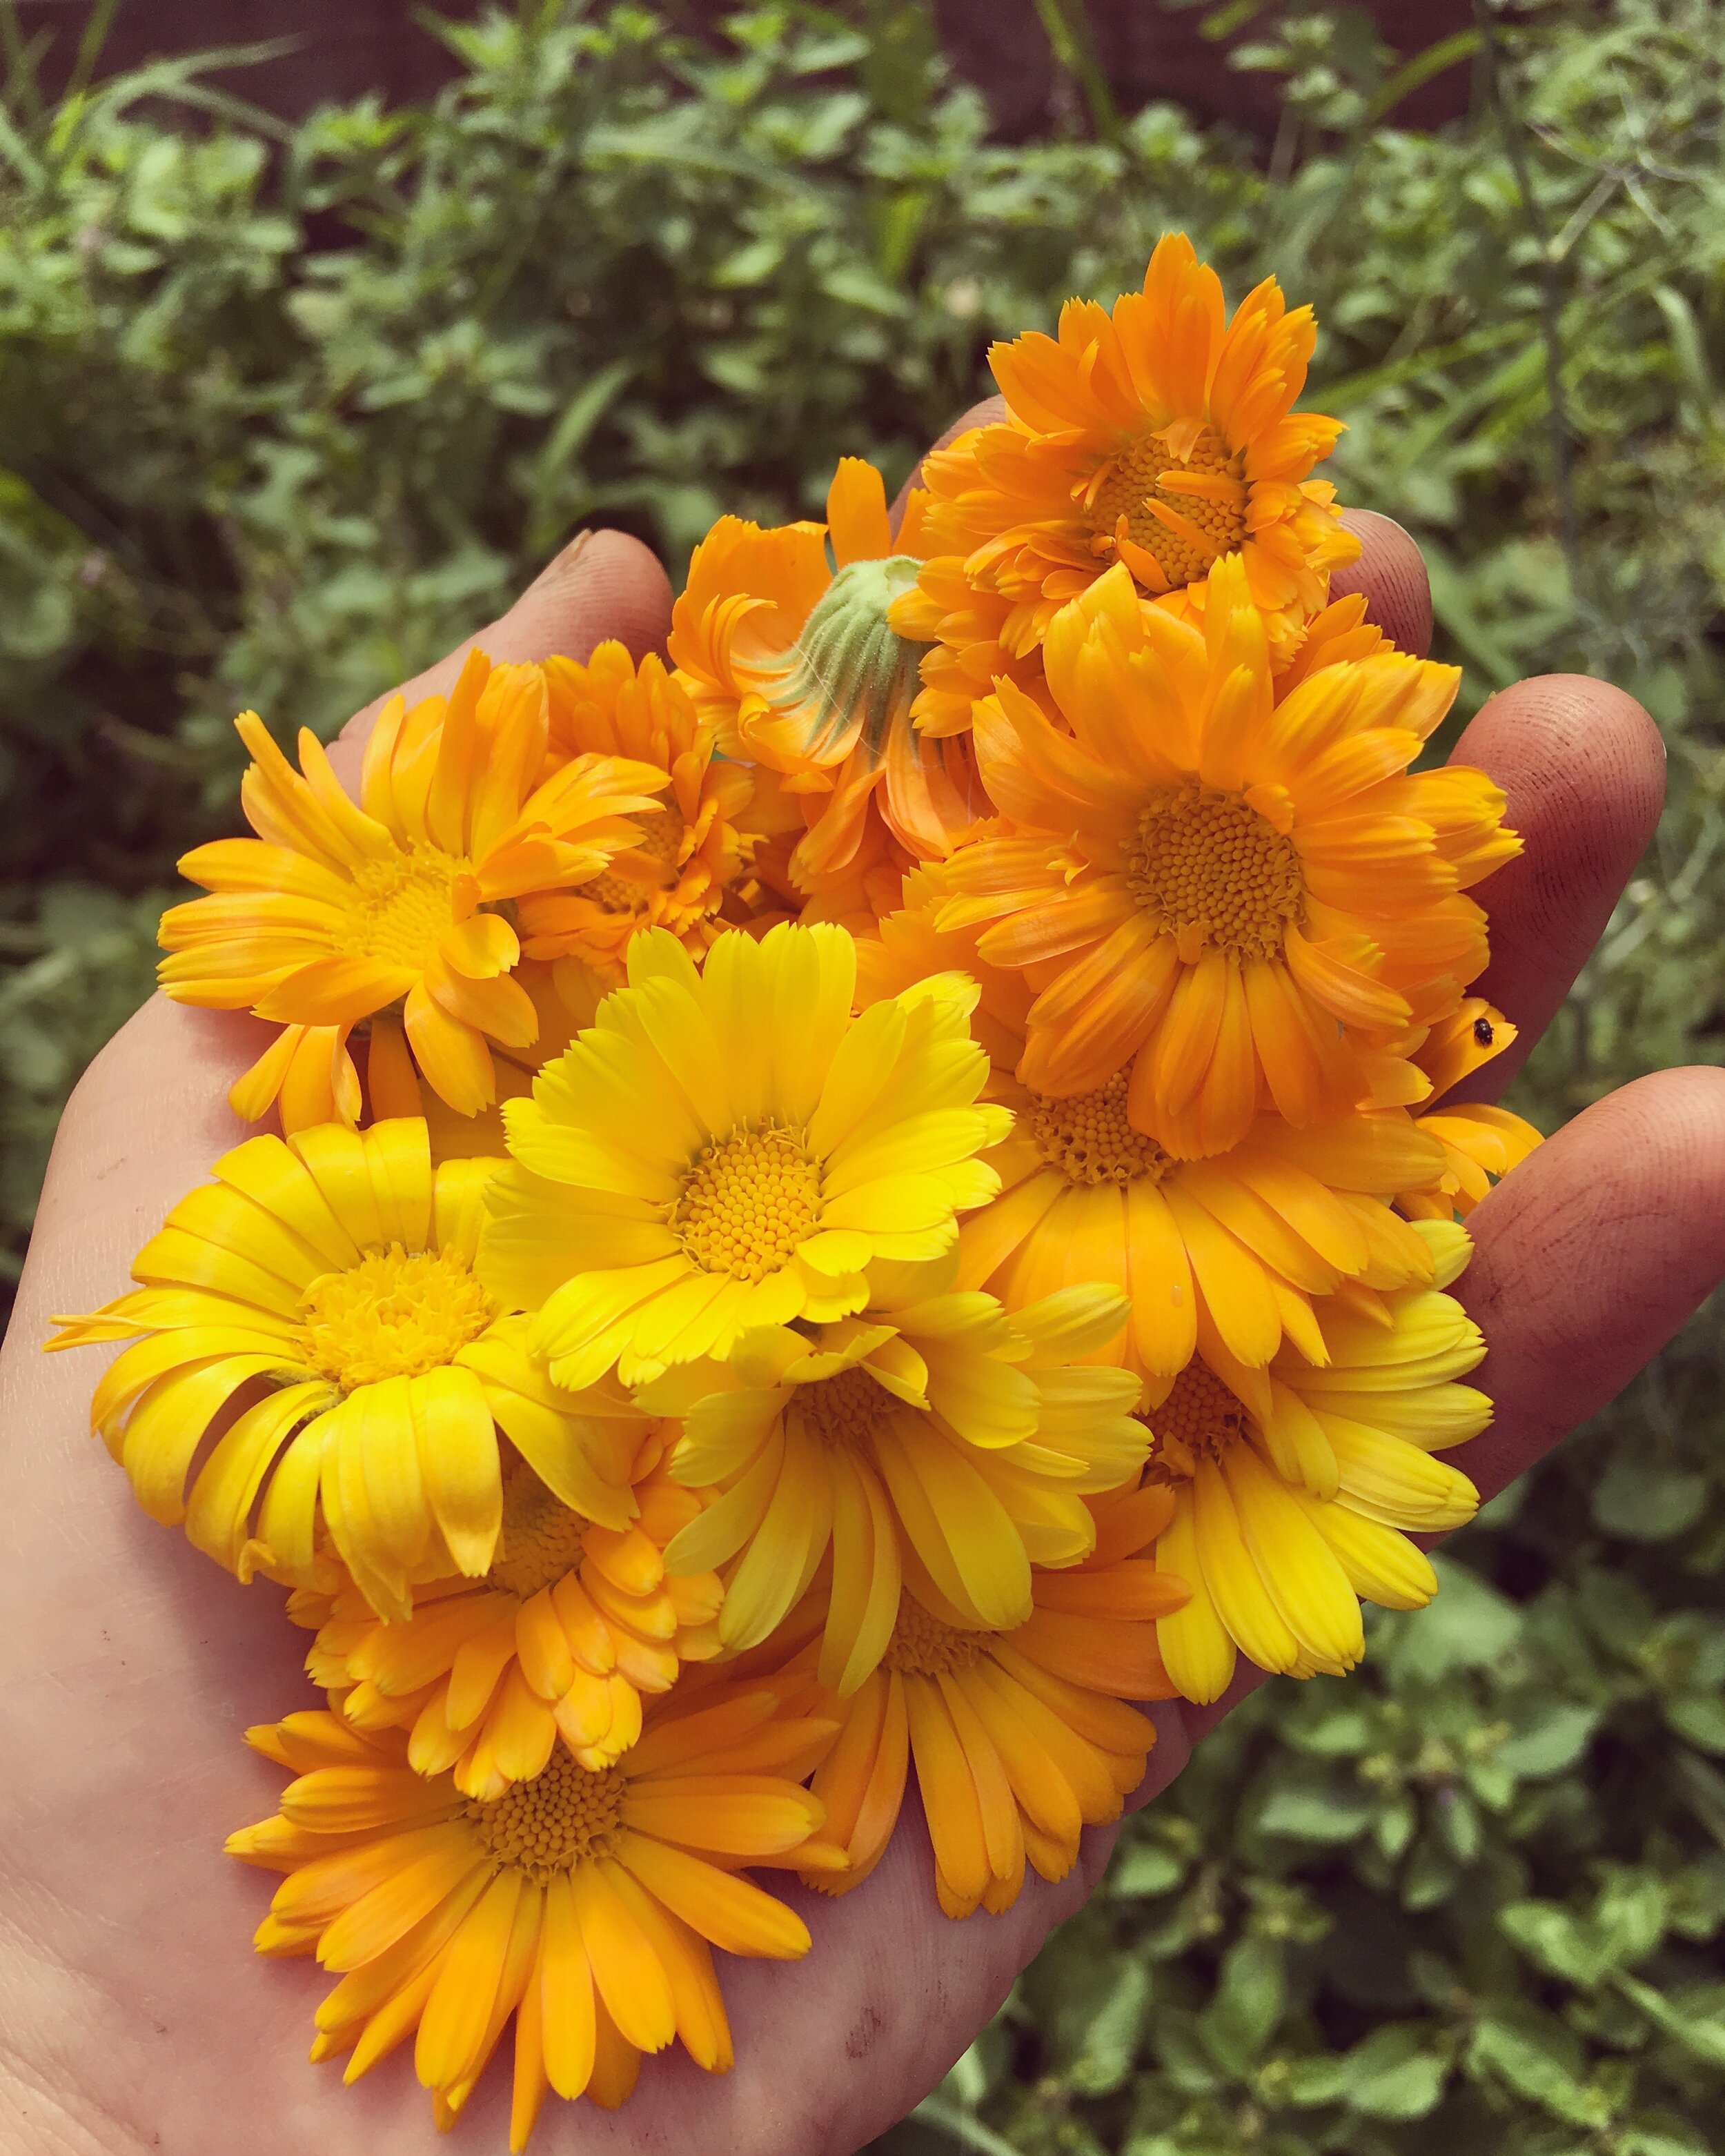
calendula sophie.JPG

Calendula (Calendula officinalis), historically also known as Pot Marigold, is one of those cheery plants that has successfully transcended the gap between herbal medicine and ornamental gardening. Its sunny blossoms start blooming early in the summer if transplanted, and will proliferate all season long and even after frost, as long as the flowers are picked before going to seed. Like others in the Asteraceae family, pollinators flock to this plant, which provides a valuable long-term nectar source. While there are many types of ornamental calendula available on the market, highly medicinal varieties include Resina, Alpha, and Erfurter Orangefarbige. You’ll know you’ve got a potent calendula if when you pick the blossom (snapping it from the stem and removing the flower head and green bracts) your fingers get sticky with resin.

If you’re growing calendula and deadheading the plants regularly, you’ll find yourself with a wealth of flower heads to use. Luckily, there are endless ways to make use of this beautiful and powerful plant! 

Calendula occupies a unique and important place in any herbal medicine chest. Powerful yet gentle, it’s listed as an active ingredient in balms for everything from cracked hands to rashy baby bums. Calendula enjoys a long history of use as a venerated wound healer and anti-inflammatory herb, soothing and repairing injuries and ulcerations of all kinds. As it also has documented immune-stimulating affects (through its work on the lymphatic system), calendula is also useful when dealing with skin issues that stem from some kind of infection. At the start of gardening season, I can often be found soaking my roughed-up hands in strong calendula tea to heal cracked cuticles and scraped knuckles. 

But we can’t talk about skin without mentioning the skin that lines our insides- the digestive tract! In the same way that calendula heals external wounds, it is equally as powerful when taken internally to alleviate the effects of inflammation in the gut. Allergic reactions both inside and out can benefit from application of this herb, and it is gentle enough to use every day in a variety of ways. I love including calendula in mouthwash formulas to heal irritation and inflammation in the gums.

There’s no reason to relegate calendula to the first-aid kit, though. It is also a wonderful tool in the kitchen, adding color and beauty to baked goods and salads as the “poor man’s saffron”. To use, simply pluck the petals off the flower head, and sprinkle into your batter or lettuce mix. The center of the heads, with their sticky resin, tend to leave an uncomfortable feeling on the back of the throat when consumed raw, so it’s best to save those for tea infusions, or thrown into soups and bone broths where you’ll get the benefit of the herb and the visual delight as well. 

Now that you’ve harvested your blossoms and dreamed up all the ways you’ll use your calendula, make sure to dry some for winter use. Flowers should be picked in the height of the day, when they have fully opened and any dew has dried. Dry flowers in baskets or on newspaper, spread in a single layer so that they are not touching (you can also use a dehydrator on the lowest setting). Calendula flowers hold lots of moisture, so it’s important to let them dry fully before storing, lest they get moldy on you. The center of the head should snap apart easily when dry. As the season wanes, leave some flowers to go to seed on the plant. You can harvest these fossil-like structures once they’ve turned brown and come off easily in your hand. 

Calendula is an excellent and safe introduction into the world of herbal medicine, and with its myriad uses, it’s one of the most reliable plants you can keep on hand throughout the year. 

Basic Calendula Oil, Two Ways:

  • Calendula flowers, wilted for a few days or completely dried

  • High quality oil, such as olive, sunflower, grapeseed, almond, or jojoba

Roughly chop calendula flowers and pack into jar, then fully cover with oil (add an extra glug or two to make sure flowers stay submerged). Label with contents and date, then leave to steep in a dry, shady place for 2-4 weeks. Different herbalists have different habits, and some prefer to let their oils steep in the sunshine, while I keep mine out of direct sunlight. 

If you’re in a rush, you can quickly make an infused oil by heating the oil and flowers slowly in a double boiler, making sure that you stay well below the smoke point for that oil. Heat gently for an hour or two. In either case, when you’re finished infusing the oil, strain out and compost the flowers, label your oil, and store in a dark place for up to a year. You can use this oil to make salves, lotions, and creams, or apply directly to skin. 

Gut-Healing Tea (make with fresh or dry herbs):

  • Calendula flower

  • Chamomile flower

  • Plantain leaf (Plantago spp.)

  • Fennel seed

  • Peppermint leaf

Blend equal parts of all herbs. Infuse about a handful (approx. ¼-½ cup) of herbs in 1 quart of boiled water, and allow to steep for an hour or overnight. Enjoy hot or iced, and drink daily as part of a regimen to help with digestive upset (can also be enjoyed as part of a healthy-skin regimen, too!)

Resources:

Calendula Monograph: https://www.herbrally.com/monographs/calendula

Henriette’s Herbal: https://www.henriettes-herb.com/blog/yell-calendula.html

Onions

Baby onions, about two to three weeks away from transplant time.

Baby onions, about two to three weeks away from transplant time.

A while back, I delivered a crate of onions and garlic to my dad. We had some coffee, talked over the Thanksgiving meal plans, and I took a little walk. That day is a distant memory, my father has since passed away, but the image of those onions and garlic has stayed in my head. The way they filled the wooden crate brings me to a memory of the smile on my dad’s face when he saw them, the food we talked about making together, the warm coffee in our hands.

Onions are a back ground vegetable, easily taken for granted, but aren’t they the basis of flavor in most dishes?

Some people are like onions too. Sharp and edgy at first, sweet and mellow with time and heat.

I am thankful for their plumpness, their abundant harvest, the flavor they will bring to our meals, and the way they generously keep so well under the right conditions.

I rarely buy onions or garlic, usually having enough from the garden to last the year, in some form or another. The storage onions that are great to eat fresh in July, when cured properly, last until March or April. By then chives are ready, then scallions, then green garlic and fresh onions again, one following the other, with a predictable rhythm.

My dad is gone now, but the memories are not, storing and keeping, sweetening with time.

The best time to plant onions is as soon as the ground can be worked, usually middle to end of April in Vermont. They don’t mind cold ground. They prefer it actually, and the earlier they go in, the rounder and larger they will be. Their trajectory is programmed by the sun; as the days get longer, the onion plants remember to follow the cue and they grow round and big. If you neglect this key part of onion growing and plant them late, the onions stay small, and more oval in shape, in a sort of protest.

Our onion plants come in 4 packs. There are about 80 plants in each pack. You just need to separate each individual plant (it is a quick job, especially if the plants are well watered). Then make a trench, 4 inches deep, as long as you want. And then lay each onion delicately in the trench, white roots down, green part up. Fill the soil in around each plant, pat firmly and water well. If 80 onions is too many, you can certainly plant some of the plants in little groups of 4 to 6, and harvest them young, to eat like scallions or baby onions. These are easily the best value in the gardening world, not be forgotten.